70
Advanced
Features
Connecting the Camcorder to a
Computer
1 Turn off the camcorder and computer.
2 Connect the camcorder to the computer
as shown below.
3 Turn on the computer.
4 Turn on the camcorder in the desired
camcorder mode.
Notes:
• It is recommended to use the AC adapter/battery
charger as a power source for extended periods
of use.
• Images with the following functions cannot be
transferred to a computer.
—TAPE-VCR/CARD-VCR mode: Playback Zoom,
Picture Effect Playback
—TAPE-CAMERA/DUAL-CAMERA/CARD-
CAMERA mode: digital zoom, digital picture
effects, Scene Menu
• Using a commercially available dedicated PC
card adapter for each card type, it is possible to
transfer still images directly from an SD Memory
Card or a MultiMediaCard to a computer (see
page 84).
• To edit still images transferred with the Video
Capture Software, use commercially available
image editing software.
Using the Camcorder with
Your Computer
It is possible to transfer still images or still
playback images from the camcorder to a
computer by using the supplied Video Capture
Software and PC connecting cable.
System Requirements
• IBM PC/AT or compatible with Intel
®
Pentium
®
133 MHz or faster processor
• Microsoft Windows 95B, Windows 95C,
Windows 98, Windows 98 Second Edition,
Windows 2000 Professional*, or Windows Me
operating system
• 32 MB or more of RAM
• 9 MB minimum of available hard-disk space
• SVGA (800 × 600 pixels) colour display
monitor with 16-bit colour or higher
• CD-ROM drive (for installation)
• RS-232C serial port
• Mouse or other pointing device
*To install the software in Windows 2000 Professional,
you must log in as Administrator.
Installing the Software
1 Turn on the computer and start up
Windows.
2 Insert the CD-ROM of the Video Capture
Software into the CD-ROM drive.
3 Double click on the “My Computer” icon.
4 Double click on the CD-ROM drive icon.
5 Double click on the “Setup.exe” file.
6 Follow the on-screen instructions to
install the software.
7 Restart the computer.
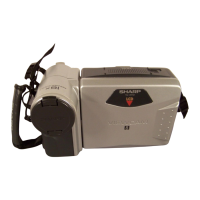
To RS-232C port
(D-sub 9-pin port)
PC connecting cable (supplied)
PC COMMUNI-
CATION jack