Shure Incorporated
5/37
3.
4.
◦
◦
◦
1.
◦
◦
◦
◦
2.
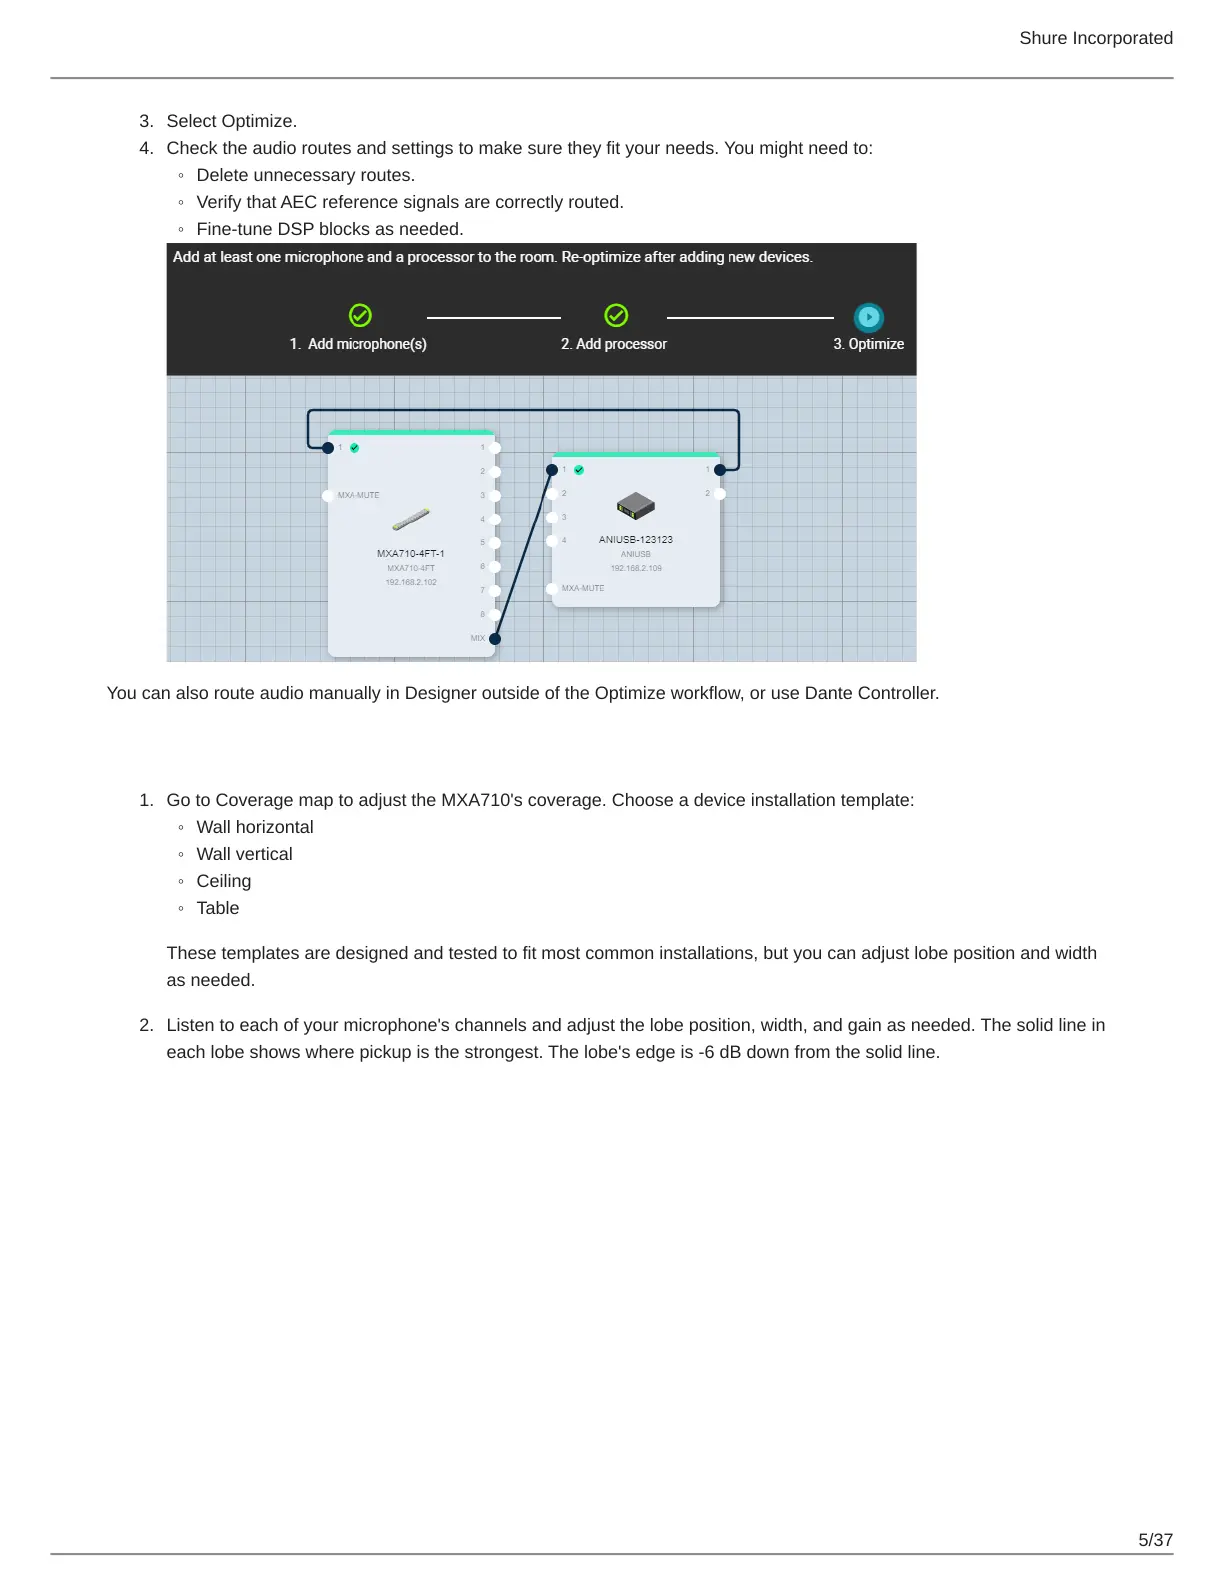
Select Optimize.
Check the audio routes and settings to make sure they fit your needs. You might need to:
Delete unnecessary routes.
Verify that AEC reference signals are correctly routed.
Fine-tune DSP blocks as needed.
You can also route audio manually in Designer outside of the Optimize workflow, or use Dante Controller.
Step 3: Adjust Microphone Coverage
Go to Coverage map to adjust the MXA710's coverage. Choose a device installation template:
Wall horizontal
Wall vertical
Ceiling
Table
These templates are designed and tested to fit most common installations, but you can adjust lobe position and width
as needed.
Listen to each of your microphone's channels and adjust the lobe position, width, and gain as needed. The solid line in
each lobe shows where pickup is the strongest. The lobe's edge is -6 dB down from the solid line.
 Loading...