4.4.2.4 Compartimento para unidad extraíble normal, conexión
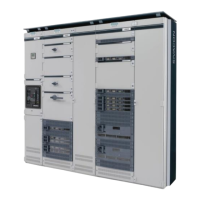
4.4.2.4 Compartment for standard withdrawable unit
4.4.2.3 Remodelación de compartimento para unidad extraíble
normal, conexión al tablero desde delante
4.4.2.3 Compartment modification for standard withdrawable
unit, front connection
front connection
Montaje y desmontaje de terminales de conexiones y paredes
separadoras
Desmontaje :
• Antes del desmontaje hay que retirar del compartimento la
correspondiente unidad extraíble y desembornar los cables
principales y de control.
• Retirar los tornillos de fijación (Torx 30) para las chapas de
separación con el compartimento de cables en la parte de-
lantera derecha del compartimento (ver figura)
Fitting and removing terminals and partitions
Removal:
• Before removal, the corresponding withdrawable unit must be
removed from the compartment as well as clamping main and
control cables.
• Remove fixing screws (torx 30) for the separating plates to the
cable compartment in the compartment front right (see figure)
• Soltar el tornillo de la parte inferior derecha, en la parte
central del compartimento, entre su fondo y la chapa de se-
paración más baja.
• Levantar la chapa de separación vertical más baja y abatirla
hacia dentro.
• Levantar unos 10 mm el terminal de conexiones de la dere-
cha, desplazarlo hacia la izquierda y retirarlo tirando hacia
arriba (ver figura de más abajo).
• Loosen screw below right in the middle of the compartment
between compartment bottom and separating plate.
• Lift lowest vertical separating plate and swivel out inwards.
• Lift connecting terminal to the right approx. 10 mm, push left and
lift up (see figure below).
Montaje :
• Introducir el gancho de la parte inferior izquierda del terminal
de conexiones por el orificio trasero del fondo del comparti-
mento (ver figura).
• Desplazar hacia la derecha el terminal de conexiones dere-
cho ligeramente inclinado e insertarlo en la ranura del borde
del fondo del compartimento.
• Volver a montar las chapas de separación en orden inverso y
fijarlas con los tornillos autorroscantes M6 (Torx 30/4 Nm).
• El montaje está representado también en el plano 8PQ5000-
1AA78; para compartimentos de 100 mm de altura, ver
8PQ5000-3AA36.
Installation:
• Put the bottom left hook of the connecting terminal at the rear into
the hole in the compartment bottom (see figure).
• Push the right terminal lightly tilted to the right and attach with the
groove to the edge of the compartment bottom.
• Fit the separating plates again in the opposite sequence and fix
with the thread-forming screw M6 (torx 30 / 4 Nm).
• The Installation is also shown on the drawing 8PQ5000-1AA78,
for 100mm high compartments refer to 8PQ5000-3AA36.
 Loading...