4.4.2.6 Compartimento para unidad extraíble pequeña, conexión
al tablero desde delante
4.4.2.6 Compartment for miniature withdrawable units,front
connection
4.4.2.6.1 Desmontaje de compartimento para unidad extraíble
pequeña
4.4.2.6.1 Dismounting miniature withdrawable unit compartment
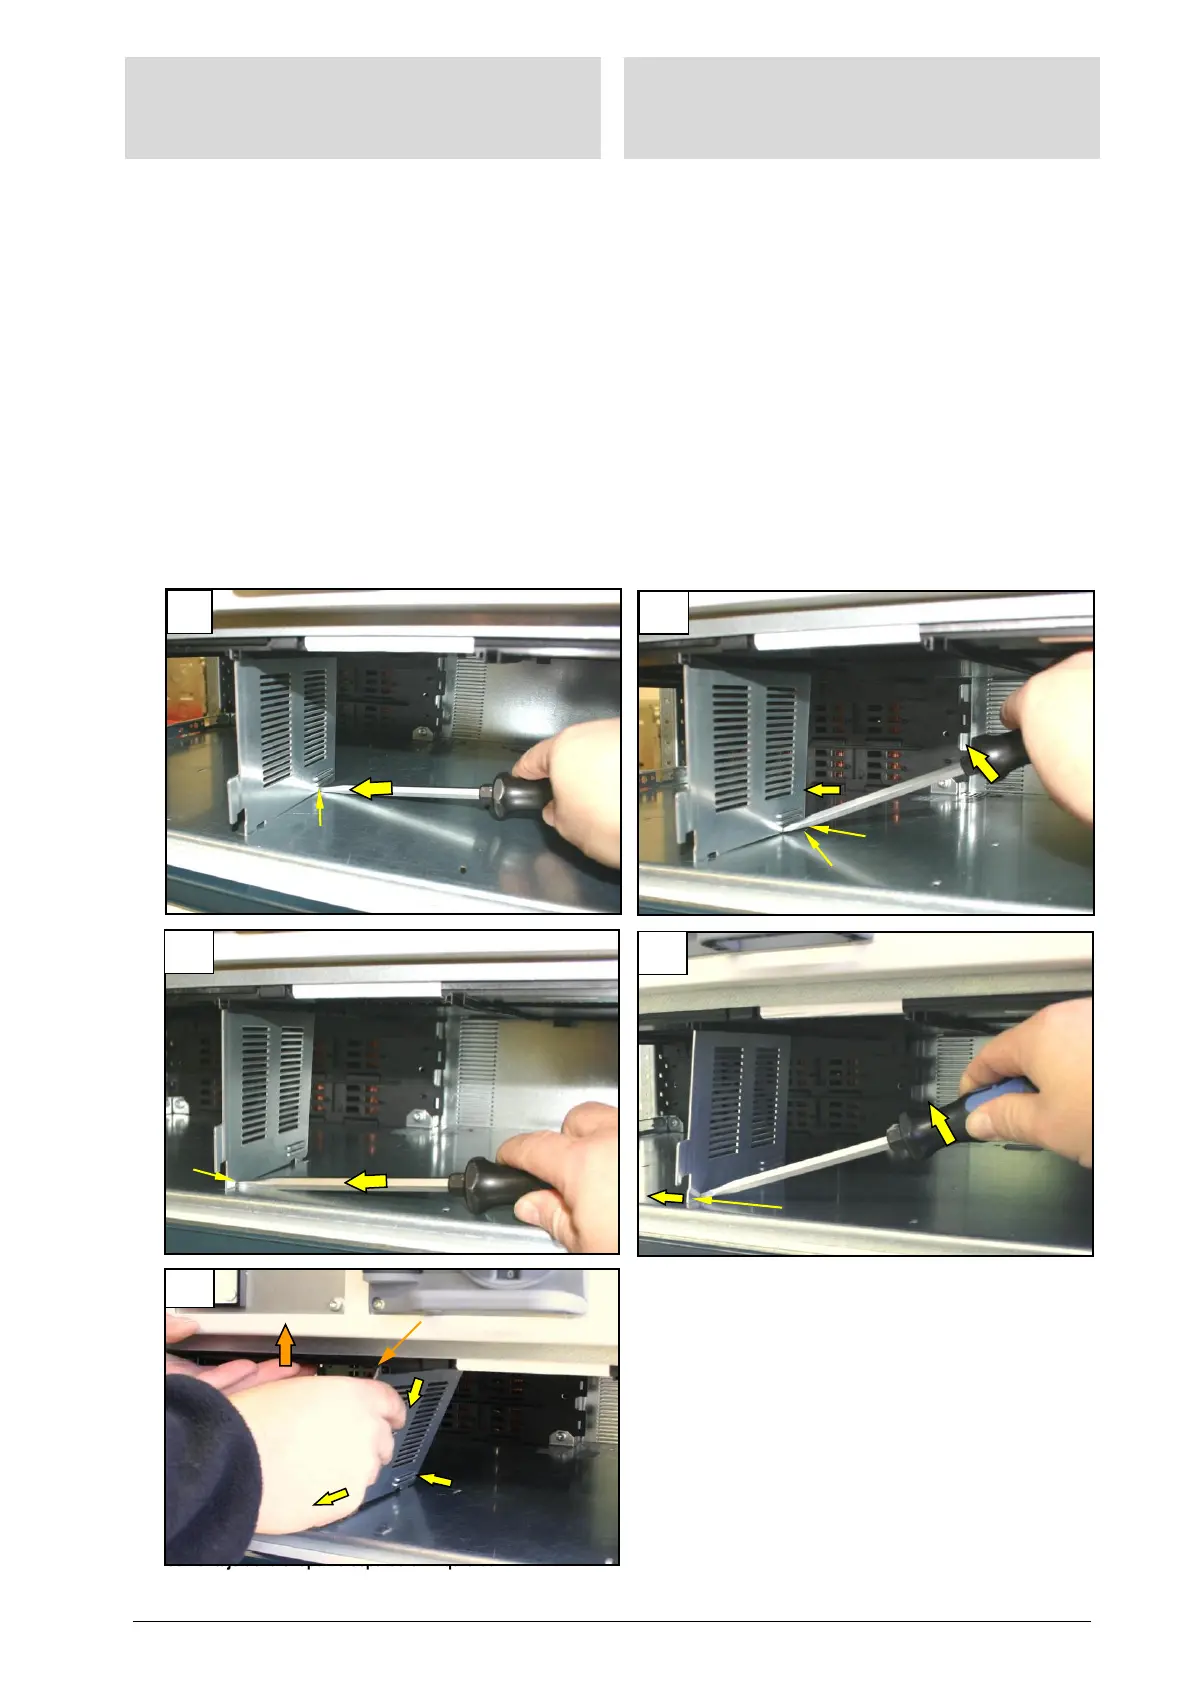
1. Desmontaje de las chapas de separación centrales
(1-3 piezas)
A) Desde la derecha, insertar un destornillador de unos 9 mm de
ancho en primer lugar en el recorte rectangular trasero (a) de la
parte inferior de la chapa de separación.
B) Después, empujar el destornillador hacia arriba hasta que el
saliente (b) junto al recorte quede liberado. A continuación, em-
pujar la parte inferior de la chapa de separación ligeramente ha-
cia la izquierda, de forma que el saliente no pueda volver a en-
trar en el orificio (c) del fondo del compartimento.
C) Seguidamente, insertar el destornillador en el recorte rectangular
delantero (d) de la parte inferior.
D) Hacer presión con el destornillador hacia arriba hasta que el
saliente (e) de aquí también quede liberado y empujar comple-
tamente hacia la izquierda.
E) Ahora la chapa de separación podrá bascularse por su parte
inferior hacia la izquierda, hasta que se pueda extraer con relati-
va facilidad de la ranura (f) de la placa adaptadora. Para ello,
empujar la placa adaptadora con la otra mano hacia arriba, con-
tra el techo del compartimento (flecha 1).
1. Dismounting the center separating plates (1-3 units)
A) From the right, apply an approx. 9 mm wide screwdriver below in
the back rectangle cut-out (a) in the separating plate.
B) Press the screwdriver up until the nib (b) beside the cut-out is
free. Finally, lever the separating sheet below a little to the left so
that the nib cannot snap back into the opening (c) in the com-
partment bottom.
C) Now apply the screwdriver below in the front rectangle cut-out
(d).
D) Press the screwdriver up until the nib (e) is free here too and
lever completely to the left.
E) Now the separating plate below can be swiveled far enough to
the left until it can be pulled relatively easily from the groove (f)
of the adapter plate. At the same time, press the adapter plate
up with the other hand to the upper compartment bottom
(arrow 1).
2. Desmontaje de la chapa de separación izquierda
A) Desde la derecha, insertar un destornillador de unos 9 mm de
2. Dismantling the left separating plate
A) From the right, apply an approx. 9 mm wide screwdriver below in
 Loading...