compartimento.
F) Seguidamente, efectuar pequeños movimientos de corrección
si es necesario para colocar la placa adaptadora en el compar-
timento de forma que los dos salientes a la derecha y la iz-
quierda de su parte superior coincidan con los correspondien-
tes orificios del techo del compartimento. Por último, sostener
la placa adaptadora con la mano izquierda procurando que los
salientes queden en los orificios.
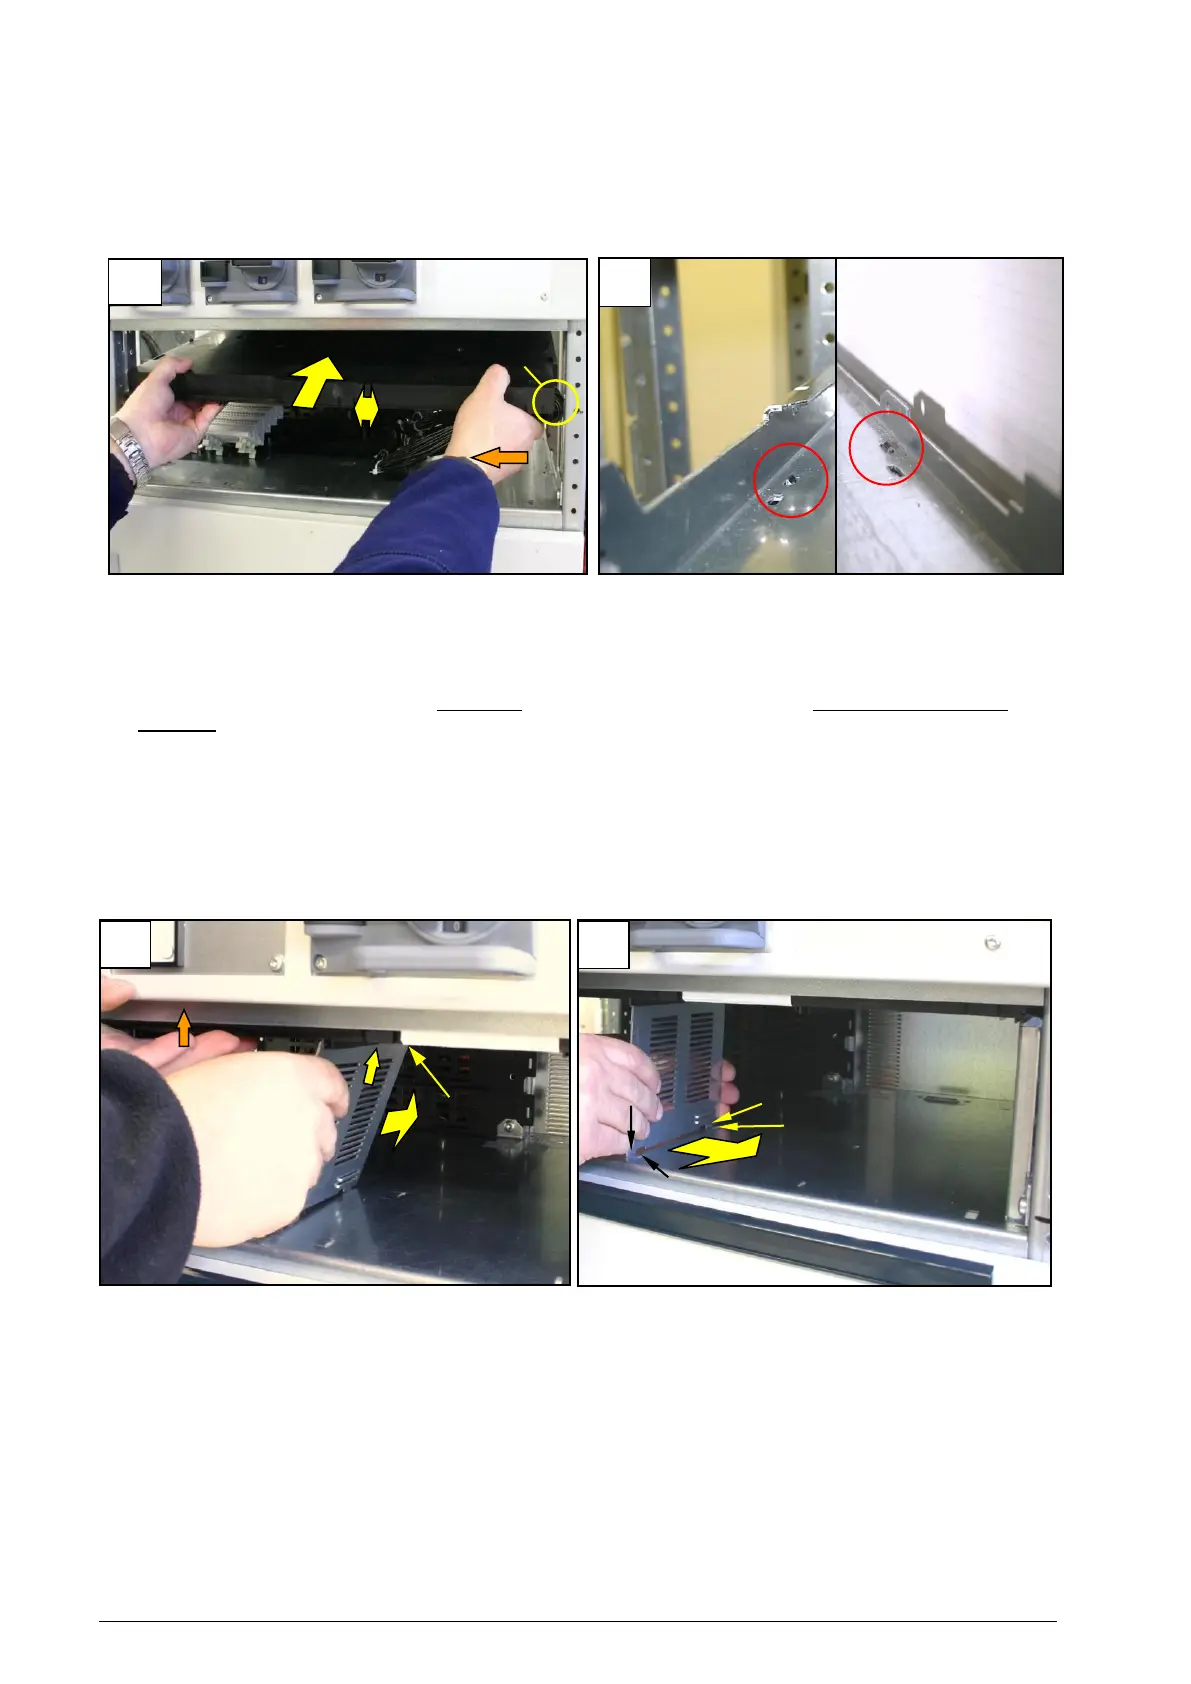
F) Then, with small corrective movements if necessary, position the
adapter plate in the compartment so that the two nibs left and
right on the top side of the adapter plate pass through the corre-
sponding openings in the compartment bottom above! Then firmly
grip the adapter plate with your left hand and be careful that the
nibs remain in the openings.
2. Montaje de la chapa de separación central
Los siguientes pasos también se encuentran en el plano
8PQ5000-0AA52
A) Insertar desde abajo la chapa de separación, sin el recorte
rectangular de la parte central inferior, en la menor de las dos
ranuras con una inclinación de aprox. -40°. El borde trasero de
la chapa de separación debe asentarse en la ranura (a) junto al
tope.
B) Aplicar un poco de fuerza con las dos manos para empujar la
parte inferior de la chapa hacia la derecha hasta que los salien-
tes (b) encajen en los correspondientes orificios (c) del fondo
del compartimento.
2. Mounting the center separating plate
The following steps are also shown on the drawing 8PQ5000-0AA52
A) Insert the separating plate, without the rectangle cut-out below
middle from below at an angle (approx. -40°) into the smaller of
the two grooves. The rear edge of the separating plate must be in
the groove at the stop (a)!
B) With both hands and a little force, press the plate below to the
right until the nibs (b) snap into the corresponding openings (c) in
the compartment bottom below.
 Loading...