- When the automatic routing is completed the route appears in preview mode, and the
legs are color coded to indicate safe or unsafe areas. Navionics uses red (unsafe) and
green (safe), while C-MAP uses red (unsafe), yellow (dangerous) and green (safe).
4. Move any routepoints if required when the route is in preview mode.
5. Select Keep to accept the routepoints positions.
6. Eventually repeat step 2 (Selection) and step 3 if you want the system to automatically
position routepoints for other parts of the route.
7. Select Save to complete the automatic routing and save the route.
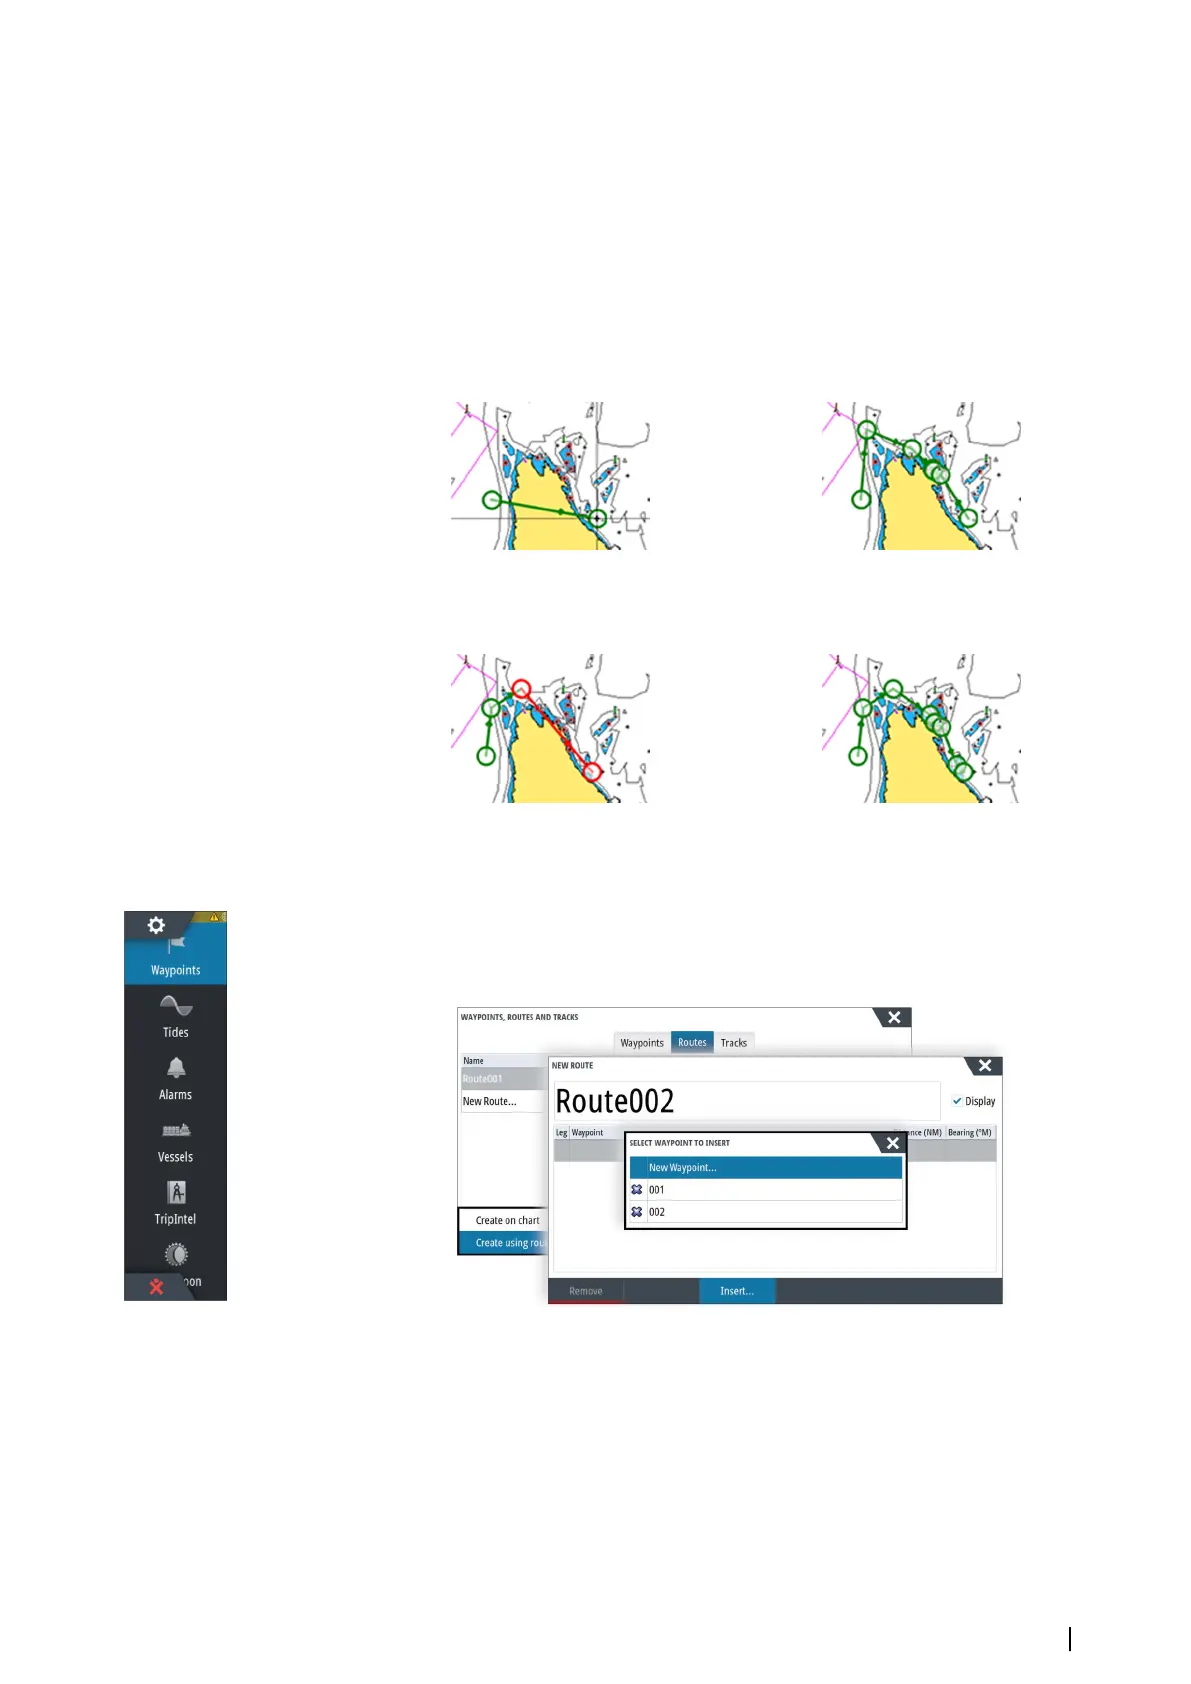
Dock-to-dock Autorouting and Easy Routing examples
• Entire route option used when first and last route points are selected.
First and last routepoint Result after automatic routing
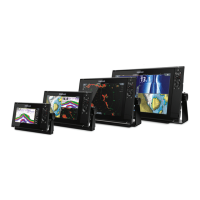
• Selection option used for autorouting part of a route.
Two routepoints selected Result after automatic routing
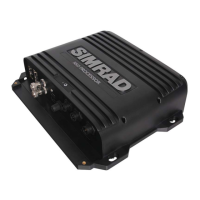
Creating routes using existing waypoints
You can create a new route by combining existing waypoints from the Routes dialog. The
dialog is activated by using the Waypoints tool on the Home page and then selecting the
Routes tab.
Converting Tracks to Routes
You can convert a track to a route from the Edit Track dialog. The dialog is activated by
activating the track, then selecting the track's pop-up, pressing the rotary knob or selecting
the info options from the menu.
You can convert a track to a route from the Edit Track dialog. The dialog is activated by
activating the track, then selecting the track's pop-up, pressing the rotary knob or selecting
the info options from the menu.
The Edit Tracks dialog can also be accessed by selecting the Tracks tool on the Home page.
Waypoints, Routes, and Tracks | NSS evo3 Operator Manual
39