92
91011
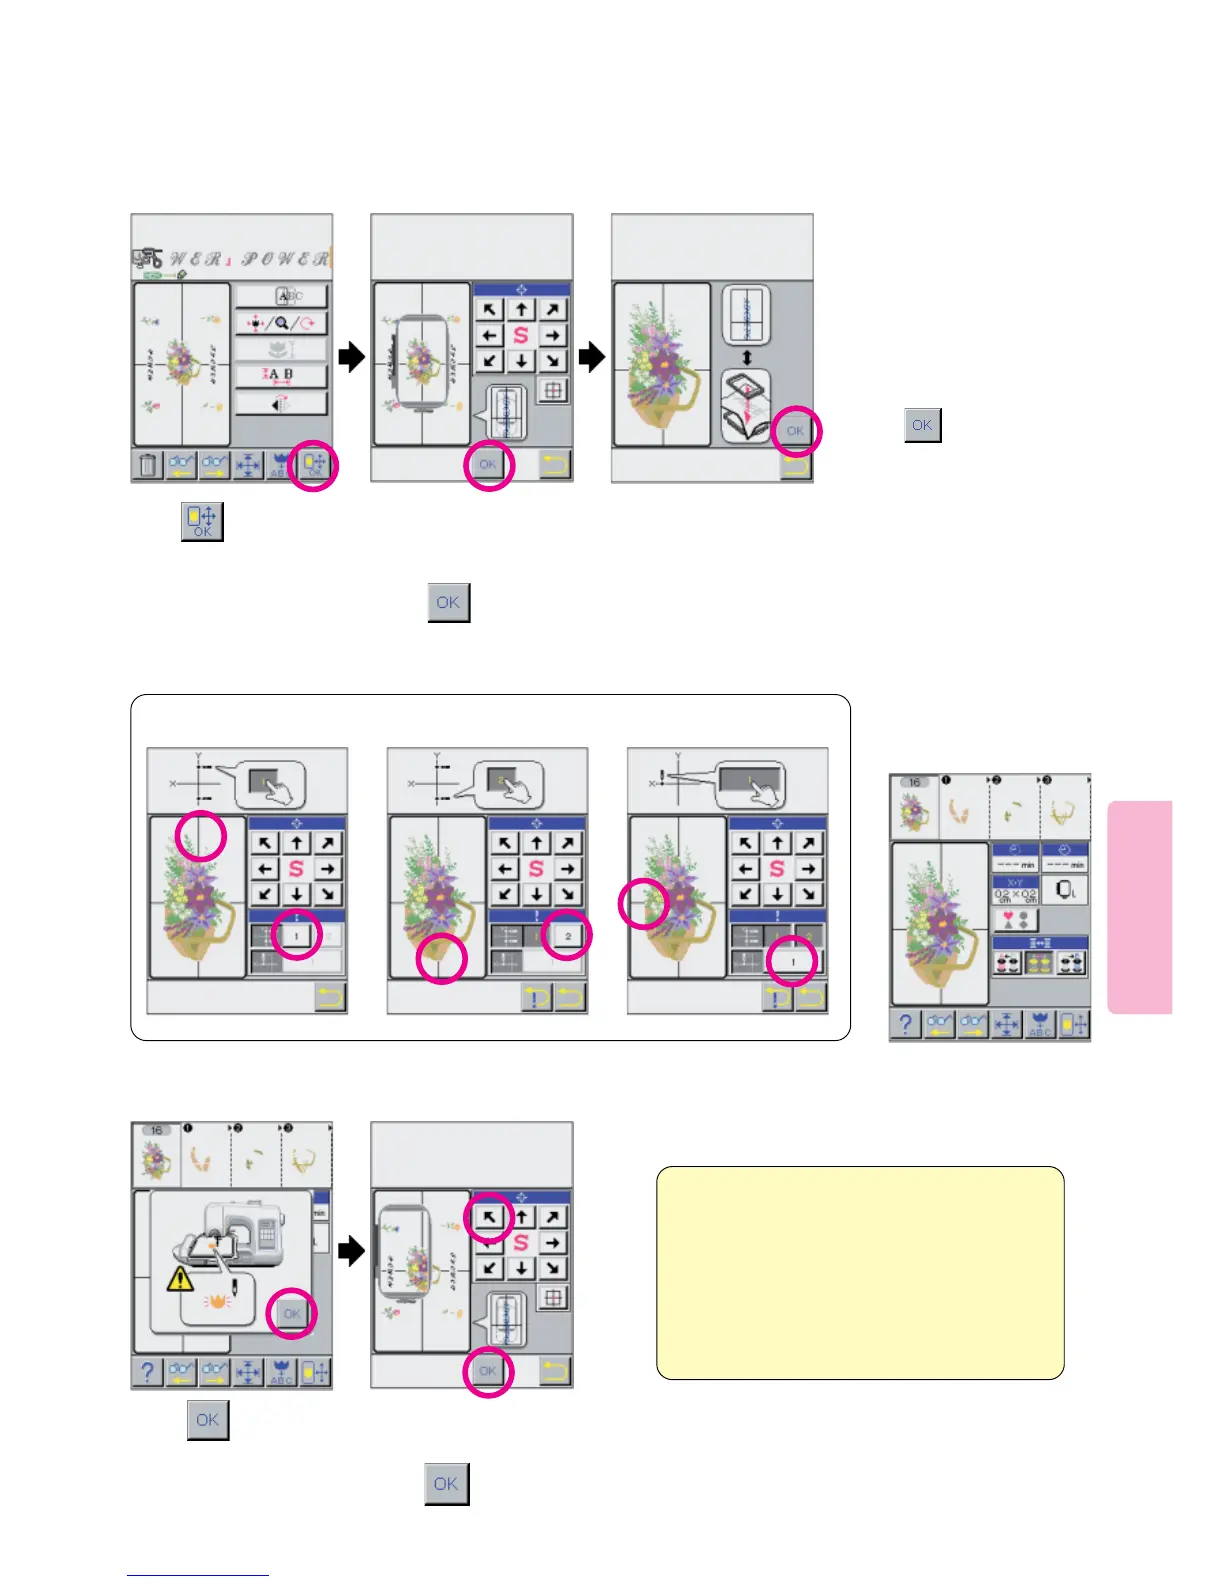
Designate location
of pattern to be
sewn first.
Press the arrow keys to
position the on-screen
frame around the pattern to
be sewn first.
Press
* Follow the sequence offered
by the on-screen helpful
messages and pictograms. It is
important to hoop the fabric per
the LCD Screen and to carefully
define the Y and X axis lines so
all portions of the design align.
When instructed,
press key.
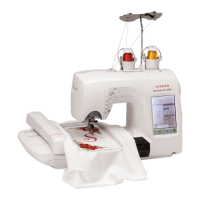
Install embroidery frame
on machine.
Determine first point on
Y-axis line.
12
Use touch-screen to establish needle entry points.
1
Determine second point
on Y-axis line.
2
Determine first point on
X-axis line.
3
Start machine.
13
Designate location of
the next pattern to be
embroidered.
15
Sewing machine will embroi-
der the pattern located in
designated position.
Press the arrows to position the on-screen
frame around the pattern to be sewn next
14
Press
Press
Insert and position
“Flower Power” Text
Press pictogram .
This example was abbreviated
as by this point you have
learned enough to easily
layout and sew this simple
Multiple Hoop Design.
 Loading...