Commissioning SMA Solar Technology AG
22 SWebBox20-IEN110711 Installation Guide
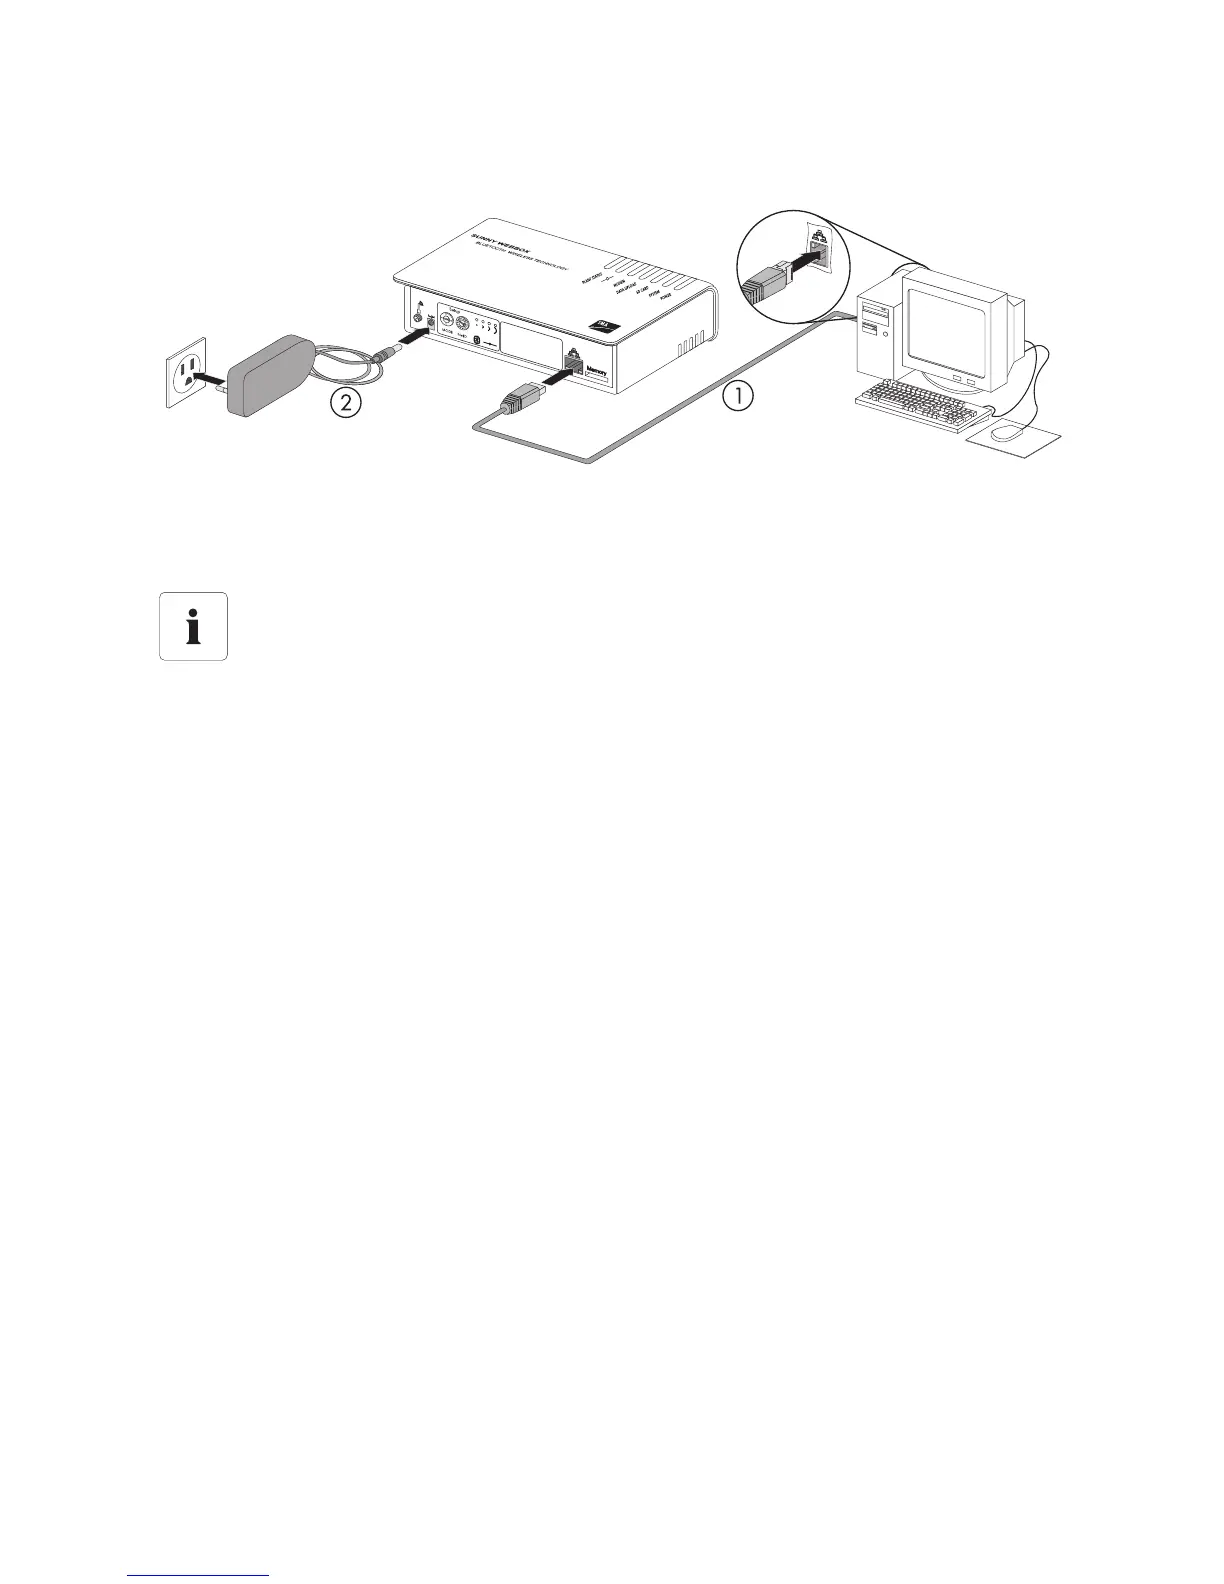
6.3 Connecting the Sunny WebBox Directly to the Computer
1. Use the blue network cable (crossover cable) to connect the Sunny WebBox directly to the
computer (see ➀ ). The terminal on the computer is generally marked with the same symbol as
the network connection of the Sunny WebBox. If necessary, refer to the computer manual.
2. Connect the plug-in power supply to the Sunny WebBox and plug it into the socket (see ➁ ).
☑ As soon as the "SYSTEM" and "POWER" LEDs glow green, the Sunny WebBox has started
up and is ready for operation. The start-up procedure can take up to 90 seconds.
–If the "SYSTEM" or "POWER" LEDs do not glow green, please refer to section
11.1 "General Troubleshooting for the Sunny WebBox" (page 47).
Now set the network area of the computer to the network area of the Sunny WebBox (see section
6.4 "Configuring Network Settings on the Computer" (page 23)).
Recommendation on network cabling
Should the network cable supplied be too short, observe the following information when
buying a longer cable:
• You will need a crossover cable.
• Unnecessarily long cables have an adverse effect on the signal quality. The
maximum permitted cable length is 100 m per segment.
• Use a high quality, at least category 5 (FTP Cat 5) or higher shielded twisted pair
cable.

 Loading...


