EasyManuals Logo

SMART Board MX Series Installation And Maintenance Guide

SMART Board MX Series
115 pages
To Next Page IconTo Next Page
To Previous Page IconTo Previous Page
Page #30 background imageLoading...
Page #30 background image
Chapter 2 Installing the display
smarttech.com/kb/171555 30
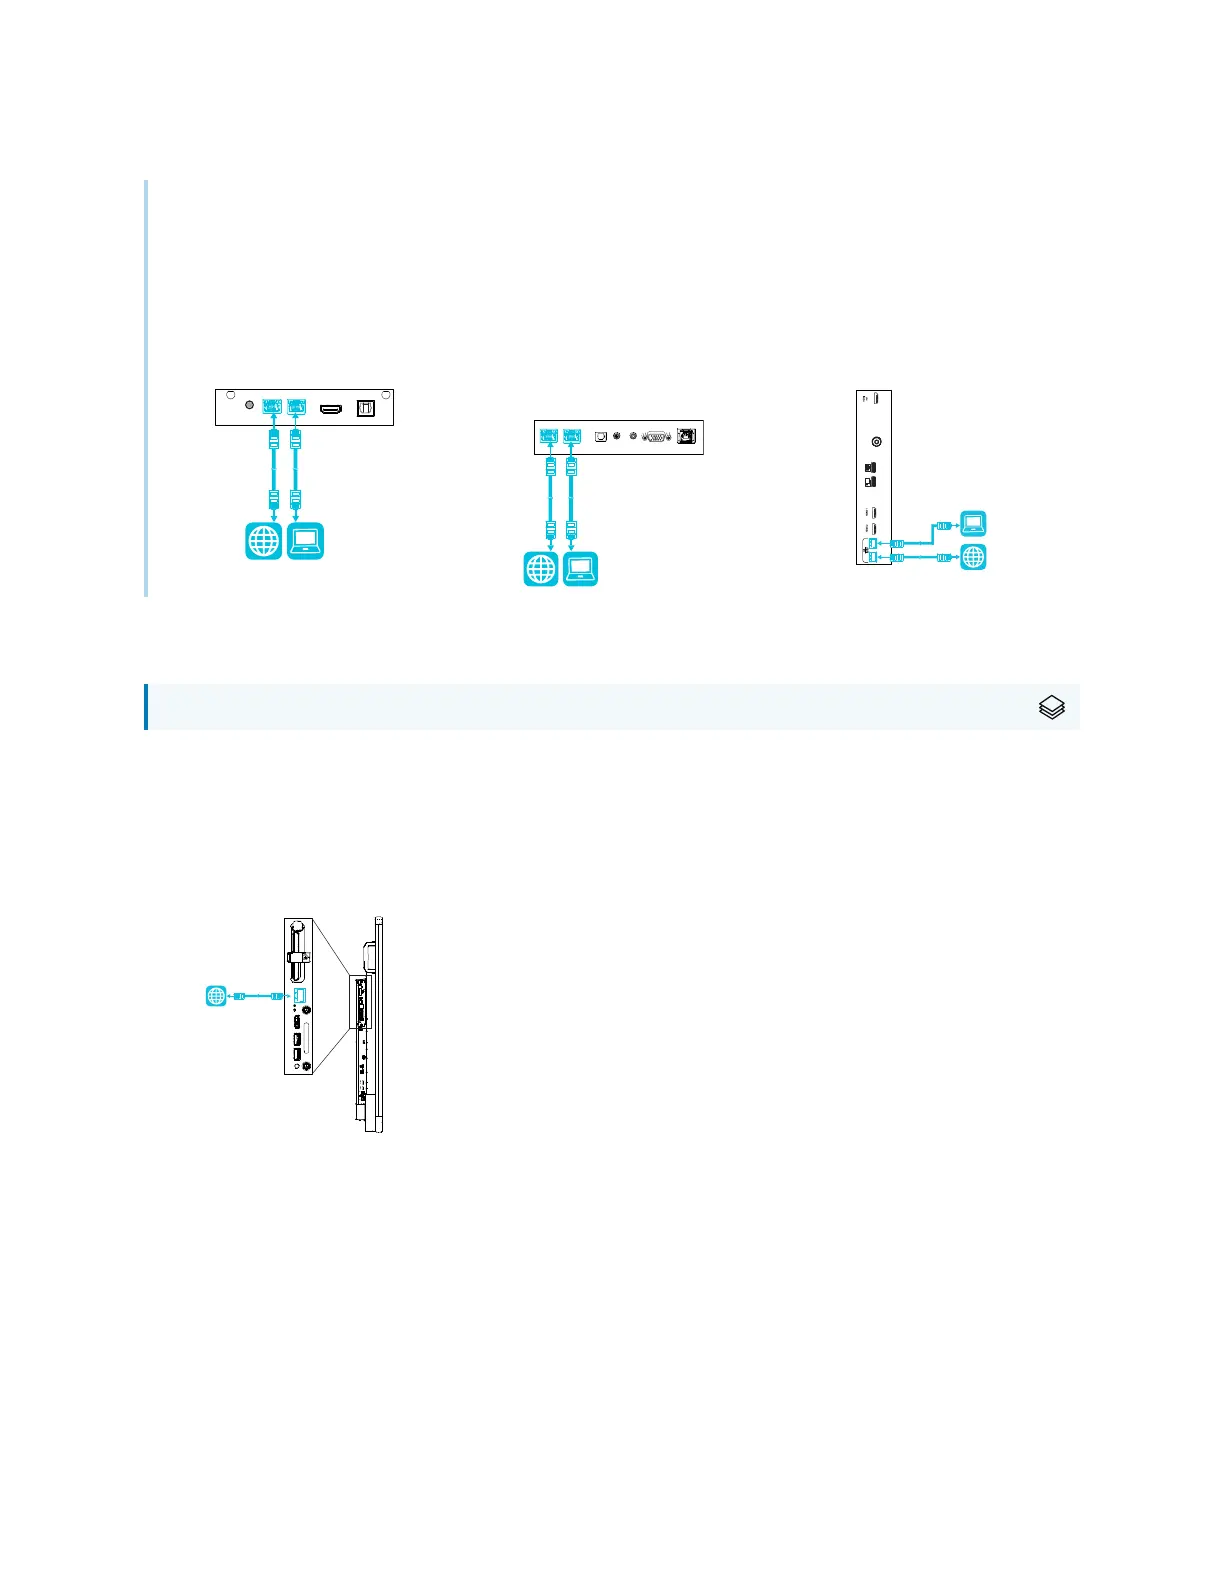
Tip
If you’re using one of the display’s RJ45 jacks to connect to a network, you can connect a computer to
the other RJ45 jack to provide network access for the computer (pictured). This is particularly useful if
there is only one wired network connection in the room. (Network access is available when Networked
Standby is enabled in Settings but not when Standby is enabled in Settings.
SMARTBoard MX (V3) series SMARTBoard MX (V2 and V2-
C) series
SMARTBoard MX series
AM50 iQ appliance
For SMARTBoard MX series displays
There are three ways to connect the AM50 appliance included with the SBID-MX365, SBID-MX375, and
SBID-MX386 models to a network:
l
Wi-Fi
l
connect an Ethernet cable from a network outlet directly to the AM50 appliance’s RJ45 jack

Table of Contents

Other manuals for SMART Board MX Series

Questions and Answers:

Question and Answer IconNeed help?

Do you have a question about the SMART Board MX Series and is the answer not in the manual?

SMART Board MX Series Specifications

General IconGeneral
Screen Sizes65", 75", 86"
Touch Points20
Aspect Ratio16:9
Response Time8 ms
Viewing Angle178°
Integrated SpeakersYes
Internal Storage16 GB
VESA Mount CompatibilityYes
Warranty3 years
Display TypeLCD
Brightness350 cd/m²
InputsHDMI, USB, VGA
Operating System CompatibilityWindows, macOS, Chrome OS
Operating SystemAndroid
ProcessorQuad-Core
DimensionsVaries by size
Touch TechnologyInfrared
WeightVaries by size: 65" - 45.6 kg, 75" - 62 kg, 86" - 78 kg

Related product manuals