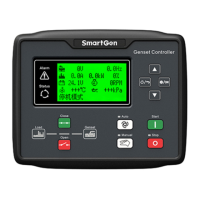
HGMS61 Genset Controller User Manual Page 18 of 47
is recommended. No.16 controller inside has been
connected to B-.
Impedance-120Ω shielding wire is recommended, its
single-end connect with ground.
B+ is supplied by 21 points, rated 10A.
Relay specification: DC 24V.
Connect to start battery positive post, 32A fuse is
used in controller.
Connect to battery negative post.
Connect to external executor. The terminal in
controller is connected to Terminal 10 of Connector
B.
Connect to external executor. The terminal in
controller is connected to Terminal 7 of Connector B.
Connect to external start battery positive post. The
terminal in controller is connected to Terminal 1 of
Connector B.
Connect to external start battery negative post. The
terminal in controller is connected to Terminal 2 of
Connector B.
CT A Phase Monitoring
Input
Externally connect to CT secondary coil. (Rated
5A)
CT B Phase Monitoring
Input
Externally connect to CT secondary coil. (Rated
5A)
CT C Phase Monitoring
Input
Externally connect to CT secondary coil. (Rated
5A)
Refer to installation instructions.
Generator U-phase monitoring input will output after
the fuse.
Generator U-phase
Voltage Monitoring
Input
Connect to genset output U-phase, the control uses
10A fuse.
Generator V-phase
Voltage Monitoring
Input
Connect to genset output V-phase, the control uses
10A fuse.
Generator W-phase
Voltage Monitoring
Input
Connect to genset output W-phase, the control uses
10A fuse.
Connect to genset output N wire.
Mains R-phase Voltage
Monitoring Input
Connect to Mians R-phase, the controller uses 10A
fuse.
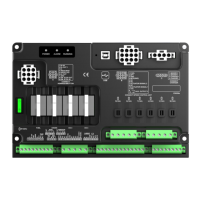
Connector A ( Connect to HGMS61D)
Connect Terminal 6 (B+ OUT) to this terminal
through a power switch to supply for positive post of
HGMS61M.
Supply power to positive post of HGMS61D.
Negative post of controller power.