SEMI-AUTOMATIC
12
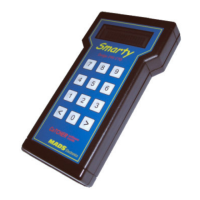
3 Device description
3.1 Information on the defibrillator
SMARTY Saver Plus is known as an AED, i.e. Automatic External Defibrillator.
Its purpose is to cope with the emergency of a patient suffering from sudden cardiac arrest and to assist in Cardio
Pulmonary Resuscitation (CPR).
The device was designed for use by non-experts and by healthcare providers who have duly followed and successfully
completed a BLS-AED course, in accordance with international guidelines.
Designed to automatically detect and analyse the victim’s heartbeat, it is able to deliver one or more defibrillation
shocks if it detects a ventricular defibrillation or a ventricular tachycardia (monomorphic or polymorphic with >180
beats). The energy is delivered through a biphasic truncated exponential (BTE) electrical shock that can self-adapt to
the patient’s thoracic impedance.
SMARTY Saver Plus assists the operator in properly performing cardiac massage, during Cardio-Pulmonary
Resuscitation, thanks to the external CPR Quality sensor (SMT-C14034).
This external device is, in fact, able to measure the depth and the frequency of the compressions performed and to send
this feedback to the SMARTY Saver Plus device via Bluetooth (see par. 5.3).
SMARTY Saver Plus is available in two versions:
• SM3-B1003: SMARTY Saver Plus Semi-automatic. Maximum energy delivered 200J
• SM4-B1004: SMARTY Saver Plus Automatic. Maximum energy delivered 200J
It is powered by the following battery:
• SMT-C14031: Non-rechargeable battery made up of a pack of 8 Li-MnO
2
cells
The device makes it possible to register rescue data on an external µSD Memory Card (optional) so that they can be
displayed on a PC using a special software owned by A.M.I. Italy S.r.l. In stand-by mode (not in use but with the battery
installed), the device performs daily self-tests to check its operating status, in order to guarantee ready use in case of
emergency.
The keyboard of the device is equipped with two LEDs (red and green) that make it possible to ascertain the outcome
of the operational tests and know the status of the device even if it is switched off (stand-by mode).
3.2 Procedure for the activation of the defibrillator
Open the packaging and make sure that all materials supplied are intact, checking their expiry date (defibrillation plates)
and storage conditions.
Connect the plates’ connector and the battery to the defibrillator and wait for the initial test to start; the device will
ask you to push the shock button for the full check of the device.
If the activation test is successful, the device invites you to connect the plates to the patient. At this point, switch off
the device, leave the plates and the battery connected and check that the green LED blinks every six seconds. Lastly,
place the defibrillator back in a safe and accessible place, so that it is ready for use.