Setting Parameters
■Parameter Code
(1) When an input current is entered for the first time, only the parameter mode can be selected.
According to “■Initial Adjustment”, calibrate the positioner.
(2) After (1), the auto mode is displayed first when an input current is entered.
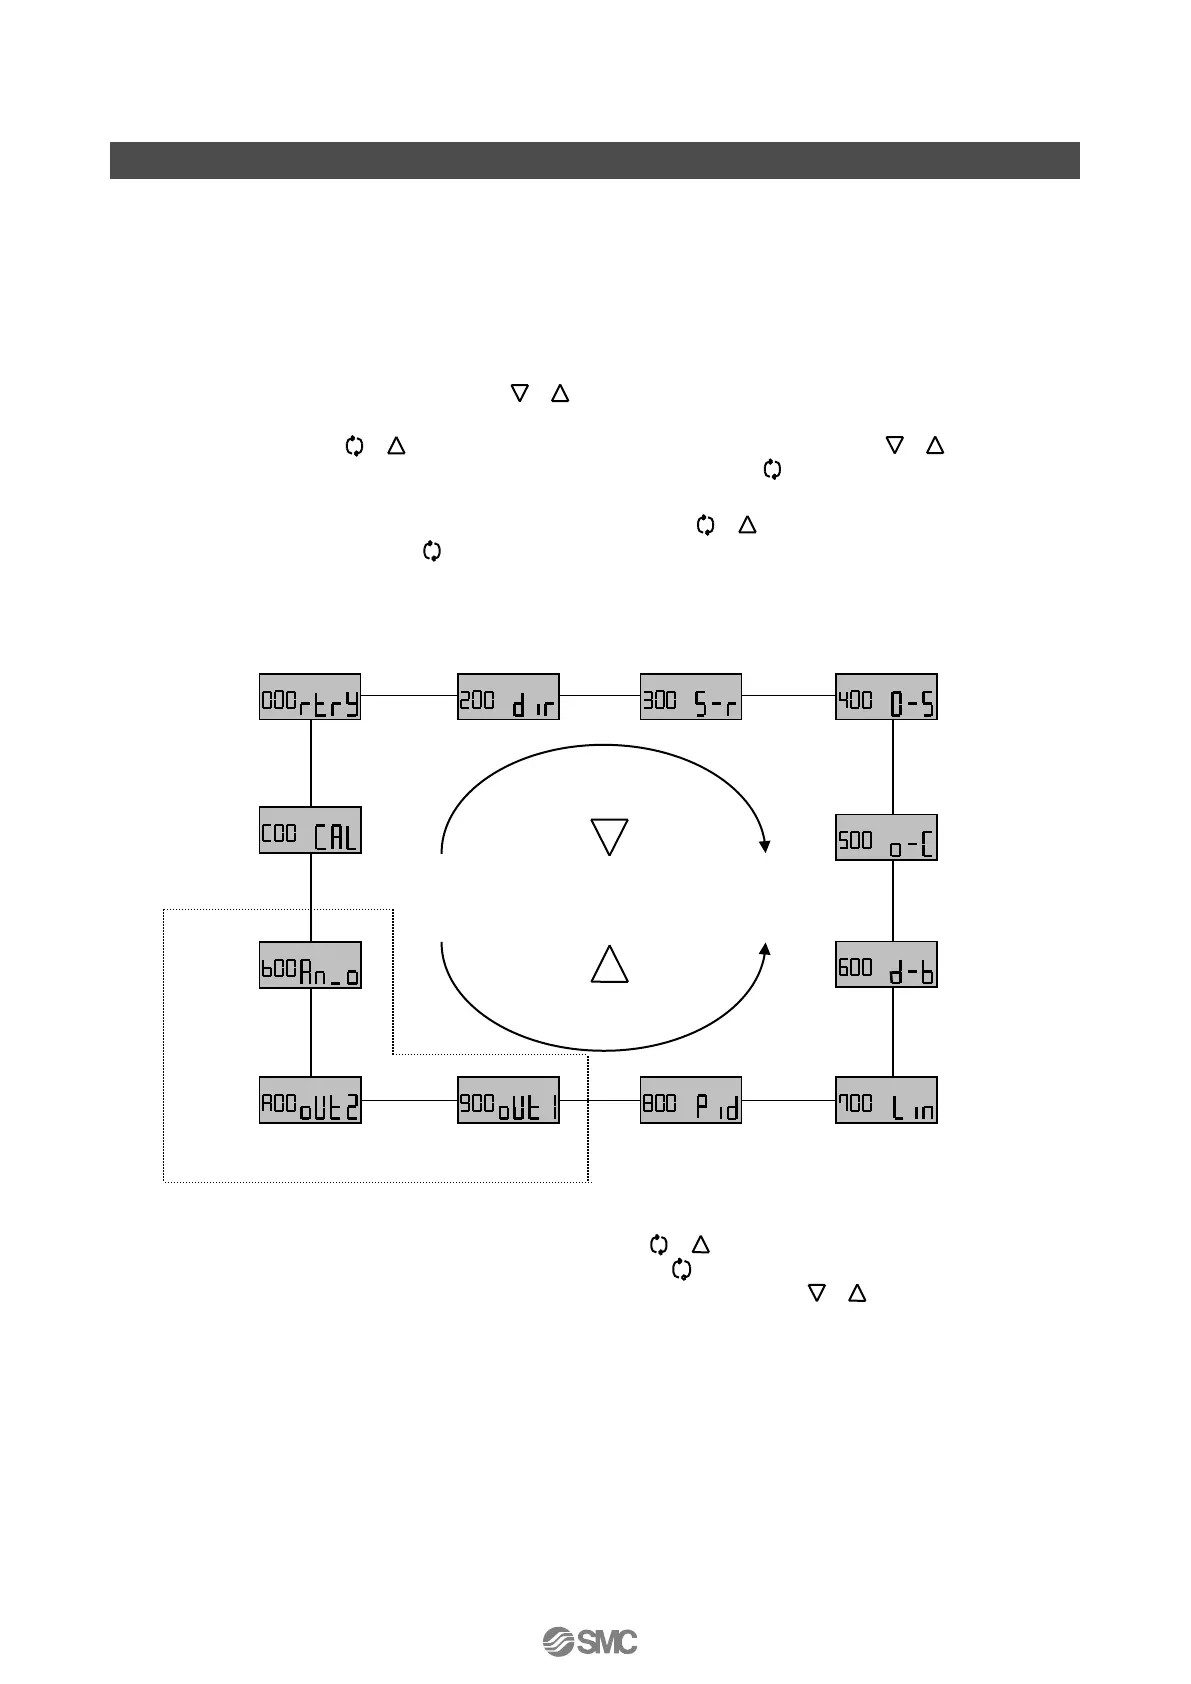
(3) The parameter code is shown in Fig. 23. The standard product (without any option) has 8
setting items. The product with option output has 11 setting items. Select the parameters in
order with the down-/ up -button ( ).
(4) Parameters stop with parameter codes flashing, and the codes can be changed by pressing
the set button ( ) for 1sec. or more. Push the down -/ up-button ( ) to modify a
value. After the value is decided, push the mode button ( ) to go back to the parameter
code flashing status
*
1
.
(5) To enter the lower hierarchy, press the set button ( ) for 1sec. or more. To go back,
press the mode button ( ) for 1sec. or more, to display a sub menu.
(6) See the next page, “■Parameter Code Detail” for detail of parameter codes.
1: See “■How to Change Values” for modifying a value.
2: The parameter surrounded by a broken line in Fig. 23 will not be shown for the standard type (IP8101-0*0)
or the product with HART communication (IP8101-0*3).
Set button ( ): to change a code
Mode button ( ): to set the code
Down-button and up-button ( ): to select parameter
 Loading...