34
CALIBRATION
In order to maximize the Arago 3™ alignment system, the cameras have been mounted on a swivel pod
assembly. This swivel pod allows the right and left cameras to rotate in order to see the targets in all eld
of views (Narrow, Normal and Wide). The Arago does not require RCP because the third camera maintains
constant calibration. NOTE: V3400 systems do not require swivel pod calibration.
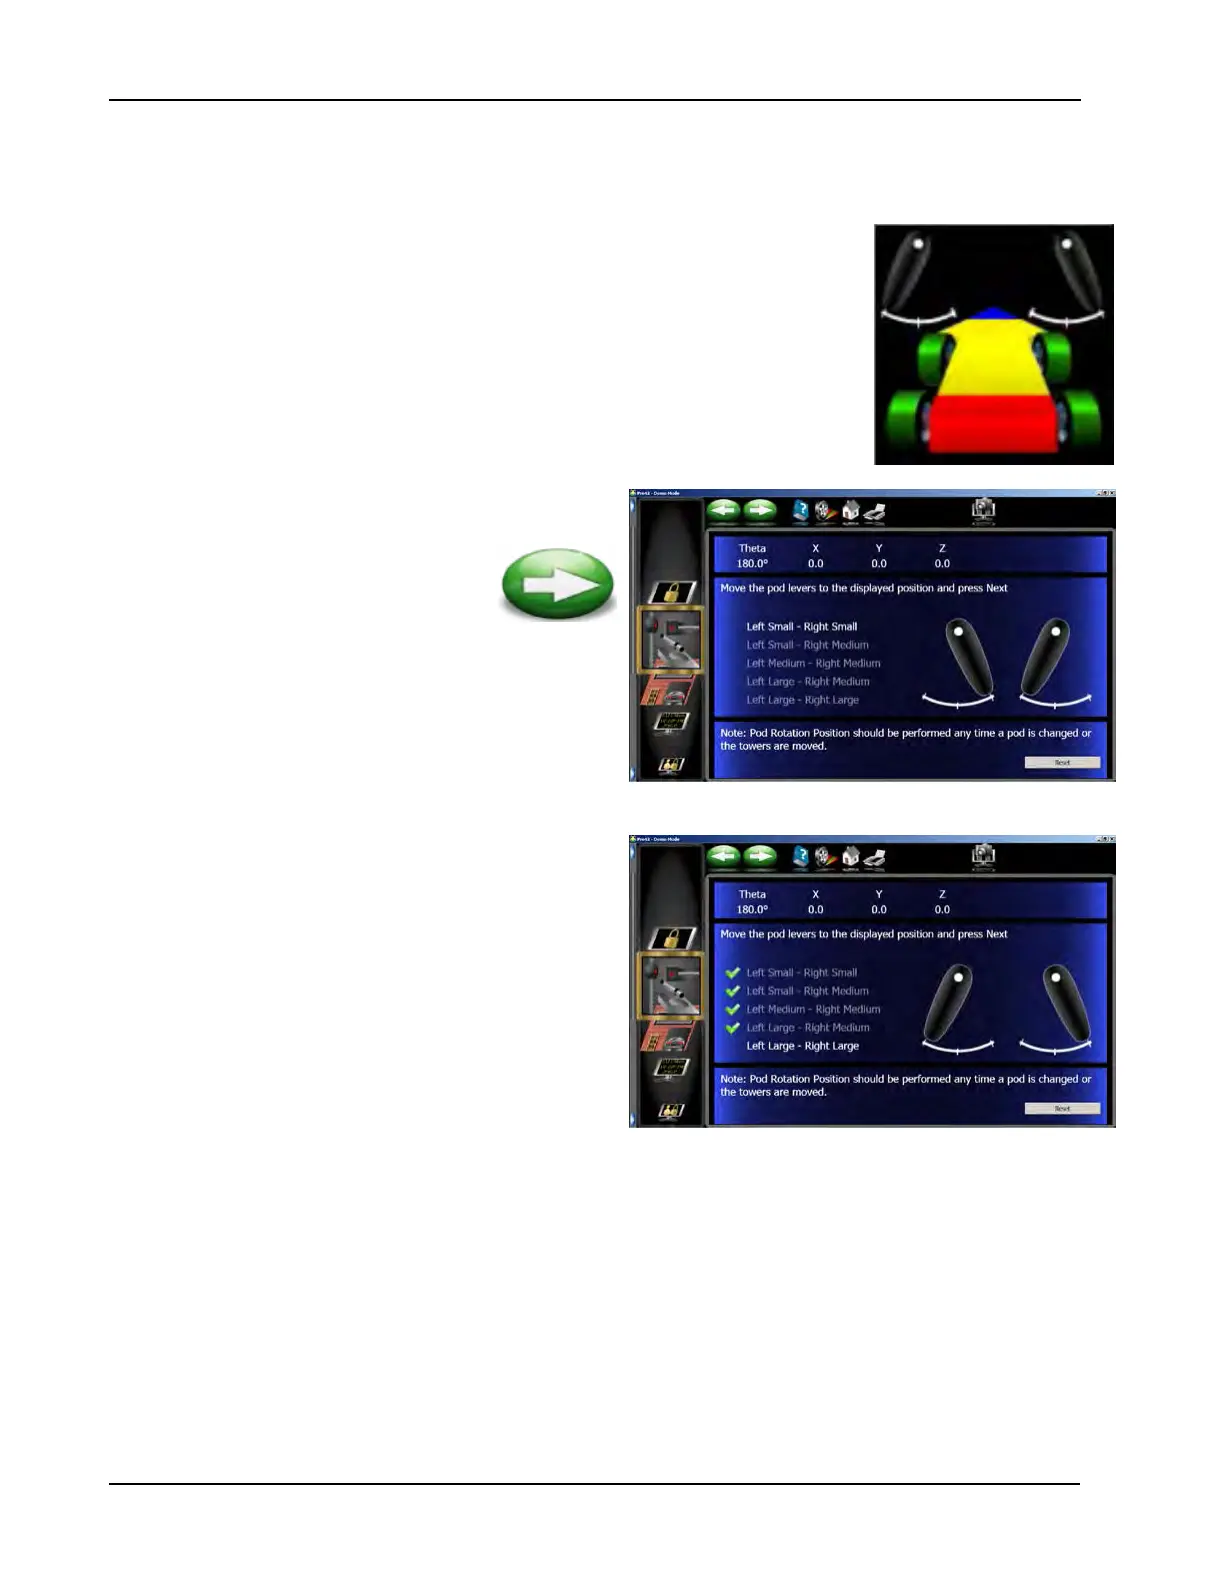
1. From the calibration menu single click on the “Pod Rotation” icon.
2. Adjust the camera lever’s to the illustrated position
shown on the screen and click on <Next>.
3. After clicking on “Next” as indicated in step 2, the cam-
era rotation levers change positions. Move the cam-
era levers to the position shown and click on <Next>.
4. Continue the process until all camera positions have
been checked. After the nal rotation lever has been
checked click on the <Next> button to exit.
NOTE: IF A MISTAKE IS MADE DURING THE TEACH-
ING PROCESS, THE OPERATOR CAN SIMPLY
CLICK ON THE RESET BUTTON TO CLEAR
THE LEARNING PROCESS AND START AT
THE BEGINNING.
Wheel Clamp Selection