Lit. No. 30118, Rev. 00 June 15, 2020
59
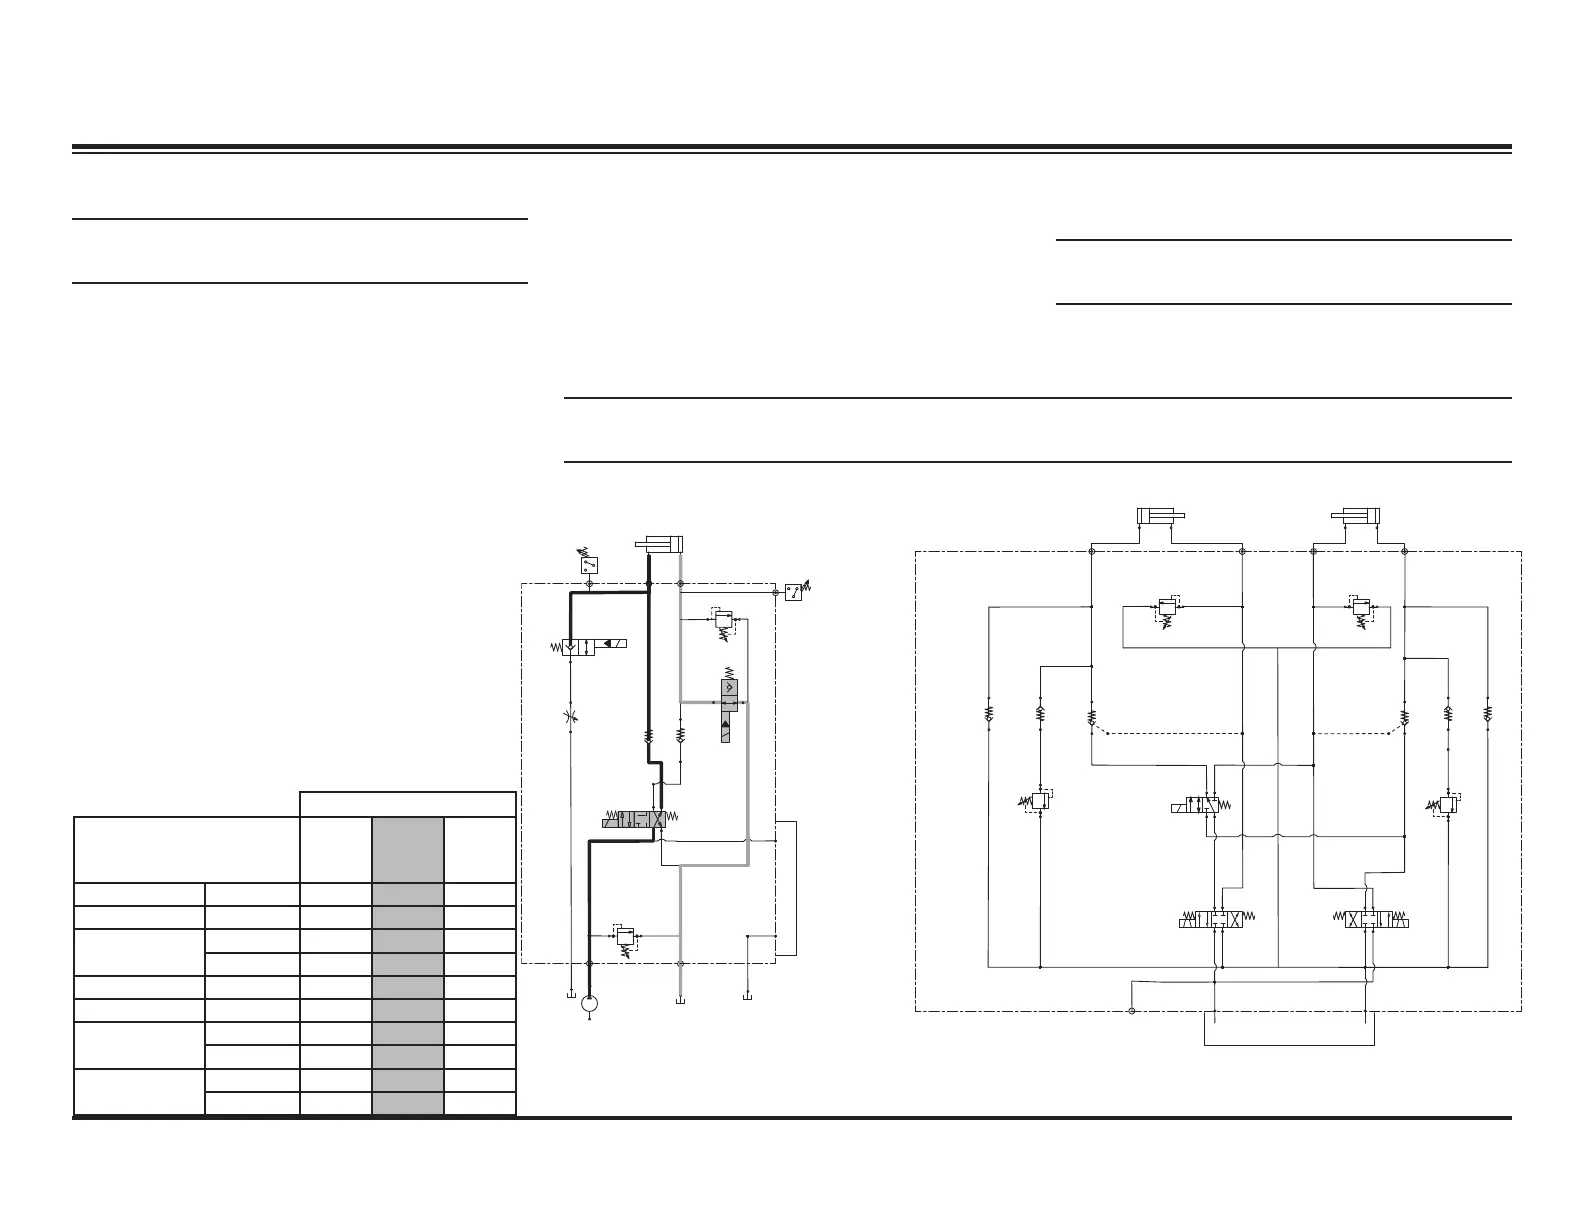
ATTACH – HYDRAULIC
PRIMARY MANIFOLD
SECONDARY MANIFOLD
LIFT RAM
RAISE
LOWER
RV2
S4
RV1
LEFT BASE LEFT ROD
RV3
RV5
CV4 CV1
PC1
RV4
RV6
PC2
CV2 CV3
S3
SV5
S5C2 S5C1
S6
S6C1
S6C2
CV5
INTERFACE
INTERFACE
T
PUMP
TANK
S1
CV6
S2
SV4
RIGHT ROD RIGHT BASE
System Response
NOTE: Read instructions for complete
attachment.
1. Control must be connected and turned OFF.
2. Move the POWER switch (top switch) to center
or OFF position, plug in electrical harness.
(ON, OFF, MOM-ON).
3. Push and hold POWER switch to the
RIGHT, this in turn sends ground down to
the ATTACH/DETACH switch (MOM-ON,
OFF, MOM-ON) by holding this switch to the
RIGHT ground is sent through the GREY wire
to the plow module port B. The module then
completes the ground path to the motor relay
and solenoid cartridge valves S2C2 and S1.
4. Hydraulic fl uid from the pump fl ows through the
activated S2C2 cartridge valve, through CV5
into the base end of the lift ram.
5. The extending ram pushes hydraulic fl uid
out of the rod end of the cylinder through the
activated S1 cartridge valve, through the quill
and back into the reservoir.
6. This action rotates the headgear up into
mounting position.
NOTE: if pressure exceeds 425 psi, RV2 will
open and dump back to tank.
7. Complete attaching the snowplow per
instructions.
NOTE: Battery voltage is supplied to the plow module, motor relay, and the 9 solenoid coils when
the snowplow is connected to the vehicle.
BLADE MOVEMENT
Solenoid
ATTACH DETACH
Scrape
Maxx™
FEATURE
(OPT)
Motor M ON ON ON
SV08-2211 S1 ON ON
SV08-47D
S2C1 ON
S2C2 ON
SV10-43 S3
SV08-2211 S4 ON
SV08-47C
S5C1
S5C2
SV08-47C
S6C1
S6C2