Pyramix Tutorial
107
SSL UF1 User Guide
Pyramix with UF1 - Tutorial
The following tutorial guides you through configuring and using the default Pyramix profile on LAYER 1 of UF1. If you wish to
configure Pyramix on a different layer, please refer to the DAW Communication section of this User Guide to ensure your DAW is
configured for the correct SSL V-MIDI ports..
SSL 360° Setup
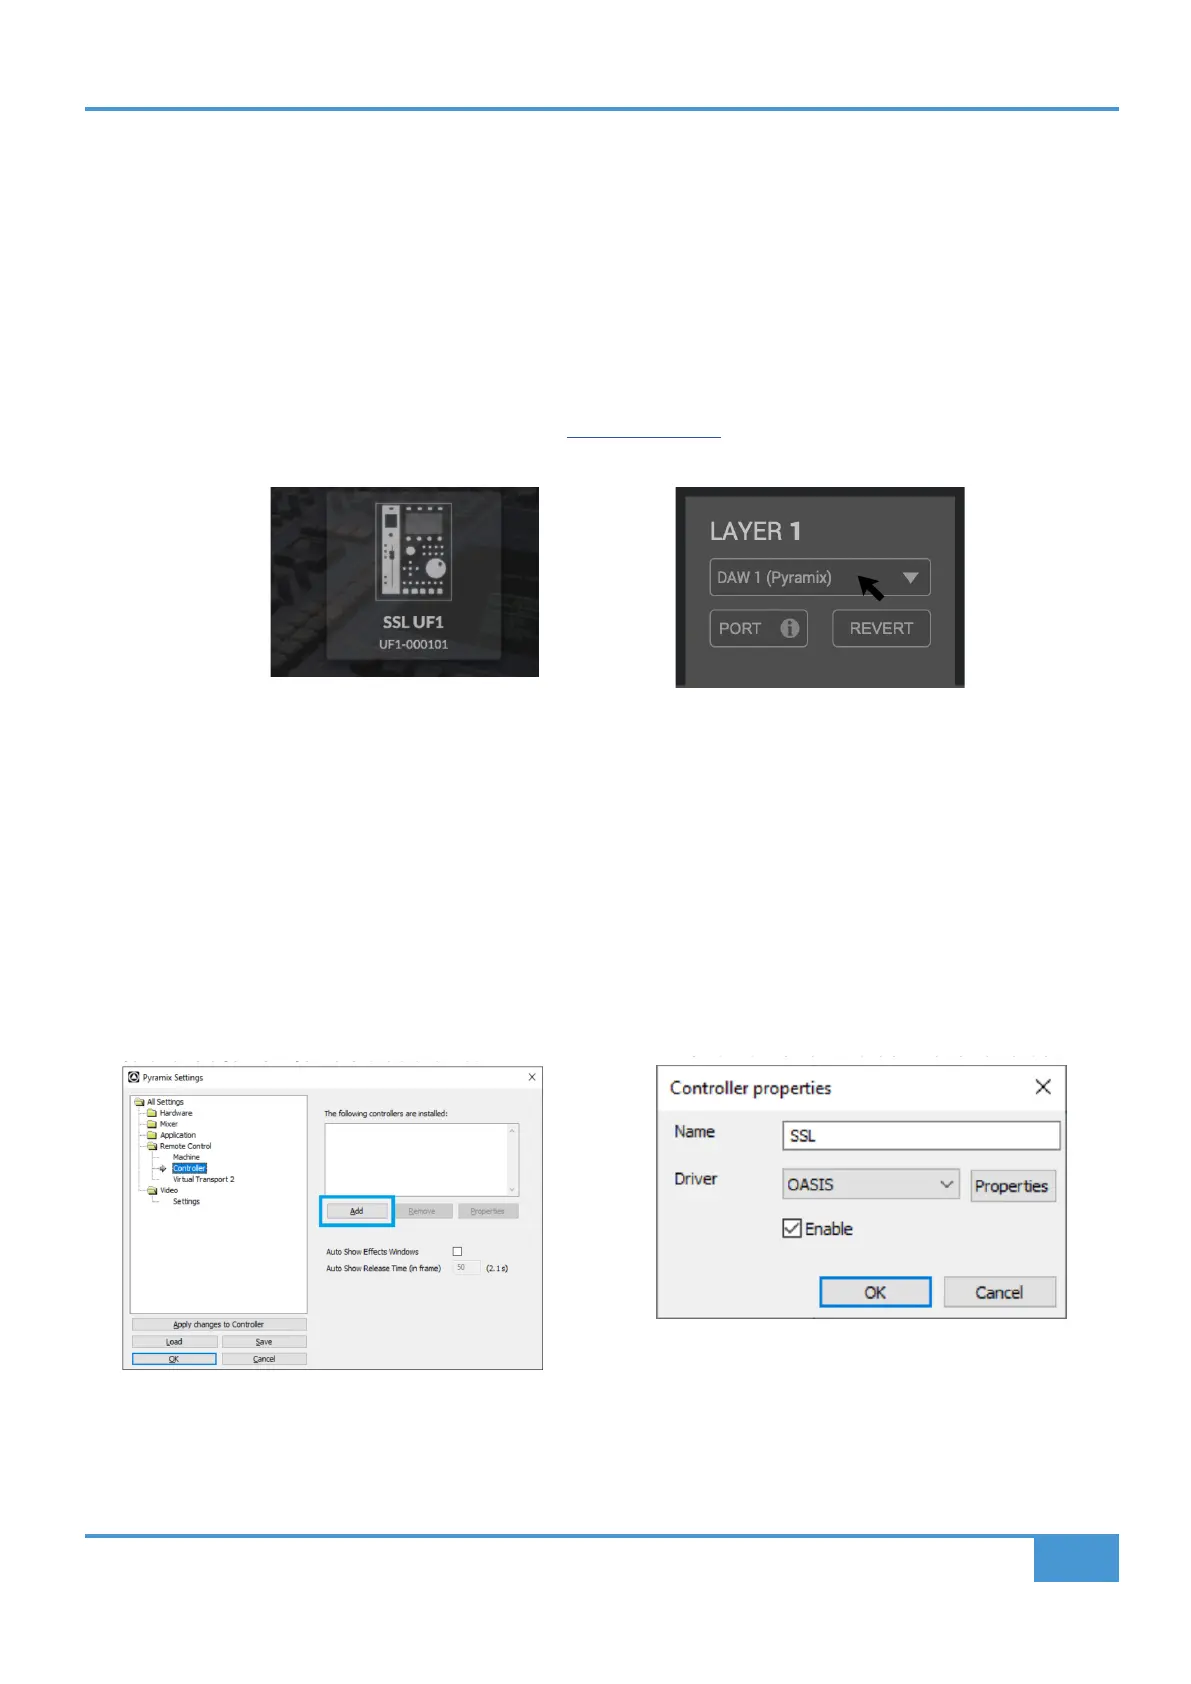
1. Open the SSL 360° application on your computer. Go to the HOME page and check that your UF1 has been detected by SSL
360°.
2. Go to the UF1 page and set Layer 1 to Pyramix using the drop-down list. If Pyramix is not available from the drop-down list it
is because you have not configured it as DAW 1 on the CONTROL SETUP page - ensure you do this first.
Pyramix Setup
3. Open Pyramix and access the Settings > All Settings menu. Go to Remote Control > Controller and click on Add.
4. Enter a name for the controller and set the Driver to OASIS.
5. Click on the Properties button.
6. In the OASIS Configuration window, set the Transport to EMC.
7. Click on the Properties button.
8. Set SSL V-MIDI Port 1 for both Midi In and Midi Out ports. In this list, ensure that any SSL V-MIDI Ports you need are assigned
9. In the Controller drop-down menu, select SSL UF8 MackieCtrl. Press OK to close the different windows.
STEP 3: Access the Settings > All Settings menu. Go
to Remote Control > Controller, click on Add.
STEP 4: Enter a name for the controller and set the
Driver to OASIS.
STEP 1 : Open SSL 360° application.
Check your UF1 has been detected.
STEP 2 : Select the default Pyramix
DAW prole from the UF1 page.