Plug-in Mixer Tutorial
122
SSL UF1 User Guide
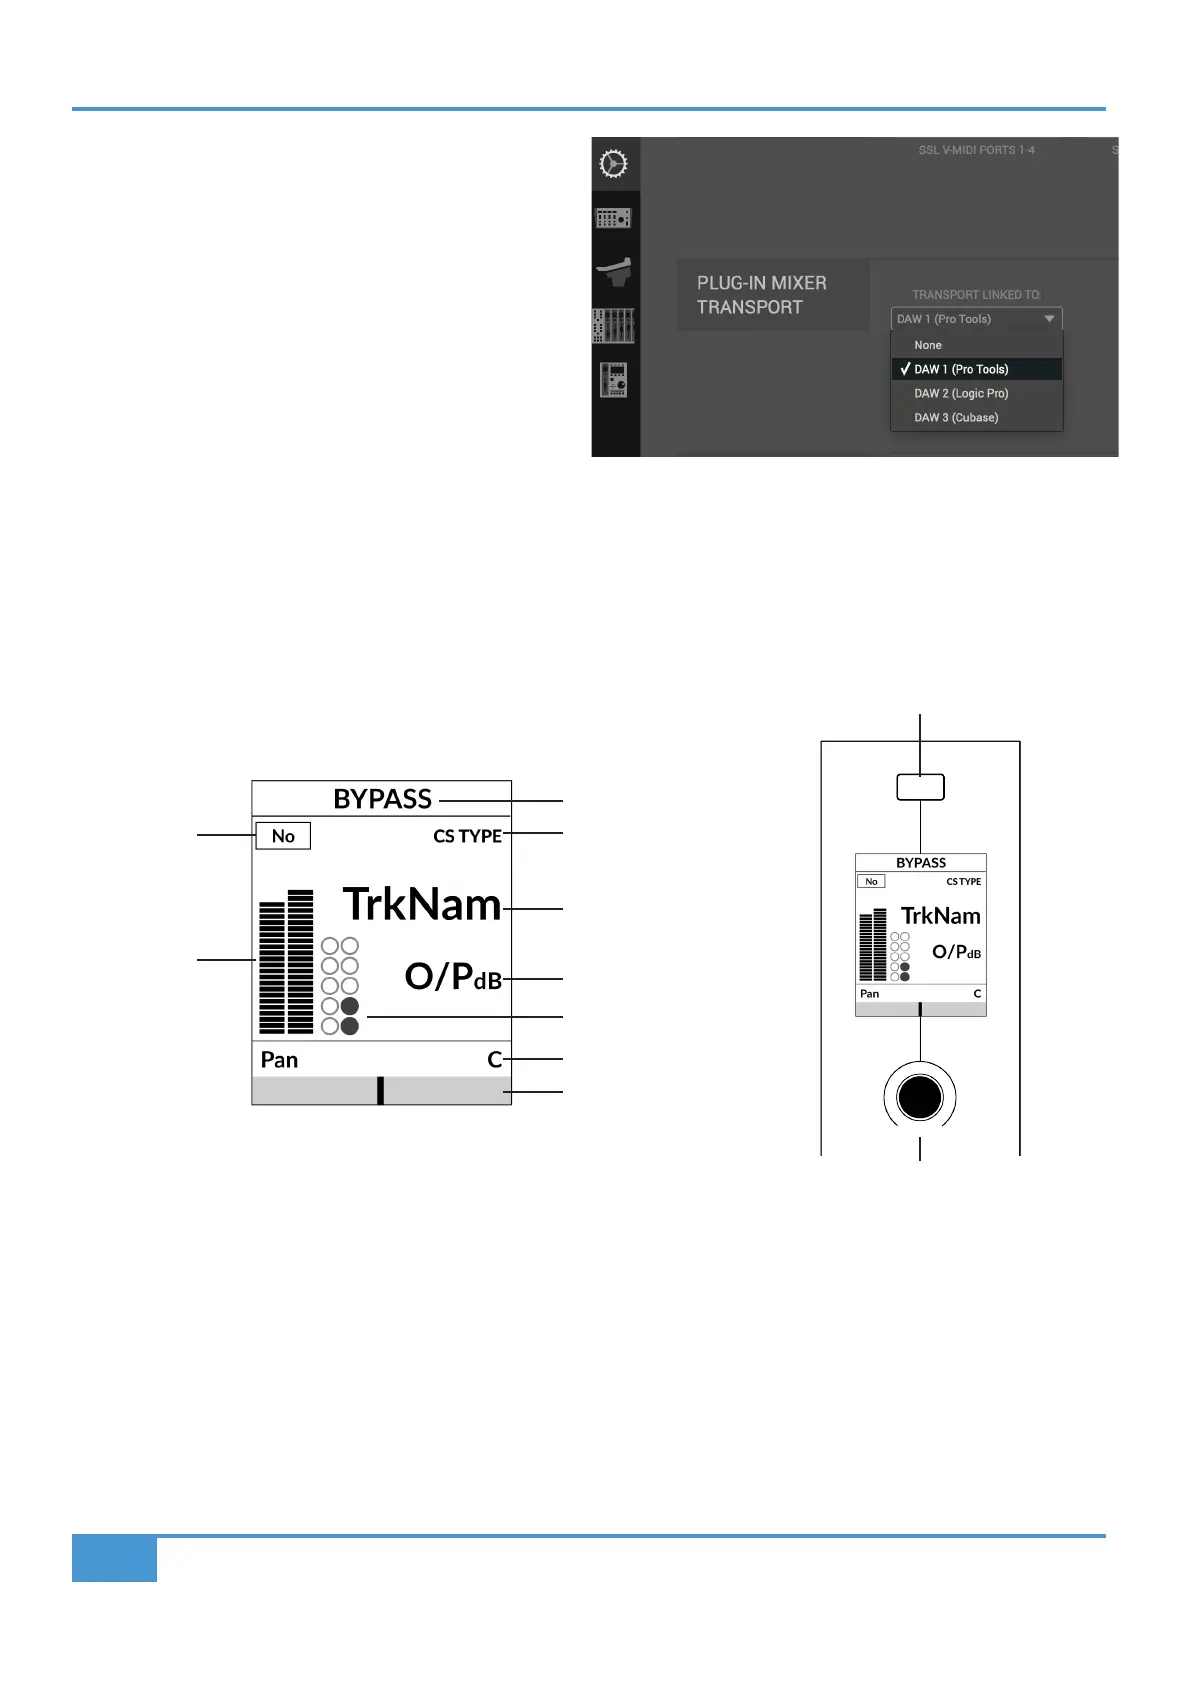
Plug-in Mixer Transport Setup
In order for the Transport functionality and the timecode
readout to work on UF1, you must ensure that the Plug-in Mixer
Layer is correctly linked to one of your configured DAWs. Go
to the CONTROL SETUP page in SSL 360° and choose your
desired DAW from the drop-down list in the Plug-in Mixer
Transport section.
Tutorial
This section guides you through using UF1 with the SSL 360°
Plug-in Mixer.
Before You Start...
Setting a Layer of UF1 to control the Plug-in Mixer allows you to extend the power of your UC1 controller. But don't worry if you
don't have a UC1 controller - you can still use UF1 on its own to control all the parameters of your 360°-enabled channel strips and
SSL Meter plug-ins.
Small LCD Layout
Bypass - Indicates if the channel strip is bypassed. You can toggle the bypass state from the soft key directly above.
Plug-in Mixer Position - Displays the position of the channel strip plug-in in the Plug-in Mixer.
Channel Strip Type - Displays the type of 360°-enabled channel strip - e.g. CS 2, 4K B.
TrkNam - Displays the DAW track name that the plug-in is inserted on in the DAW.
O/PdB - Displays the channel strip Output Fader value.
Metering - Displays the metering of the plug-in.
Dynamics Metering - Displays the gate and compressor gain reduction activity from the plug-in.
Pan Value - Displays the value of the pan control on that instance of channel strip.
V-Pot Readout Bar - Displays the position of the Pan. You can adjust the Pan position from the V-Pot encoder directly below the
small LCD. Push the V-Pot to reset the Pan to centre.
Enlarged view of LCD screen
Track Name
Output Fader dB
Pan Value
Pan Position
Dynamics Metering
Plug-in Mixer
Position
Metering
Channel Strip Type
Channel Strip Type
Bypass
Pan