Studio One Tutorial
81
SSL UF1 User Guide
Studio One with UF1 - Tutorial
The following tutorial guides you through configuring and using the default Studio One profile on LAYER 1 of UF1. If you wish
to configure Live on a different layer, please refer to the DAW Communication section of this User Guide to ensure your DAW is
configured for the correct SSL V-MIDI ports.
SSL 360° Setup
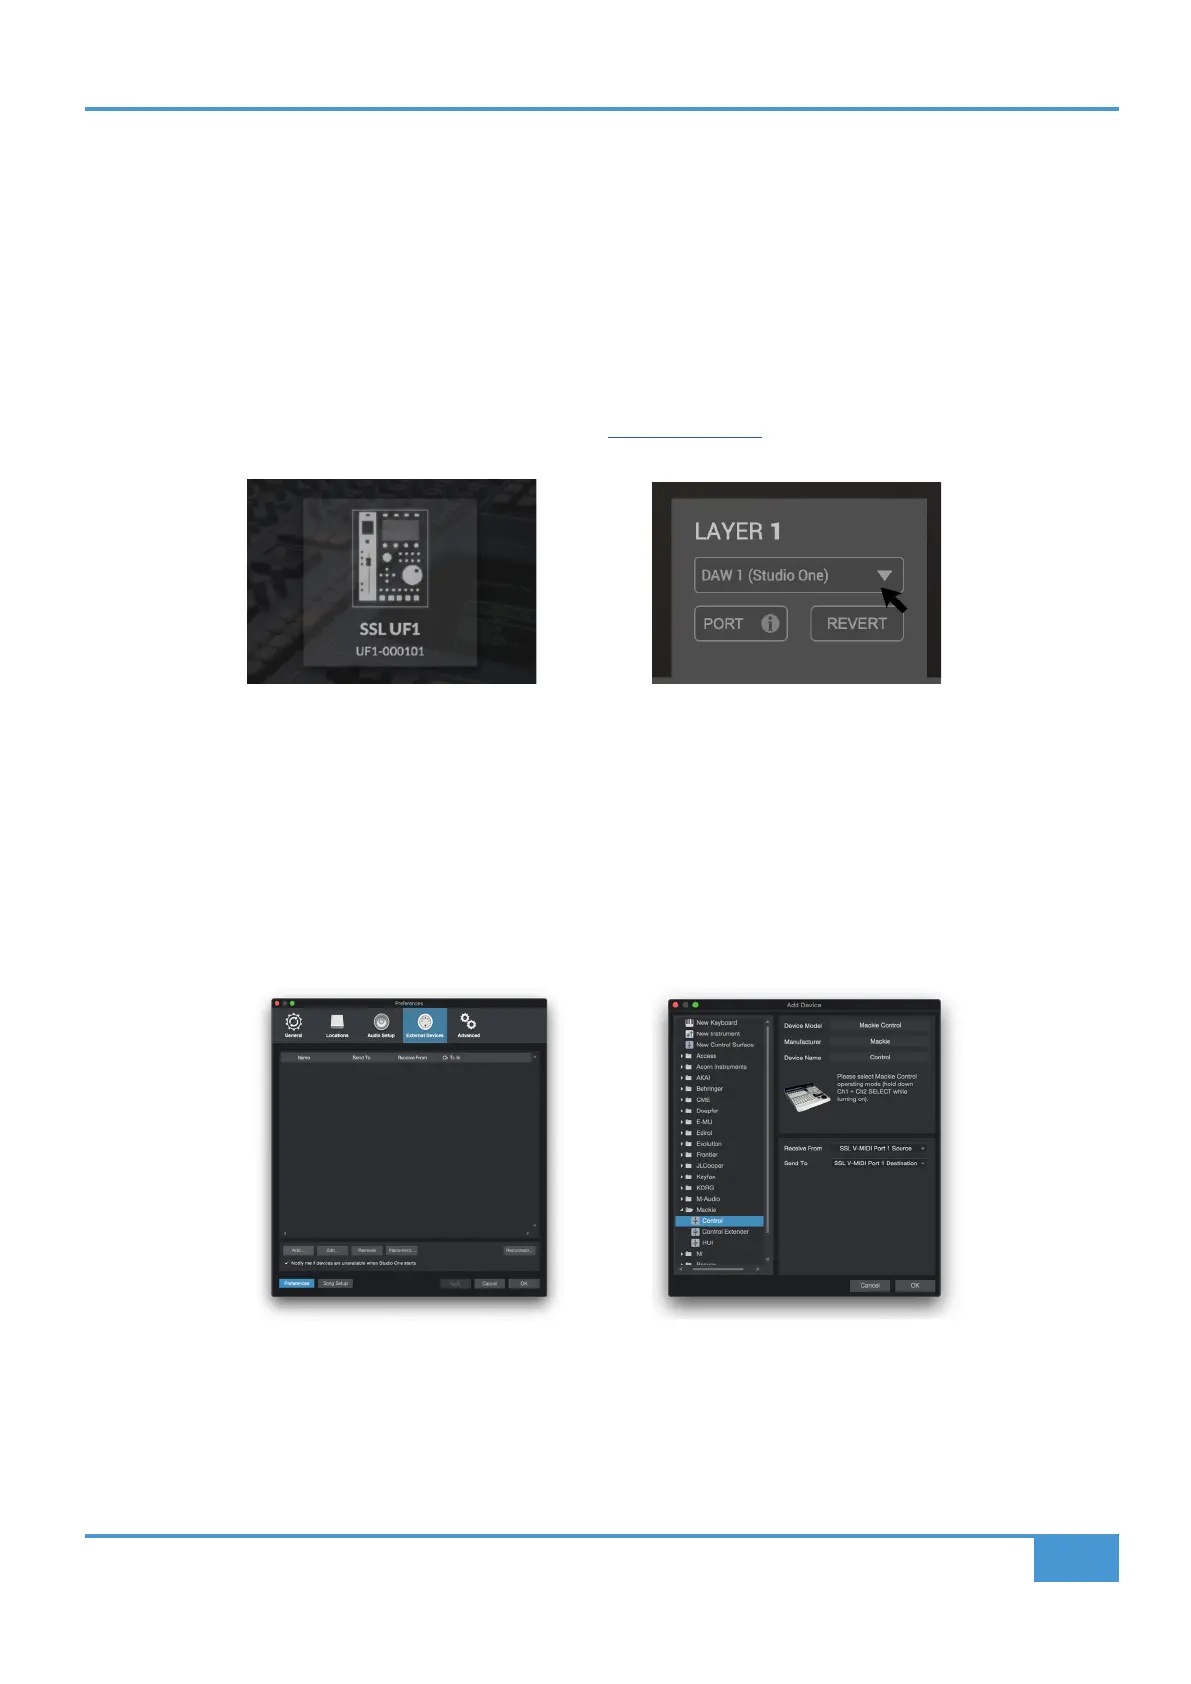
1. Open the SSL 360° application on your Mac or Windows computer. Go to the HOME page and check that your UF1 has been
detected by SSL 360°.
2. Go to the UF1 page and set Layer 1 to Studio One using the drop-down list. If Studio One is not available from the drop-down
list it is because you have not configured it as DAW 1 on the CONTROL SETUP page - ensure you do this first.
Studio One Setup
3. Open Studio One. Go to Preferences > External Devices and click on the Add... button.
4. In the Add Device window, select Mackie Control and set Receive From to SSL V-MIDI Port 1 Source and set Send To to
SSL V-MIDI Port 1 Destination. Click OK.
STEP 3 : Go the Preferences menu
and click on the External Devices
tab.
STEP 4 : Add a Mackie Control and
congure for SSL V-MIDI Port 1 on
Receive From and Send To.
STEP 2 : Select the default Studio
One DAW prole from the UF1 page.
STEP 1 : Open SSL 360° application.
Check your UF1 has been detected