Product Overview & Features
22
SSL UF1 User Guide
UF1 Page
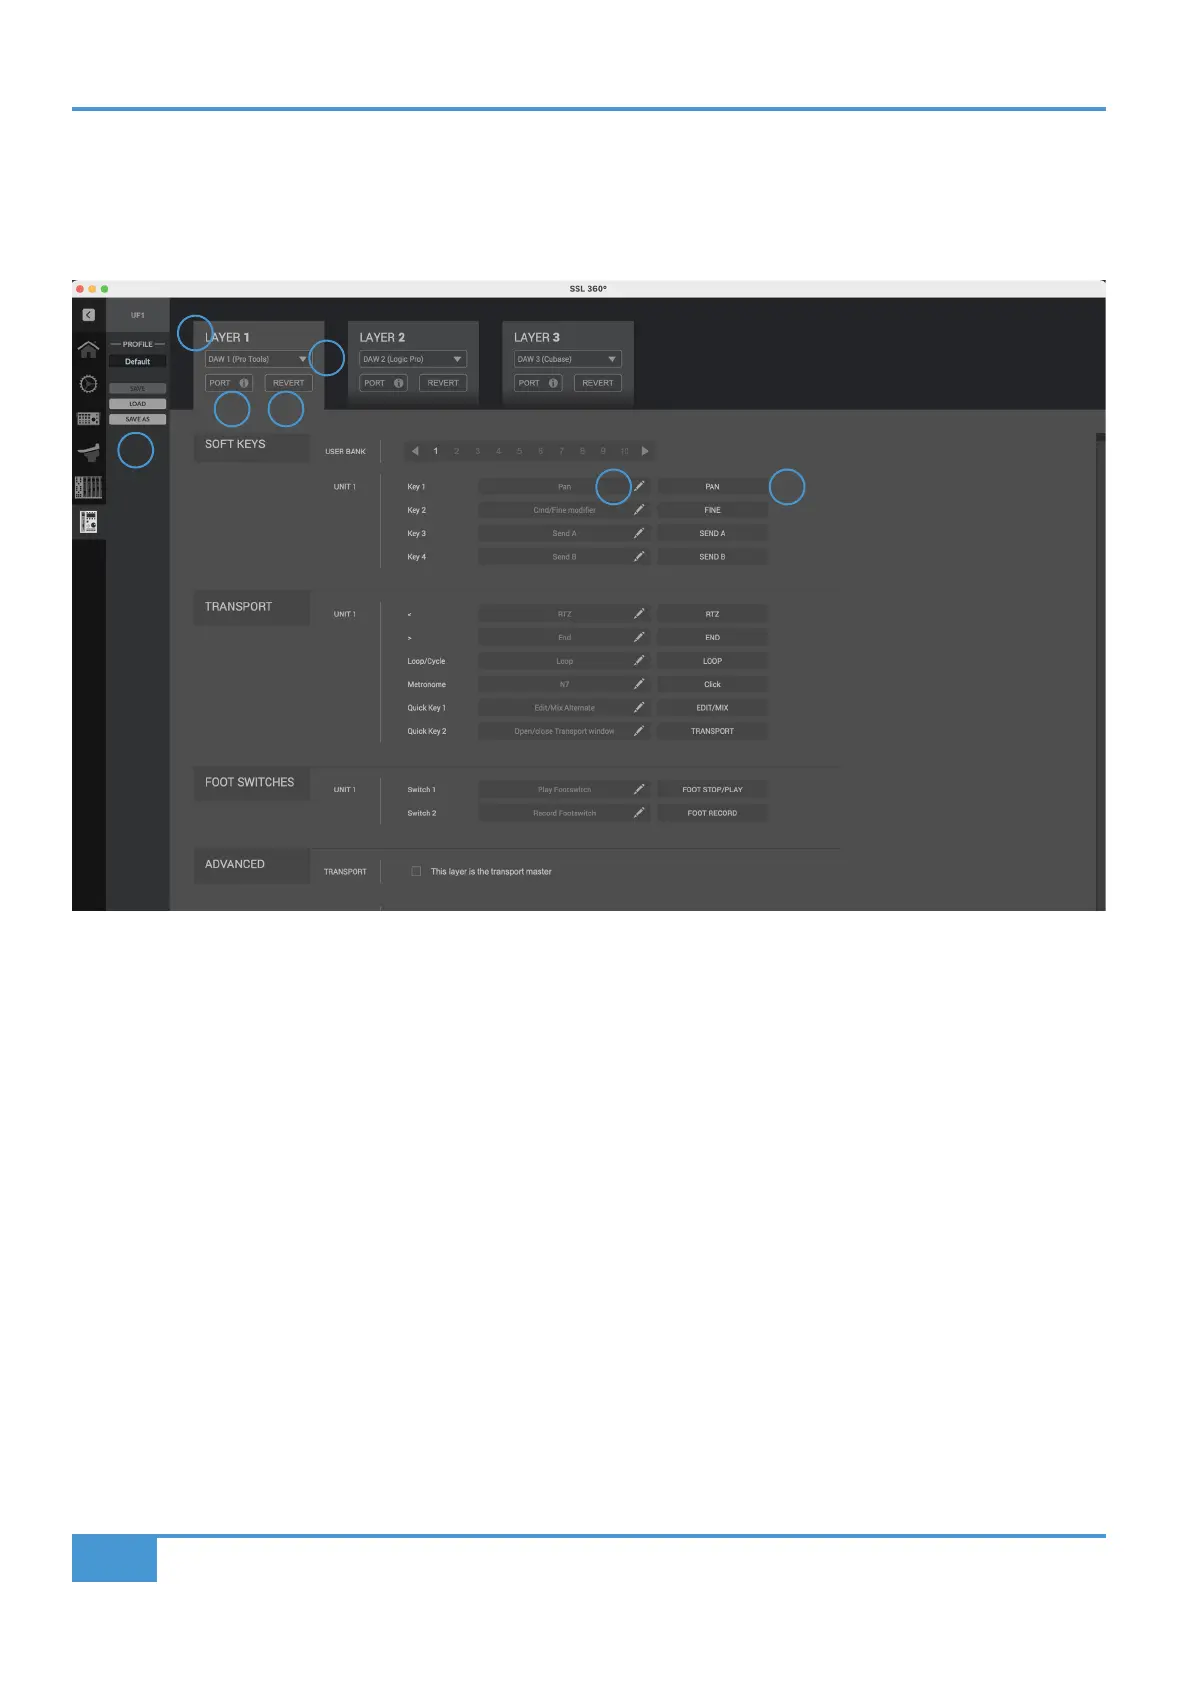
The UF1 page can be selected from the menu toolbar on the left-hand side and is where you configure UF1 to work with your
DAW(s). It is also the place where you can customise any of the user-assignable keys. Customised DAW profiles can then be saved
and loaded as .xml files should you need to work on another computer with SSL 360° installed.
1 - LAYER Tabs
UF1 can be configured for 3 different DAWs simultaneously, with each DAW occupying what is called a 'Layer'. If you only use one
DAW, then it is likely you'll only need one layer. If using multiple DAWs (or a DAW and the SSL 360° Plug-in Mixer), simply click in
the LAYER 2 or LAYER 3 tabs to configure as appropriate.
2 - DAW / Plug-in Mixer Profile Selection
Use the drop-down list to select your DAW for the chosen layer, or to set a layer to control the Plug-in Mixer. The DAW you can
select is determined by the choice you made on the CONTROL SETUP page. See the previous page of this User Guide for more
information.
3 - PORT INFO
Clicking on PORT INFO provides some basic instructions on how to configure your SSL V-MIDI ports correctly (useful as a
reminder). If you are configuring UF1 for the first time, please refer to the more detailed explanations found at the start of each
DAW Tutorial section as the PORT INFO does not cover every detail.
4- REVERT
Allows you to revert this Layer to the factory-shipped DAW profile.
5 - DAW Command/Keyboard Shortcut Assignments
Clicking on the pen symbol will allow you to change the assignment of any of the user-assignable keys. See the next page for
more information.
1
2
3 4
5 6
7