45
14.7 Setting the run time
(run time monitoring)
NOTE
The limit switches must be set before
setting the run times, see “8.3 Setting the
motor limit switches” on page 23.
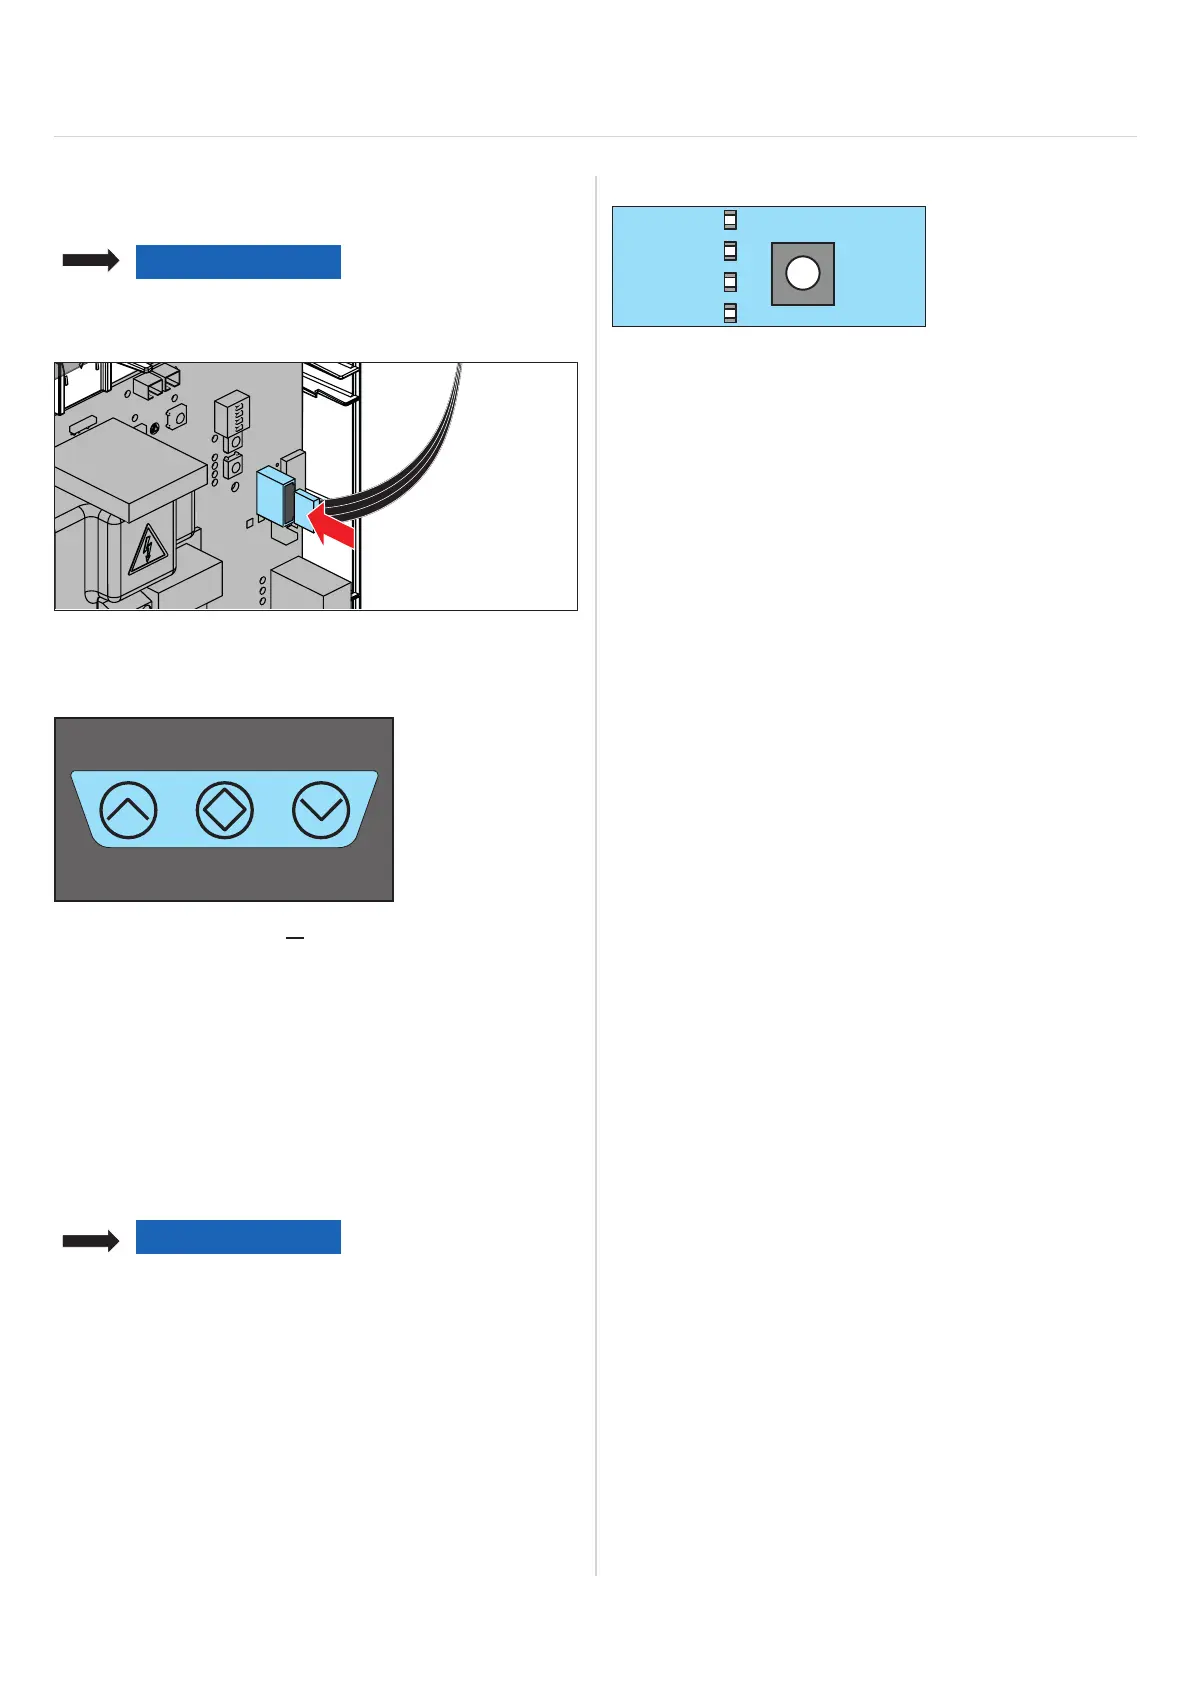
1. Connect ribbon cable to the control unit circuit board.
2. Close housing cover and fasten it with the screw on the
underside.
3. Press the door OPEN or door CLOSE button on the
housing cover to start the automatic learning process.
⇒ The door remains in one of the two end positions.
⇒ The lighting lights up continuously.
4. Press the button for the opposite direction until the
corresponding end position is reached (end position
must be approached without interim stop).
⇒ Internal lighting goes out when the end position
is reached.
⇒ The run times for both directions are programmed.
NOTE
► Resetting run times: see “Resetting the
control unit” on page 28.
► Only dead man mode is possible if the run
times have not been programmed.
► If faults occur, observe the internal lighting:
“Integrated lighting as error display” on
page 37.
14. Brief instructions
14.8 Programming the transmitter
RADIO
CH2
CH3
See “8.7 Explanation of the radio channels” on
page 26.
1. Press the radio button repeatedly to select the required
radio channel.
2. Press the desired button on the transmitter until the
LED for the radio channel goes out.
⇒ LED goes out – programming has been
completed
⇒ The transmitter has transferred the radio code
to the radio receiver
3. Repeat the above steps to program additional
transmitters.
14.9 Function test/Final test
The door must reverse during the door CLOSE movement
if it hits a 40-mm-high obstacle on the ground.
1. Open the door with the operator.
2. Place a 40-mm-high object in the centre of the door.
3. Close the door with the operator.
⇒ If the door hits an obstacle, the operator must
immediately reverse.
⇒ The operator opens the door completely at a pulse
from the transmitter.