2 System Overview
Basic User Manual 17
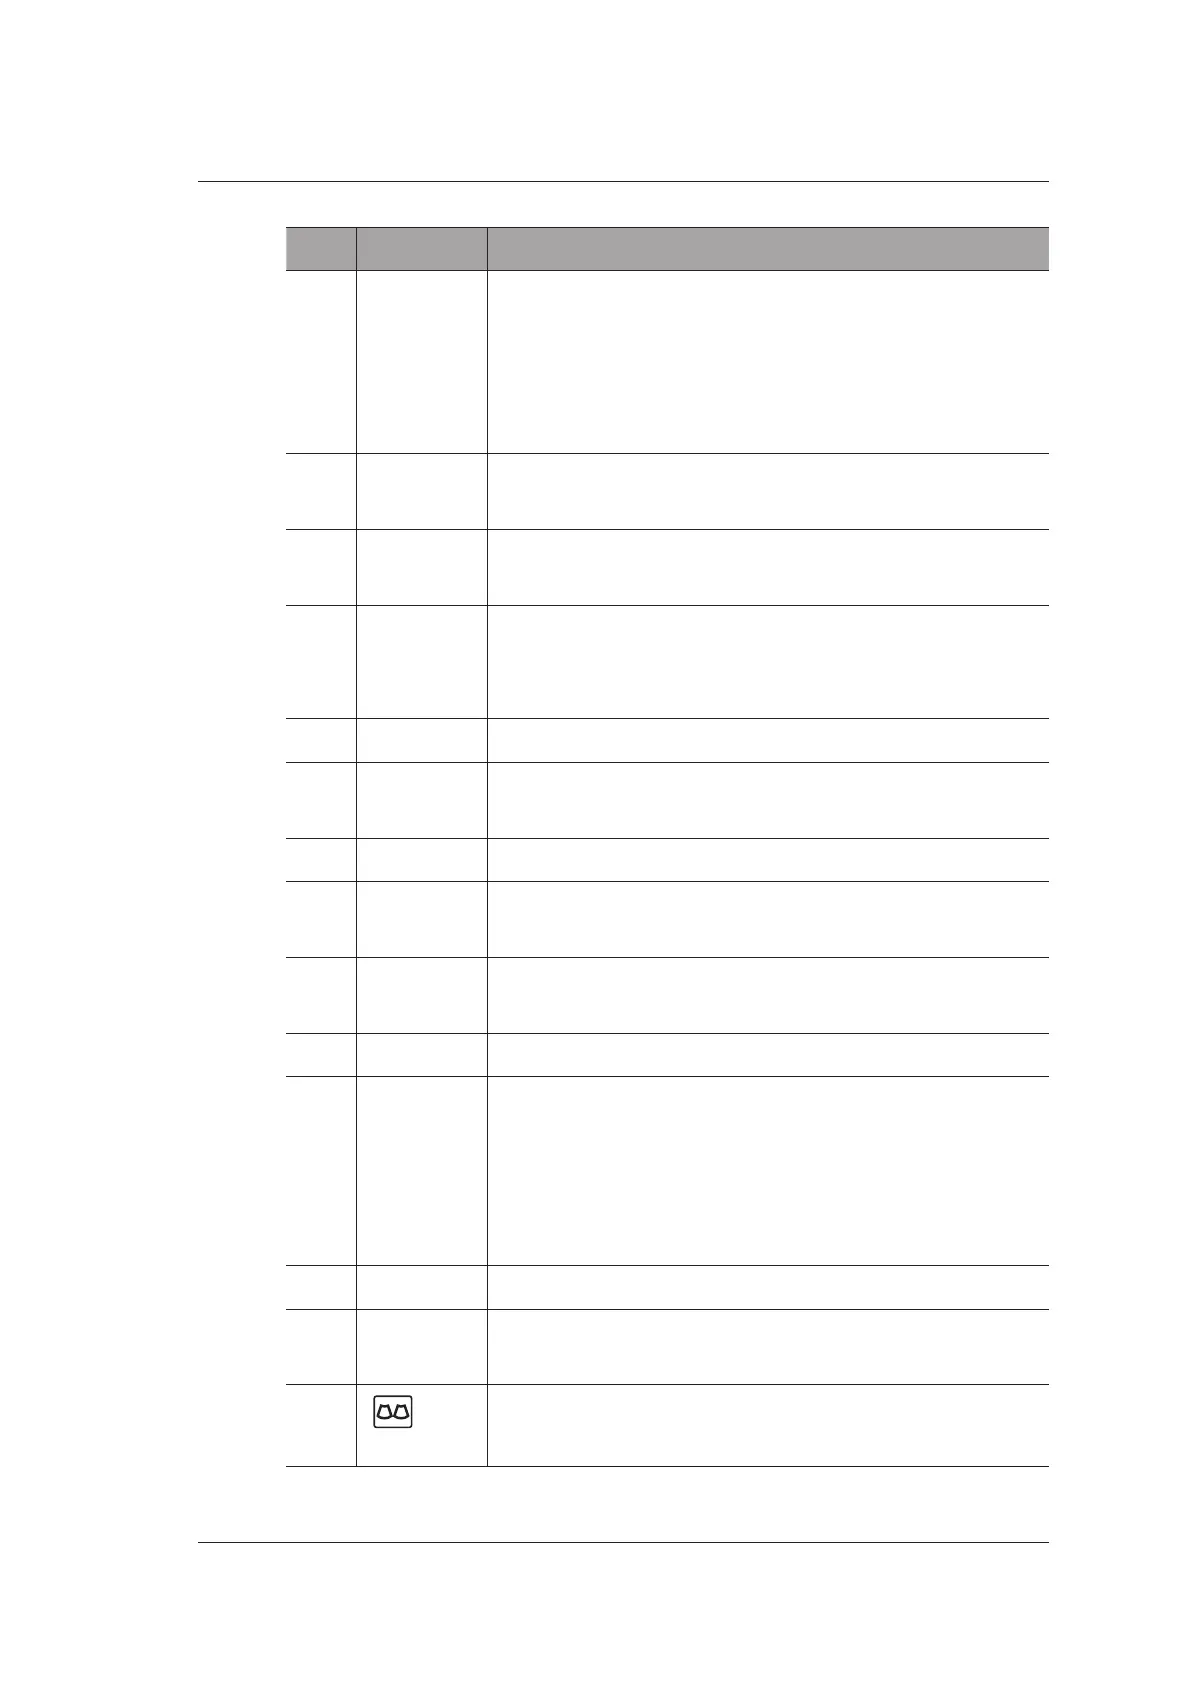
No. Name Description
9 Angle
●
Adjust the flow direction in the PW mode.
●
Adjust the arrow direction when the arrow annotation
feature is activated.
●
Adjust the measurement angle of the hip joint when
performing the HIP measurement.
10 P1 Save images. Or, the function of this key can be set as required.
For details, refer to Section 4.1.3 Save Settings.
11 P2 Save screenshot. Or, the function of this key can be set as
required. For details, refer to Section 4.1.3 Save Settings.
12 Body Mark
●
Press it to add body mark on an image.
●
Rotate it to adjust the probe mark direction if the body mark
annotation feature is activated.
13 Annot Annotate an image with typed words.
14 Clear Remove all measurement results, annotations, arrows and body
mark from the display.
15 Pointer Activate the trackball cursor.
16 Confirm
Key
Confirm the current operation.
17 Calc Activate the application-specific measurement and calculation
features.
18 Trackball Move the cursor and adjust ROI.
19 Update
●
Enter the M/PW mode in an inactivated M/PW mode.
●
Switch between measurement markers when performing
distance or ellipse measurement.
●
Undo the trace when performing a trace measurement.
●
Select the interest area when the zoom feature is activated.
20 Caliper Activate the basic measurement and calculation features.
21 Confirm
Key
Confirm the current operation.
22
●
Activate dual-split screen display.
●
Switch between two images in dual-split display.