12
[CD TEST MODE]
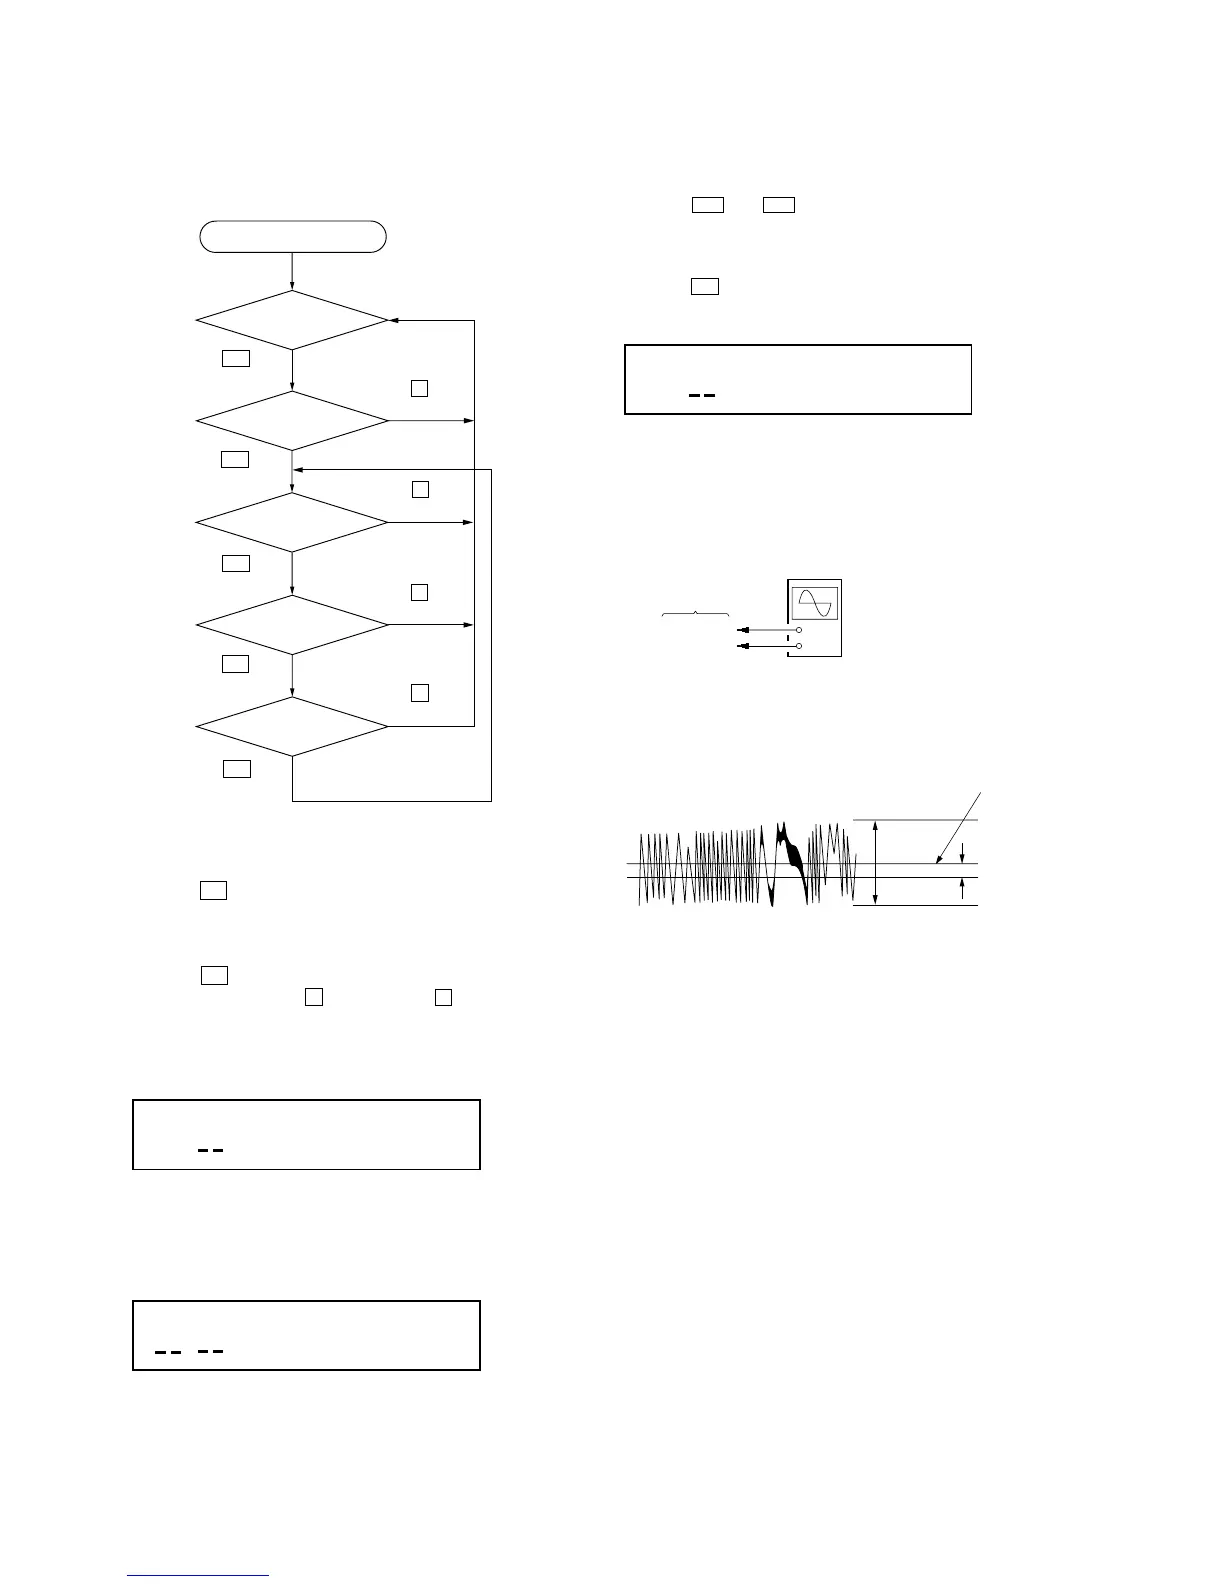
In the CD test mode, the set works as following sequence.
CD test mode sequence:
1. Enter the CD test mode
3. FOCUS mode
5. LPC OFF
mode
2. STOP mode
4. ALL SERVO
ON mode
6. TRACKING
GAIN UP mode
Press the u (CD)
button.
Press the u (CD)
button.
Press the u (CD)
button.
Press the x (CD)
button.
Press the u (CD)
button.
Press the x (CD)
button.
Press the x (CD)
button.
Press the x (CD)
button.
Press the u (CD)
button.
2. STOP Mode
1. Press the [EJECT ] button twice to disc tray open and close.
(All servo ON)
2. Press the
> and . button to move the optical pick-up
to position of the track where signal is recorded.
3. FOCUS Mode
1. Press the u button to enter the FOCUS mode and display
as below. (Focus servo ON. CLV-S, tacking and sled servo OFF)
2. Connect an oscilloscope to TP (TE) and TP (VC) on the CD
board.
Connection:
3. Confirm the traverse level and center values of waveform sat-
isfy specified value as follows.
Specified value:
traverse level A : more than 350 mVp-p
center values B : 0 ± 50 mV
Display
F
* * * *
+
–
BD board
TP (TE)
TP (VC)
oscilloscope
(DC range)
B (DC
voltage
A
0 V
Center of the waveform
Traverse waveform
Z
Note: TRACKING GAIN UP mode is not used in servicing.
1. Entering the CD Test Mode
1. Press the ?/1 button to turn the power ON.
2. Press the [EJECT ] button to open the disc tray, and put a
disc.
3. Press the
[EJECT ] button to close the disc tray.
4. Press the
?/1 button to turn the power OFF.
5. While pressing the both x (TAPE B) and x (CD) buttons,
press the [CD] (function) button.
6. Enter the CD test mode, and display as below for a few sec-
onds.
Note: Lights up “STEREO” indication :LPC ON
Does not light up “STEREO” indication :LPC OFF
*) LPC: Laser power control
7. Then display as below, and enter the STOP mode.
Display
AUTO
F
* * * *
STEREO
Display
* * * *
STEREO
Z
Z