3-15 (E)
HDC-P1
Color monitor
R
G
B
Color monitor
R
G
B
3-3-6. RPN Adjustment
Preparation
. Adjust the color monitor manually for better display condition.
. Setting for MSU-900
CLOSE button → ON (lit)
DETAIL button → OFF (lit)
MASTER GAIN → 12
. Menu setting
MENU: SERVICE
PAGE: OHB_ADJ2
ITEM: CONC. TEST MODE → ON
Adjustment Procedure
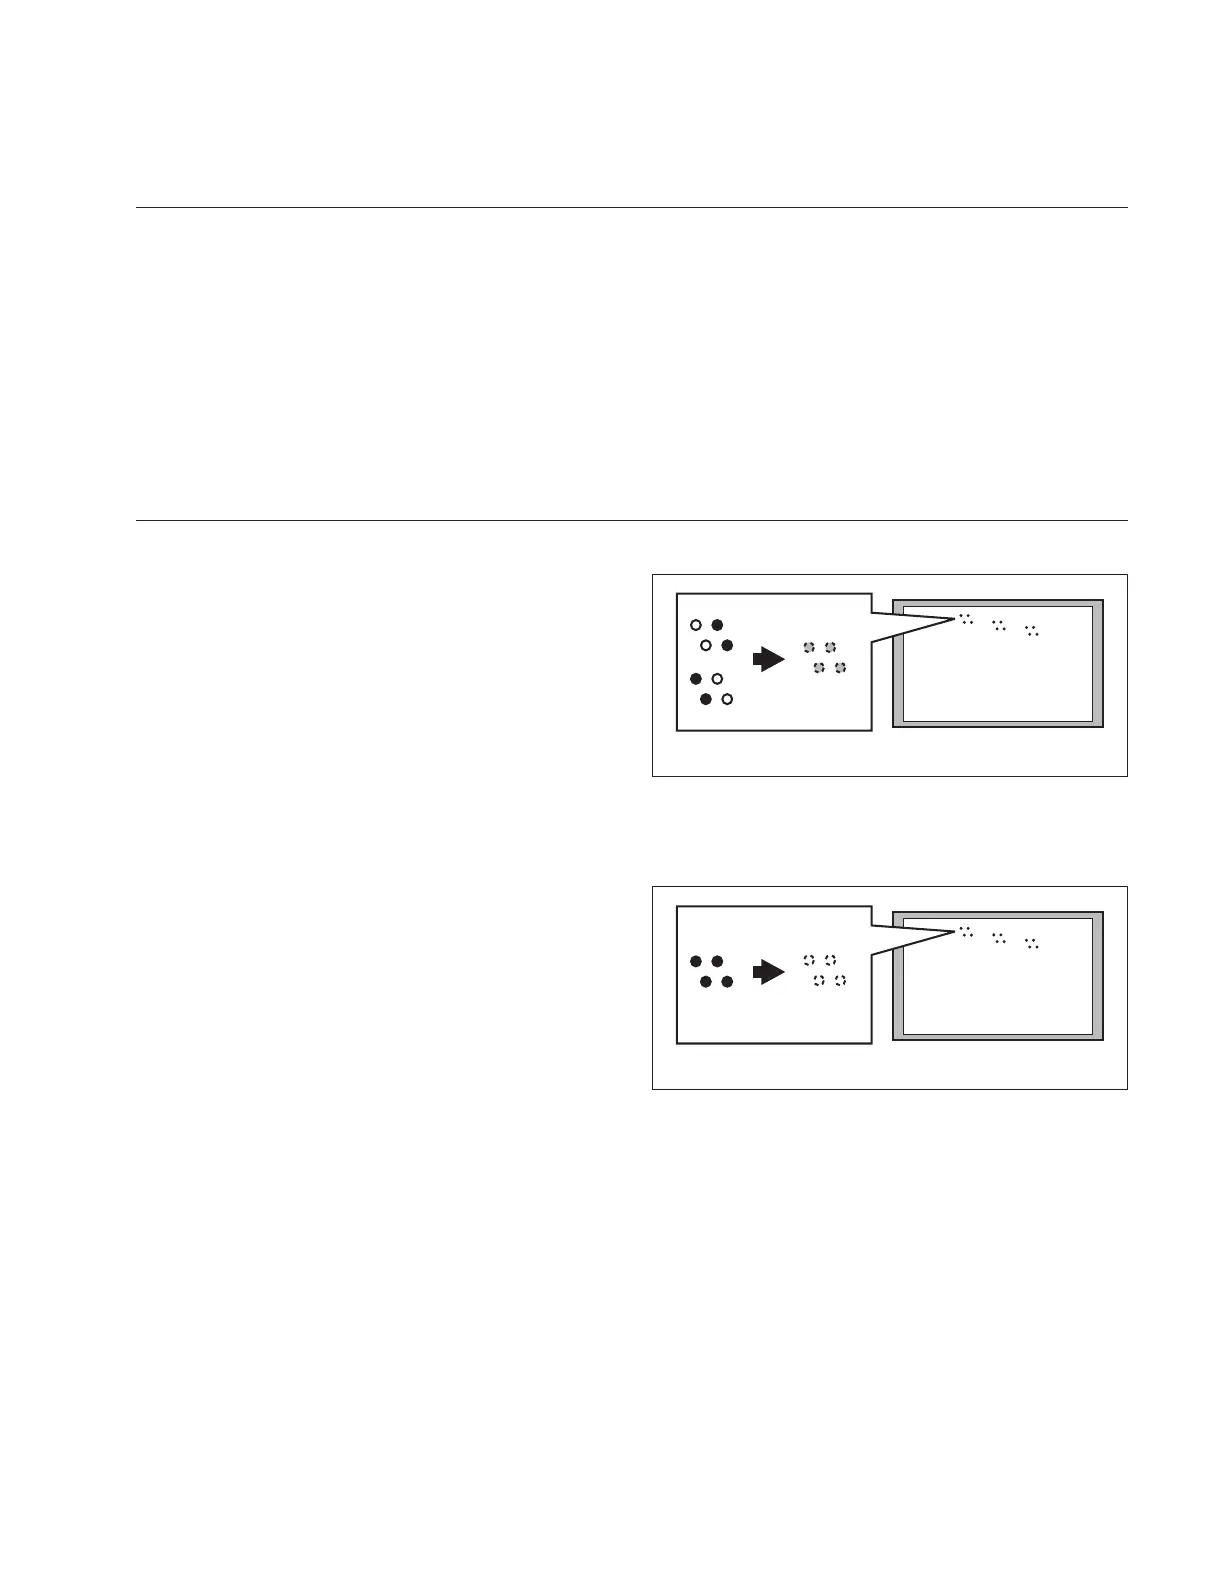
1. Adjustment Item:
MENU: SERVICE
PAGE: OHB_ADJ1
ITEM: DC_ADJ_B [R1],[G1],[B1]
Specifi cation:
Adjust this so that the dots displayed on the
color monitor (R/G/B: four dots each) are of
the same brightness.
2. Execute STORE FILE.
MENU: SERVICE
PAGE: OHB_ADJ1
ITEM: STORE FILE
3. Adjustment item:
MENU: SERVICE
PAGE: OHB_ADJ2
ITEM: DC_ADJ_C [R1],[G1],[B1]
Specifi cation:
Adjust this so that the dots displayed on the
color monitor (R/G/B: four dots each) disap-
pear.
4. Execute STORE FILE.
MENU: SERVICE
PAGE: OHB_ADJ2
ITEM: STORE FILE
5. Setting after adjustment
MASTER GAIN → 0
CONC, TEST MODE → OFF
6. Set the value to the value adjusted in steps 1 and 3 and
execute STORE FILE for each format.
(For the format change procedure, refer to the Opera-
tion Manual.)
n
If the residual point noise (RPN) still remains after the
RPN adjustment, perform the RPN compensation (Section
3-6).
 Loading...