HT-ST9
43
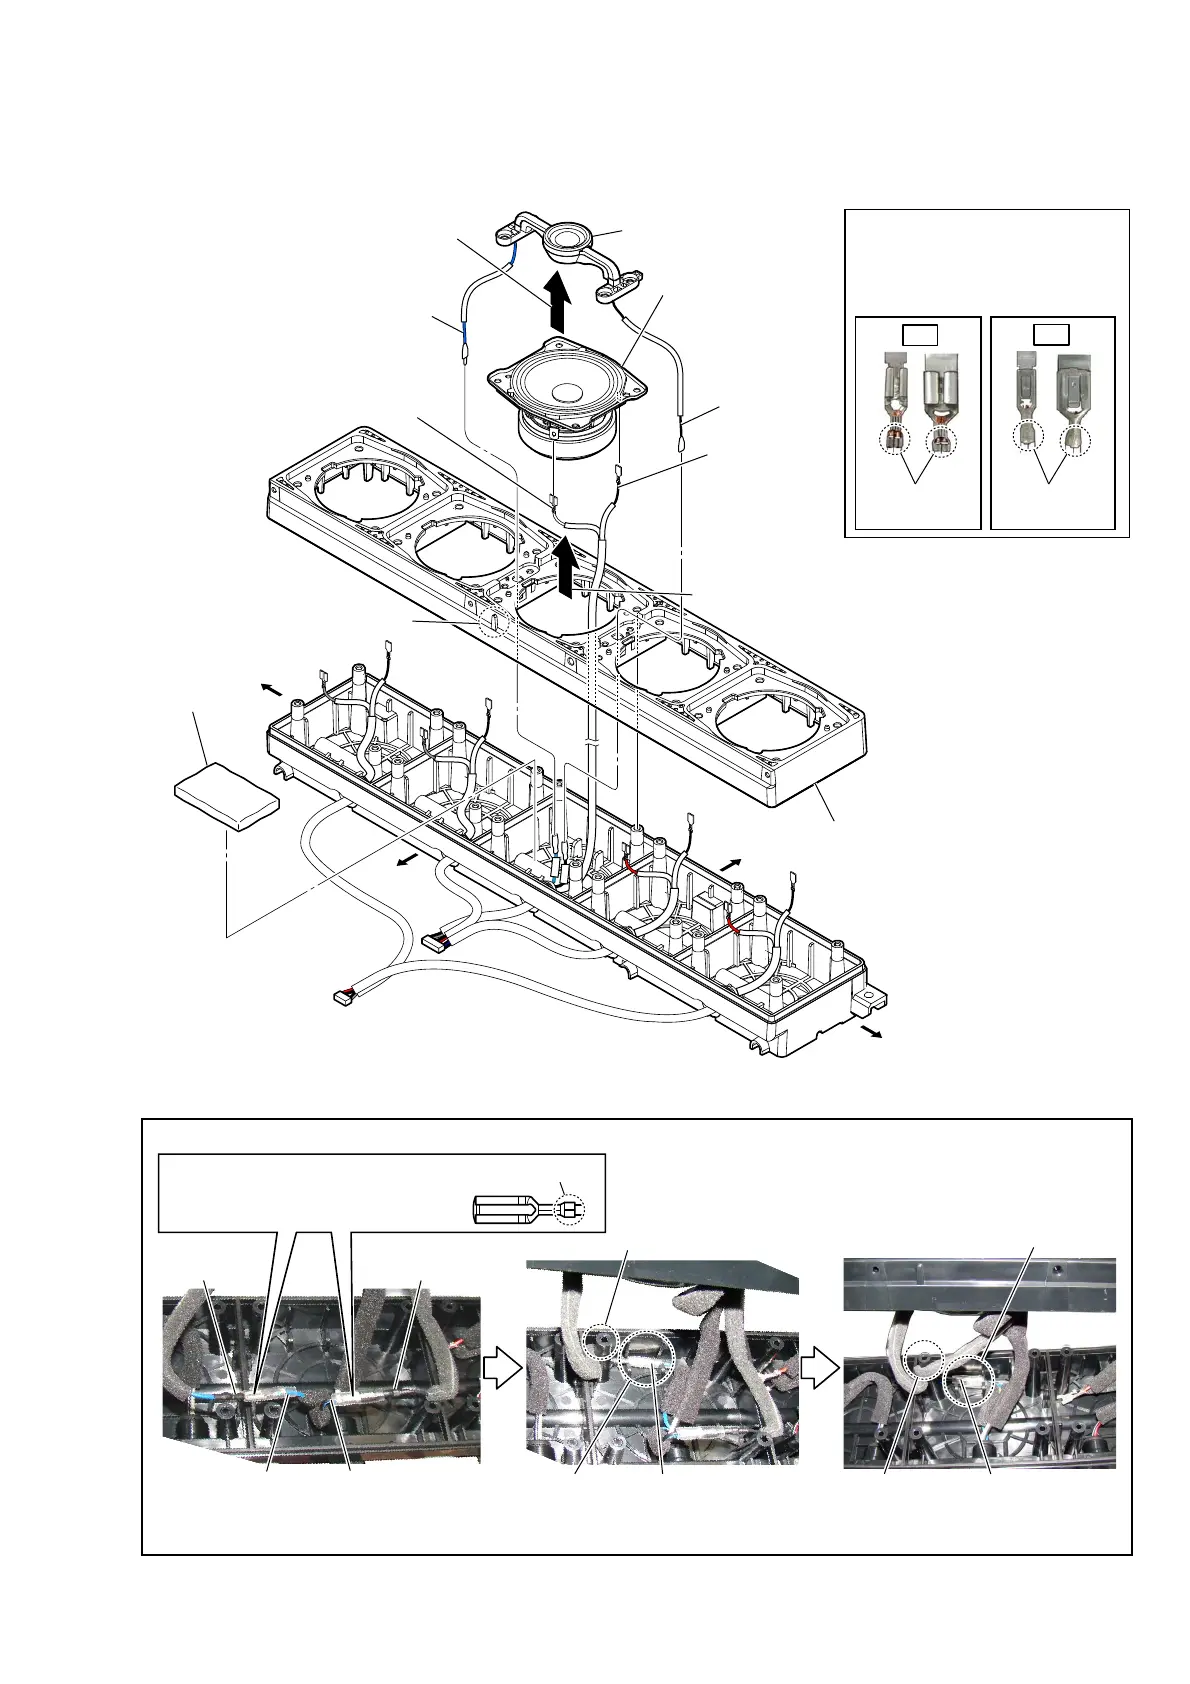
2-35. LOUDSPEAKER (SP9, SP10) (CENTER)-2
OK
NG
Caulking is
outside.
Caulking is
inside.
4 loudspeaker (6.5 cm)
(woofer (center))
(SP9)
3 terminal
(narrow side)
[black]
3 terminal
(wide side)
[white]
1
Lift up the loudspeaker (SP10)
in the direction of the arrow.
– Center speaker block front view –
2
Lift up the loudspeaker (SP9)
in the direction of the arrow.
6 cushion
(absorbent)
7 terminal
[black]
7 terminal
[blue]
8 loudspeaker (18 mm)
(tweeter (center)) (SP10)
two grooves
screw boss
terminal [blue]
– Cabinet center block top view –
screw boss
two grooves
terminal [black]
Installation direction for
the woofer speaker wire
Right side
Top side
Left side
guide
Bottom side
terminal [blue]
(connection cable
with speaker)
terminal [black]
(connection cable
with speaker)
terminal [black]
(tweeter)
terminal [blue]
(tweeter)
Note 1:
When installing the speaker wire,
make the position of caulking of
terminals is outside.
5 baffle (center)
Note 2:
When installing the baffle (center),
install so that the guide is at the
bottom side.
Note 3:
When installing the speaker wire,
make the position of caulking of
terminals is upside.
Caulking is upside.
+ow to install the tweeter speaker wire