HT-ST9
7
2. Checking method of wireless LAN operation
Necessary Equipment:
• Access point supporting WPS
Procedure:
1. Connect this unit with TV monitor.
2. Press the [
@
/
1
] button to turn the power on.
3. Press the [HOME] button on the remote commander, display
the home screen.
4. Press the [V]/[v] buttons on the remote commander to select
the “Setup”, and press the [ ] button on the remote command-
er.
5. Press the [V]/[v] buttons on the remote commander to select
the “Network Settings”, and press the [ ] button on the remote
commander.
6. Press the [V]/[v] buttons on the remote commander to select
the “Internet Settings”, and press the [ ] button on the remote
commander.
7. Press the [V]/[v] buttons on the remote commander to select
the “Wireless Setup(built-in)”, and press the [b] button on the
remote commander.
8. Press the [V]/[v] buttons on the remote commander to select
the “Wi-Fi Protected Setup (WPS)”, and press the [b] button
on the remote commander.
9. The “Start” screen is display, and press the [WPS] key on the
access point.
10. Press the [b] button on the remote commander, setup is start.
11. The message “Next, check the network connection” is display,
and press the [b] button on the remote commander.
12. When wireless LAN connection is completed, “Wireless Con-
nection: OK” and “Internet Access: OK” is displayed.
Note: Refer to the instruction manual about details of the setting method.
3. Checking method of wired LAN operation
Necessary Equipment:
• Router
• Network LAN cable
Procedure:
1. Connect this unit with TV monitor.
2. Connect the unit to the router with the network LAN cable.
3. Press the [
@
/
1
] button to turn the power on.
4. Press the [HOME] button on the remote commander, display
the home screen.
5. Press the [V]/[v] buttons on the remote commander to select
the “Setup”, and press the [ ] button on the remote command-
er.
6. Press the [V]/[v] buttons on the remote commander to select
the “Network Settings”, and press the [ ] button on the remote
commander.
7. Press the [V]/[v] buttons on the remote commander to select
the “Internet Settings”, and press the [ ] button on the remote
commander.
8. Press the [V]/[v] buttons on the remote commander to select
the “Wired Setup”, and press the [b] button on the remote
commander.
9. Press the [V]/[v] buttons on the remote commander to select
the “Auto”, and press the [b] button on the remote command-
er.
10. The “The network will be confi gured with the following set-
tings” screen is display, and press the [b] button on the remote
commander.
11. Press the [V]/[v] buttons on the remote commander to select
the “Save & Connect”, and press the [
] button on the remote
commander.
12. When wired LAN connection is completed, “Physical Connec-
tion: OK” and “Internet Access: OK” is displayed.
Note: Refer to the instruction manual about details of the setting method.
4. Checking method of NFC operation
Necessary Equipment:
Smartphones, tablets, or music players with the NFC function built-in
(OS: Android™ 2.3.3 or later, excluding Android 3.x)
Procedure:
1. Press the [
@
/
1
] button to turn the power on.
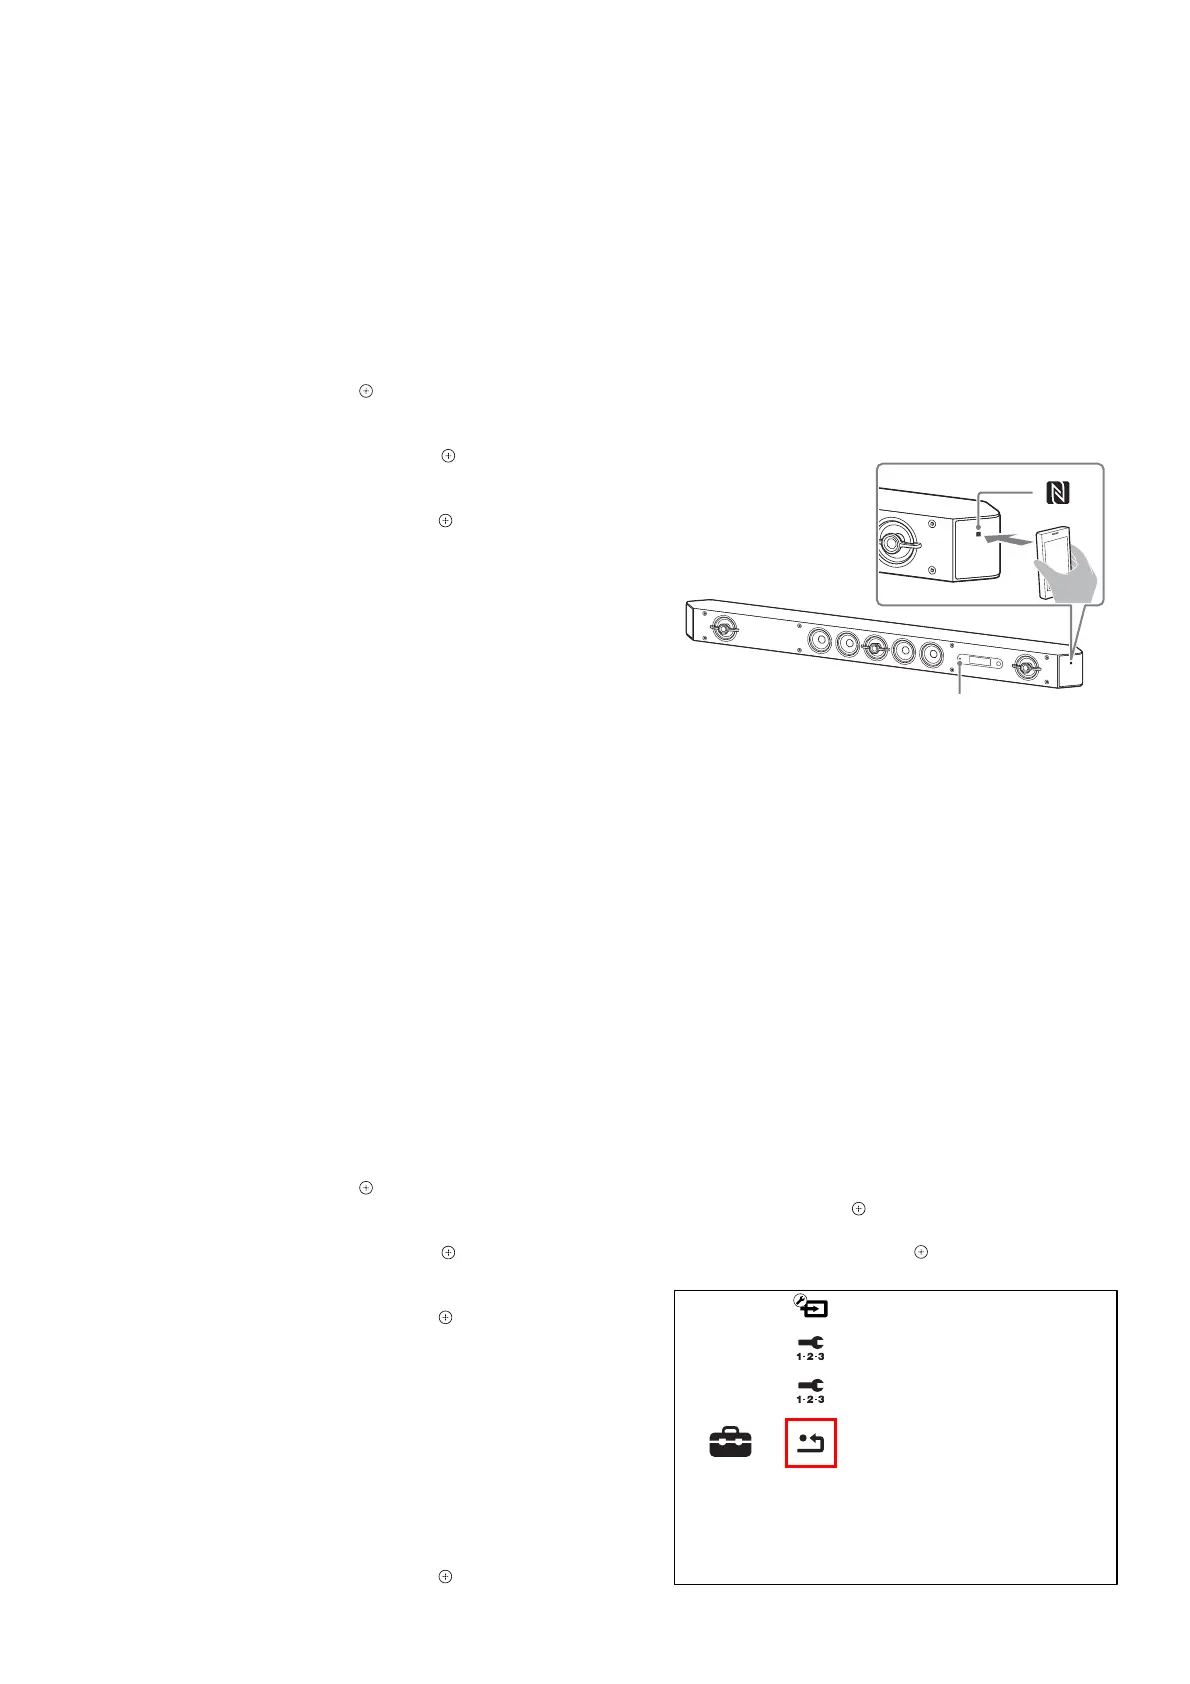
2. Touch the N mark of the Bar Speaker with the Bluetooth de-
vice.
– Front view –
Bluetooth indicator (blue)
3. Make sure that the indicator (blue) of the Bar Speaker lights
up. (This indicates that a connection has been established)
4. Start playback of an audio source on the Bluetooth device.
Note: After checking of NFC operation, be sure to delete the pairing infor-
mation before returning this unit to the customer.
5. Factory initialize
Return all of the unit setting to their factory defaults.
Note 1: Disconnect the following connections when you use this mode.
USB
LAN
HDMI IN 1
HDMI IN 2
HDMI IN 3
Note 2: The operation in this mode must use a remote commander and TV
monitor.
Procedure:
1. Connect this unit with TV monitor.
2. Press the [
?/1
] button to turn the power on.
3. Press the [HOME] button on the remote commander, and the
home menu is displayed.
4. Press the [V]/[v] buttons on the remote commander to select the
“Setup”, and press the [
] button on the remote commander.
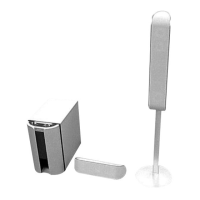
5. Press the [V]/[v] buttons on the remote commander to select
the “Resetting”, and press the [
] button on the remote com-
mander.
Setup
Resetting
Easy Network Settings
Easy Setup
Input Skip Setting
– Continued on next page –