Connecting and Installing the TV (continued)
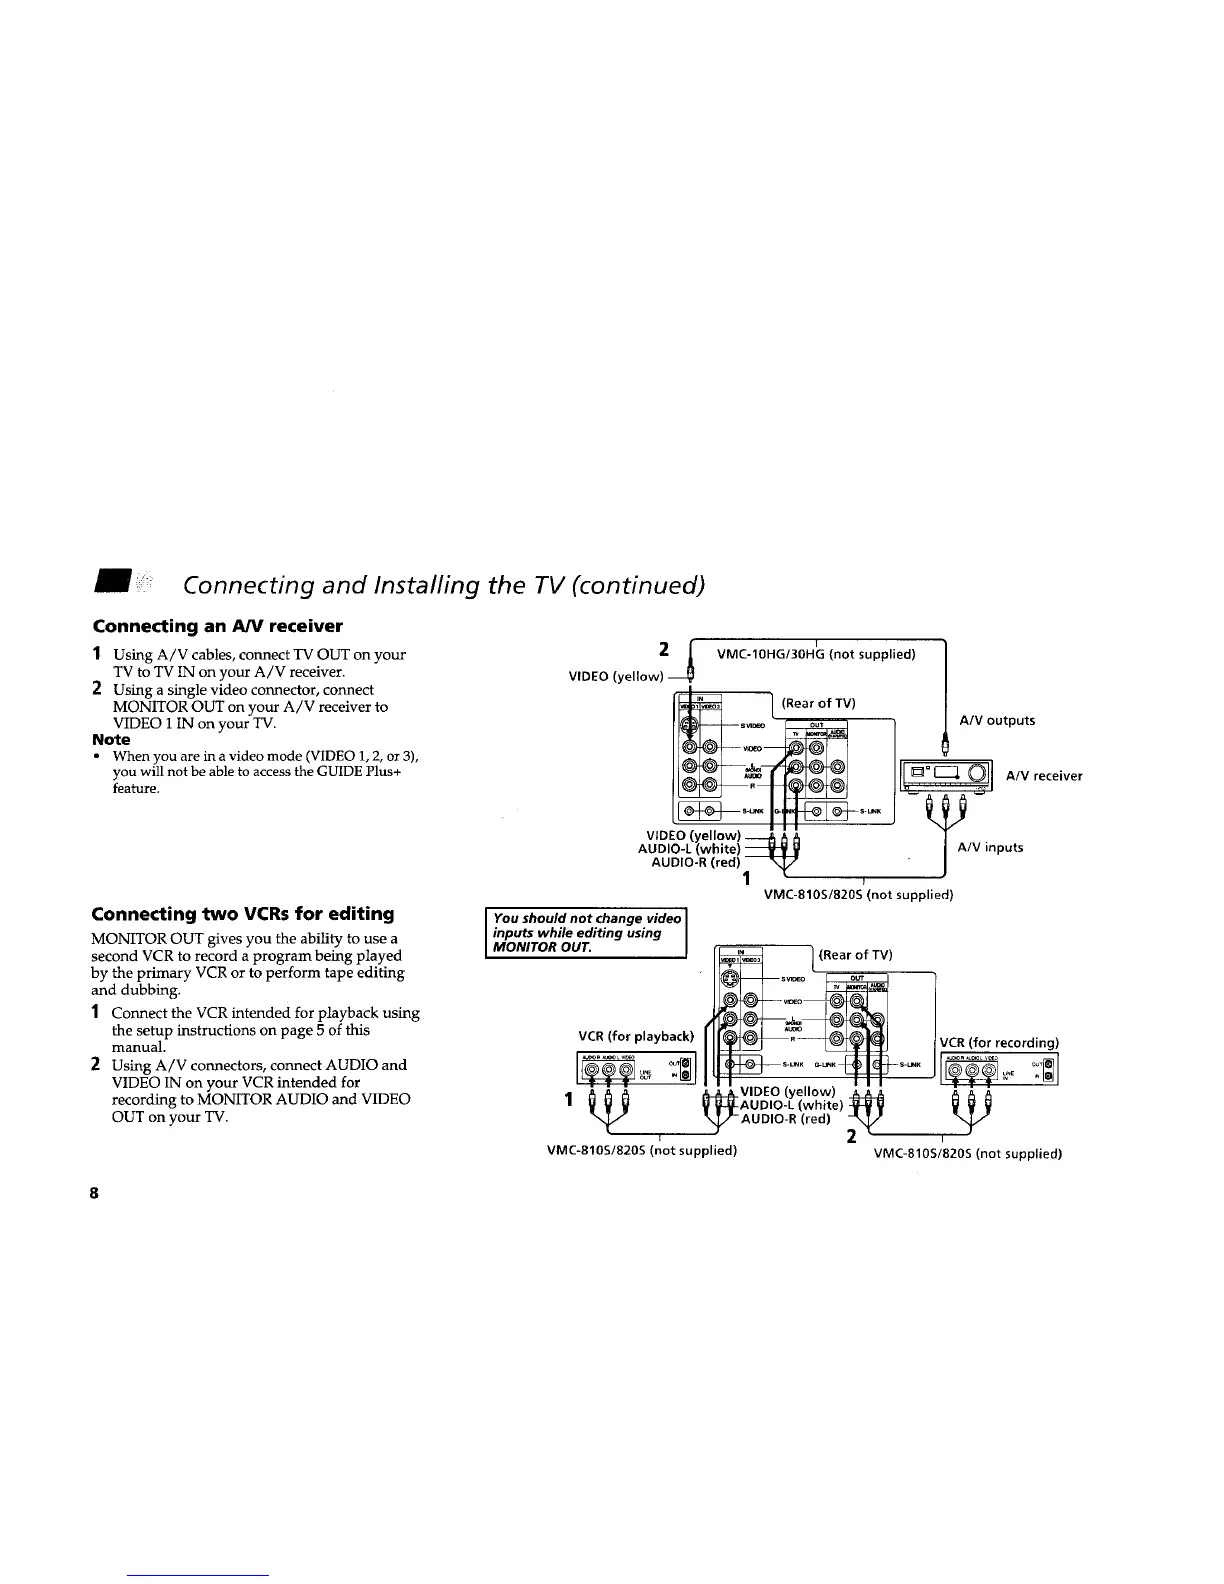
Connecting an A/V receiver
1 Using A/V cables, connect TV OUT on your
TV to TV IN on your A/V receiver.
2 Using a single video connector, connect
MONITOR OUT on your A/V receiver to
VIDEO 1 IN on your TV.
Note
• When you are in a video mode (VIDEO 1, 2, or 3),
you will not be able to access the GUIDE Plus+
feature.
Connecting two VCRs for editing
MONITOR OUT gives you the ability to use a
second VCR to record a program being played
by the primary VCR or to perform tape editing
and dubbing.
1 Connect the VCR intended for playback using
the setup instructions on page 5 of this
manual.
2 Using A/V connectors, connect AUDIO and
VIDEO IN on your VCR intended for
recording to MONITOR AUDIO and VIDEO
OUT on your TV.
VIDEO (yellow)2j
I
VMC-10HG/30HG (not supplied)
(Rear of TV)
A/V outputs
I_l A/V receiver
VIDEO(yellow) _ h
AUDIO-L (white) _ /V inputs
AUDIO-R (red)4_
/
VMC-810S/820S (not supplied)
You should not change video
inputs while editing using
MONITOR OUT.
l (Rear of TV)
VCR (for playback)
I
VMC-810S/820S (not supplied)
VCR(for recording)
iN
_VIDEO (yellow) _
AUDIO-L (white) -_1 V
AUDIO-R(red) -_
I
VMC-810S/820S (not supplied)
8



 To Next Page