Connecting and Installing the TV (continued)
S-Link connections
S-Link is designed to allow your Sony
components to "communicate."
Connecting S-Link to a VCR
S-Link will automatically power on the TV and
switch to the correct video input when a tape is
inserted in the VCR.
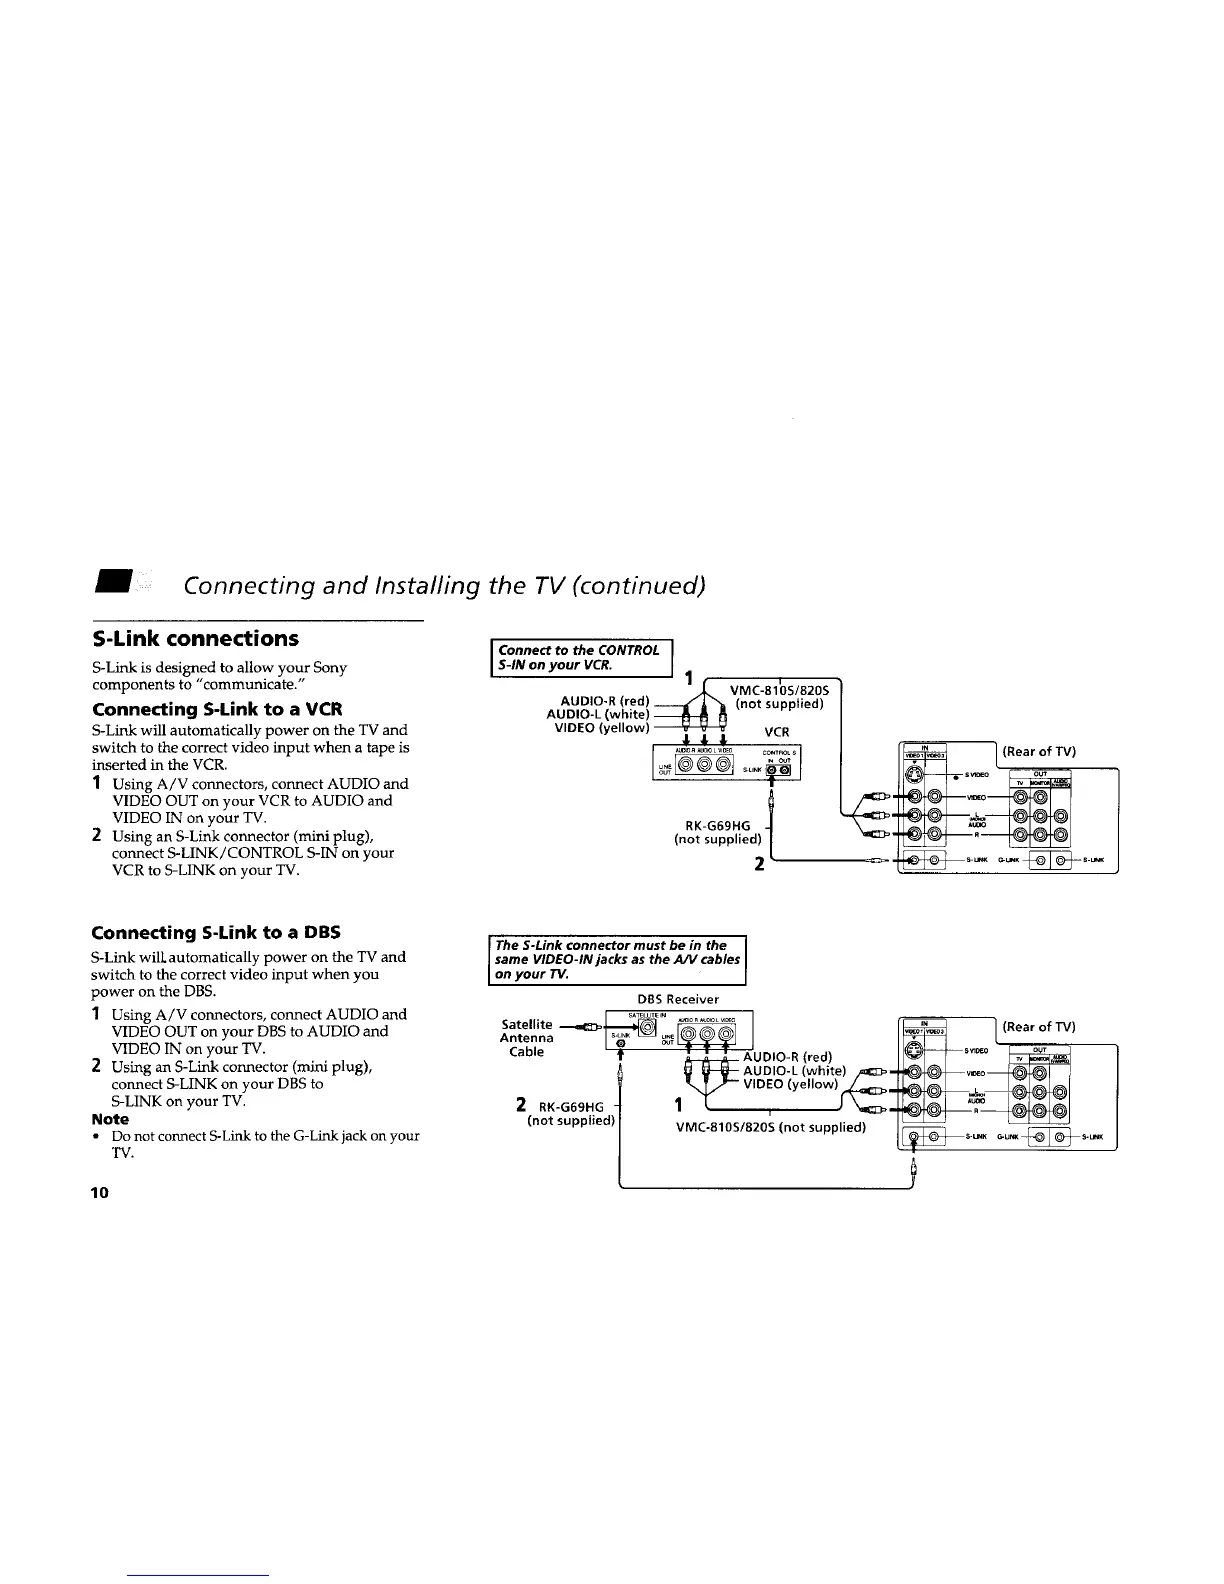
1 Using A/V connectors, connect AUDIO and
VIDEO OUT on your VCR to AUDIO and
VIDEO IN on your TV.
2 Using an S-Link connector (mini plug),
connect S-LINK/CONTROL S-IN on your
VCR to S-LINK on your TV.
I Connect to the CONTROL I
S-IN on your VCR. I
' 1 j_ VMC-81bs/820s
AUDIO-R !red! ___l,/jl'-,.ll (not supplied)
AUDIO-L (wnite) _ I_
VIDEO (yellow) _ VCR
Auto R _UD_ L VlOEO ¢ONTP_L S
IN OUT
LI_
OUT SU_K
RK-G69HG 1
(not supplied) /
2"
[ (Rear of TV)
Connecting S-Link to a DBS
S-Link will. automatically power on the TV and
switch to the correct video input when you
power on the DBS.
1 Using A/V connectors, connect AUDIO and
VIDEO OUT on your DBS to AUDIO and
VIDEO IN on your TV.
2 Using an S-Link connector (mini plug),
connect S-LINK on your DBS to
S-LINK on your TV.
Note
• Do not connect S-Link to the G-Link jack on your
TV.
10
The S-Link connector must be in the
same WDEO-IN jacks as the A/V cables
on your TV.
DBSReceiver
SAT_ITE IN ]
Satellite _
Antenna _
Cable _ AUDIO-R (red)
_ AUDIO-L (white)/_c3=-
VIDEO (yellow) t____€_"
2 RK*G69HG" 1_ , J _.
(not supplied) VMC-810S/820S (not supplied)
r_ [ (Rear ofrv)
VIDEO



 To Next Page