3 Advanced use
12 SOREDEX 208396 rev 2
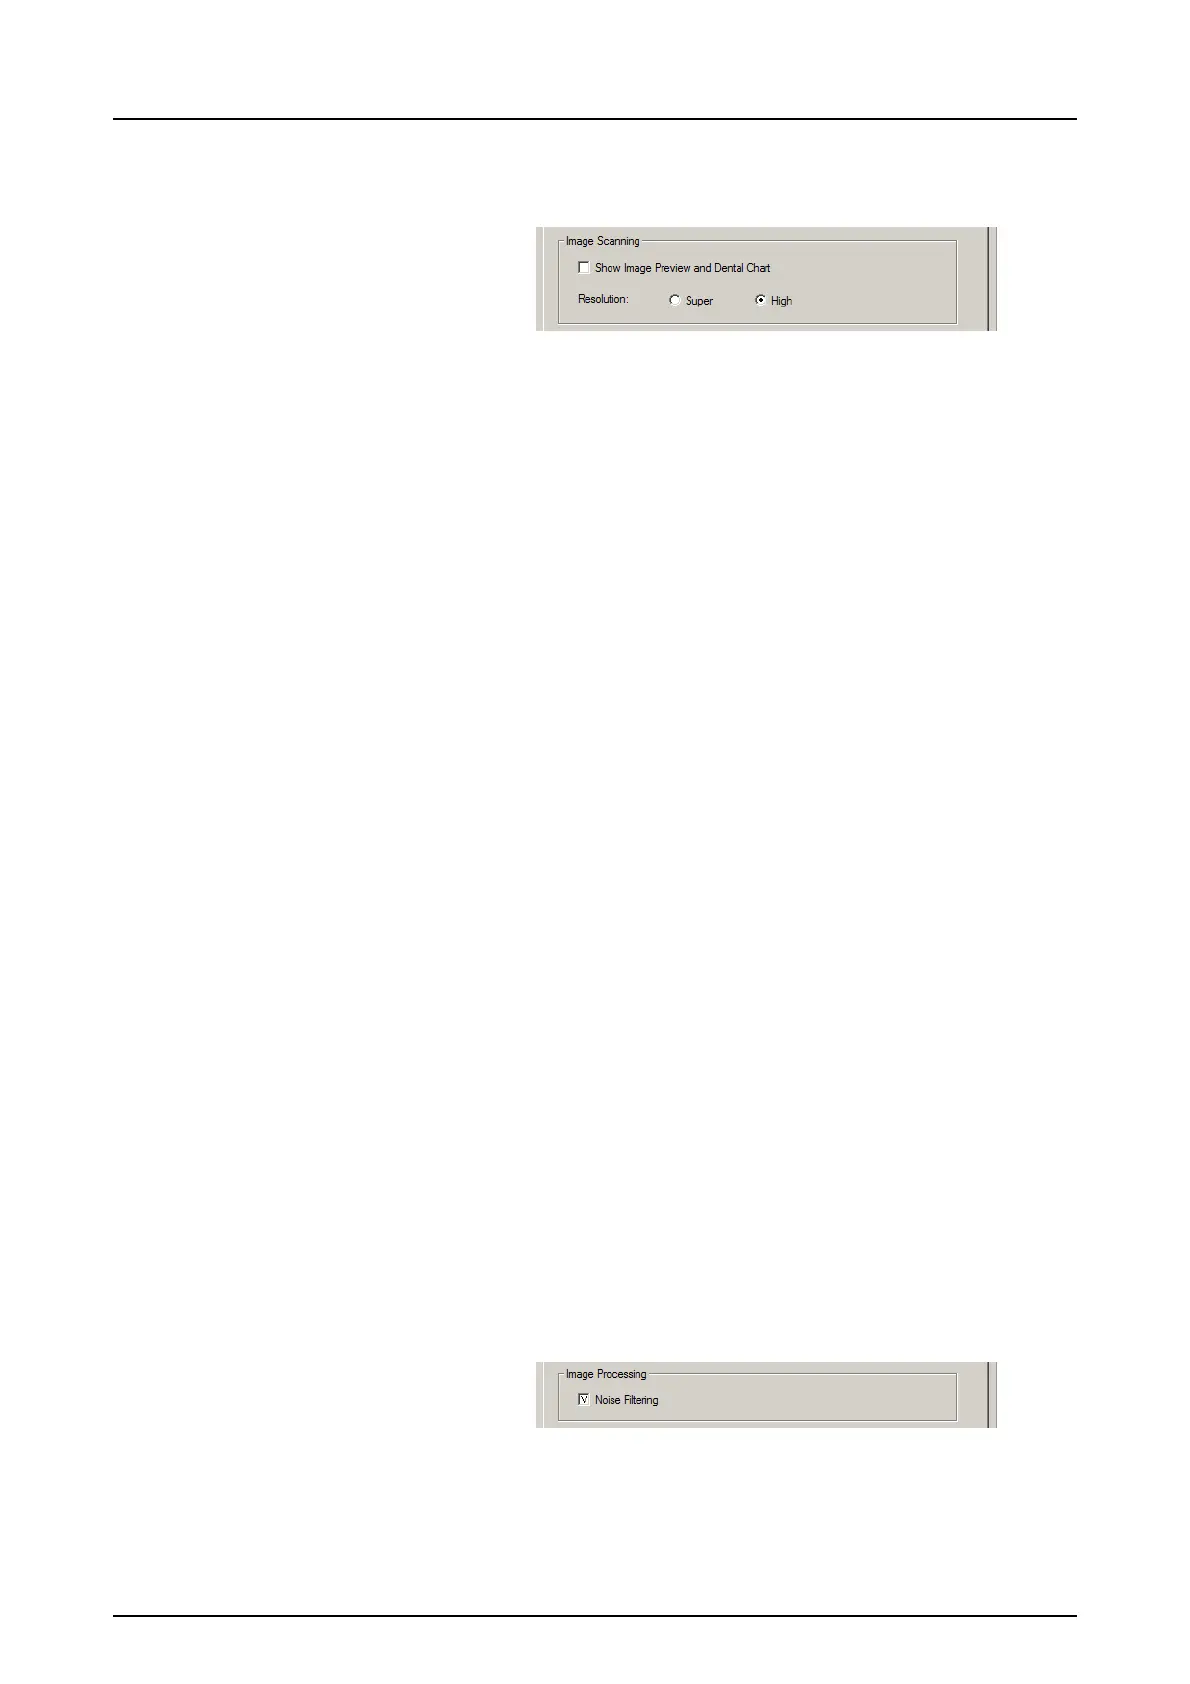
3.1.2 Image Scanning
If Show Image Preview and Dental Chart is selected a
preview image with a dental chart for tooth numbering
appears before the image is saved.
3.1.3 Using the dental chart
1. After an imaging plate has been processed a window
opens that shows a preview image and a dental chart.
2. Click the tooth / teeth on the chart that correspond to
the tooth / teeth in the image. Tooth numbers are as-
signed to the selected teeth.
The tools at the top of the window allow the image
to be manipulated.
3. Click OK to save the image and tooth numbers.
3.1.4 Resolution
Super gives a pixel size of 30 μm. This results in images
with better resolution, but may require longer exposure
time to compensate.
High (recommended default) gives a pixel size of 60 μm.
This results in images with less noise especially if short
exposure times are used.
3.1.5 Image Processing - Noise Filtering
Noise Filtering selected (recommended default), makes
images smoother when they are taken at short exposure
times.