SC5 Signal Conversion Installation Guide
16
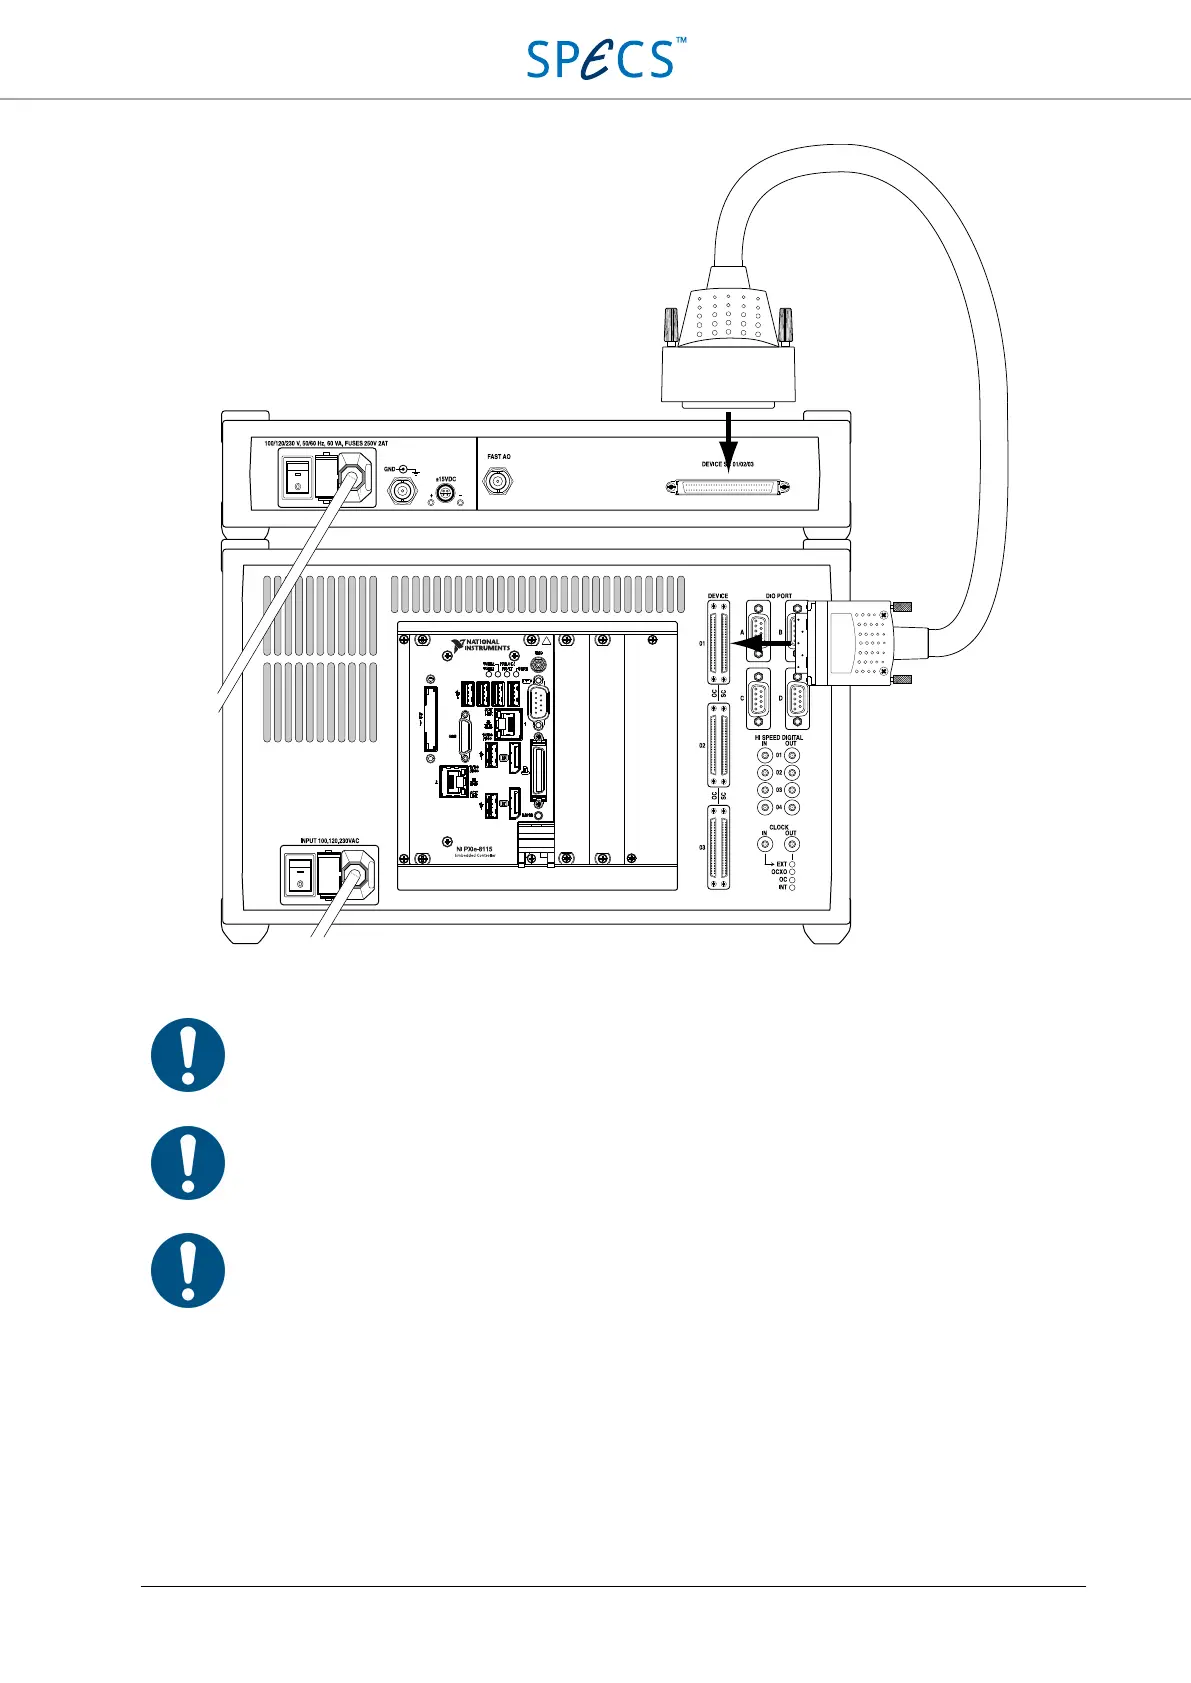
Figure 5: Connection of the SC5 to the RC5, when only one SC5 has to be connected. The power cords of both intsruments
have to be connected to the mains first.
Note:
Connect both the SC5 and the RC5 to the mains using the supplied power cords, before
connecting the instruments together!
Note: Make sure that the screws of the DEVICE RDIO cable connectors are tightened, otherwise the
connectors might be damaged. Do not overtighten the screws!
Note: If a single SC5 is connected to the RC5, it must be connected to the SC 01 port at the back of the
RC5. Do not connect it to the SC 02 or SC 03 ports.
Multiple SC5 connection
Up to three SC5s can be connected to a single Nanonis RC5. Follow the instructions given in the previous section for
the connection of the additional SC5 units.
Since the different SC5s are addressed by their port number in the Nanonis software, make sure to label the
instruments on the front panel in order to recognize which instrument is connected to which port.