January, 2016 120-23
Model F120 UV/IR Flame Detector
12. Use a 4 mm hex wrench to loosen the locking screw on the rear of the detector
housing
13. Unscrew the front housing from the rear housing
14. Remove the electronics module from the rear terminal blocks by gently rocking the
board side-to-side. Place a nger under the top PC board and place another nger
under the edge of this board on the opposite side. Gently rock the board side-to-side
while pulling in order to disengage the module from the rear housing.
!
WARNING: Do not allow dirt or nger marks to get onto the face of the UV or IR
sensors located on the top of the electronics module.
!
WARNING: Do not remove or tamper the locking screw in the rear cover. Operating
the detector without the screw in place could allow moisture to enter the detector,
or cause an explosion. The stainless steel cover plate over the screw prevents it
from being removed.
15. Set the front housing, rear housing and electronics module aside.
The front and rear housing threads and O-ring are shipped prelubricated. This
lubrication is required. It insures the ease of assembly and future disassembly. It
also increases the water resistance of the unit. Should the lubrication become
inadvertently contaminated (dirt, etc.) or removed, the lubrication replacement
procedure in the Maintenance section of this manual must be followed.
!
NOTE: The ame detector can be mounted using either a Conduit Swivel Mounting
Bracket for conduit installation or a Wall/Ceiling Swivel Bracket for cable gland
installation. For conduit installation, go to Step 4-A and for cable gland installation,
go to Step 4-B.
4-A. Install the Conduit Swivel Mounting Bracket
For Conduit Installation
1. Prior to installing the ame detectors, the electrical conduit must be installed.
2. Install a conduit seal tting on end of the conduit run, no more than 18 inches from the
ame detector.
!
IMPORTANT: When installing with conduit, you must use a conduit seal tting in
the conduit located no more than 18 inches (46 cm) from the ame detector. The
wires passing through the conduit seal must be completely sealed with packing to
prevent any water that condenses inside the conduit from entering the ame detector
housing. Moisture inside the ame detector housing will damage the electronics and
make the ame detector inoperable. This conduit seal is also required whenever the
ame detector is installed in hazardous areas that contain ammable gas or vapors to
prevent explosions. In hazardous locations, the conduit seal must always be provided
in compliance with local codes.
3. Mount the Conduit Swivel Bracket on the end of conduit. Screw the Conduit Swivel
Bracket and make sure you have a tight t.
4. Mount the rear housing of the ame detector on the Conduit Swivel Bracket. Tighten
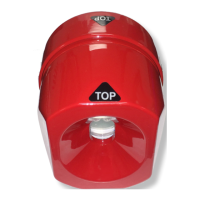
the rear housing on the Conduit Swivel Bracket until the metal nameplate located
on the outside of the rear housing is facing downward. The “TOP” label on the rear
housing will then be on top when it is installed properly.