120-58 January, 2016
Model F120 UV/IR Flame Detector
TROUBLESHOOTING
!
CAUTION: All repairs shall only be performed at a Safety Systems Technology
facility and by its authorized service personnel. Failure to comply will invalidate the
warranty on the detector.
Disconnect or inhibit external alarm wiring before troubleshooting the unit, which might send
the detector into alarm.
Automatic Self-Check
The Automatic Self-Check is a comprehensive set of tests which insures proper operation of
the detector. The Automatic Self-Check is automatically performed during normal operation,
and is performed each time the system power is reapplied. If the detector Reset input is
wired, the operator can also request the Automatic Self-Check by activating the Reset input
of the detector.
Should any test fails, the flame detector will signal a Fault condition and attempt
continued operation. A Fault at time of initial installation is usually due to incorrect
assembly of the housing. It could also indicate a dirty or contaminated viewing window.
SEE “Maintenance” section of the manual for instructions on how to clean the lens of the
detector.
LED Indicator
A non-functioning LED indicator may indicate damage. Send the electronics module to the
factory for repair or replacement. SEE “REPAIRS” section of this manual for instructions.
Fault Yellow LED Indicator is On
After Installation or Maintenance
If the Fault yellow LED turns on after initial installation of the unit, this may indicate the following:
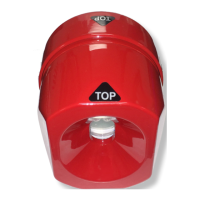
• Front and rear housings are not properly aligned.
Inside the front housing, a spring-loaded lamp contacts must engage with the top PC
board when the detector is fully assembled. If the connection is loose, the detector will
report a fault.
Make sure the front and rear housings are screwed tight together. DO NOT overtighten.
Look for the alignment marks on the side of the front and rear housings. Align these
marks together. You may have to turn the front housing counterclockwise to align the
marks.
• The Automatic Self-Check has detected a dirty lens.
Clean the outside surface of the viewing lens of any accumulated dust, dirt, lm or debris.
SEE “Maintenance” section of the manual on how to clean the lens.
• The Automatic Self-Check has become inoperable.
To determine if the Automatic Self-Check has become inoperable, use a UV/IR test
lamp to test if the detector is still working. Ensure that the lens is free from any dust or
debris. The green Power and yellow Fault LED lights will be on. If the detector pass the
operation test, this could mean that the Automatic Self-Check has stopped working. The
front housing has to be repaired or replaced.
 Loading...