54
EN
6.5 Surface Determination with the Autoleveler CA-Plugin (Scan)
To open the UCCNC plugin Autoleveler CA, click Conguration – General Settings – Congure Plugins. Activate the plugin
Autoleveler CA by ticking Enabled. If you want the plugin to be displayed when UCCNC is started, also tick Call start-
up. You can open the plugin by clicking . To save the changes, click and . You can now close
Plugins conguration. Restart UCCNC. You should now see the plugin in its own window.
The Autoleveler CA plugin mainly covers two applications. On one hand, this plugin lets you project planar drawings
upon an uneven surface. On the other hand, you can scan three-dimensional shapes and then reuse them as a 3D le,
like a STL format. Both applications are described hereafter.
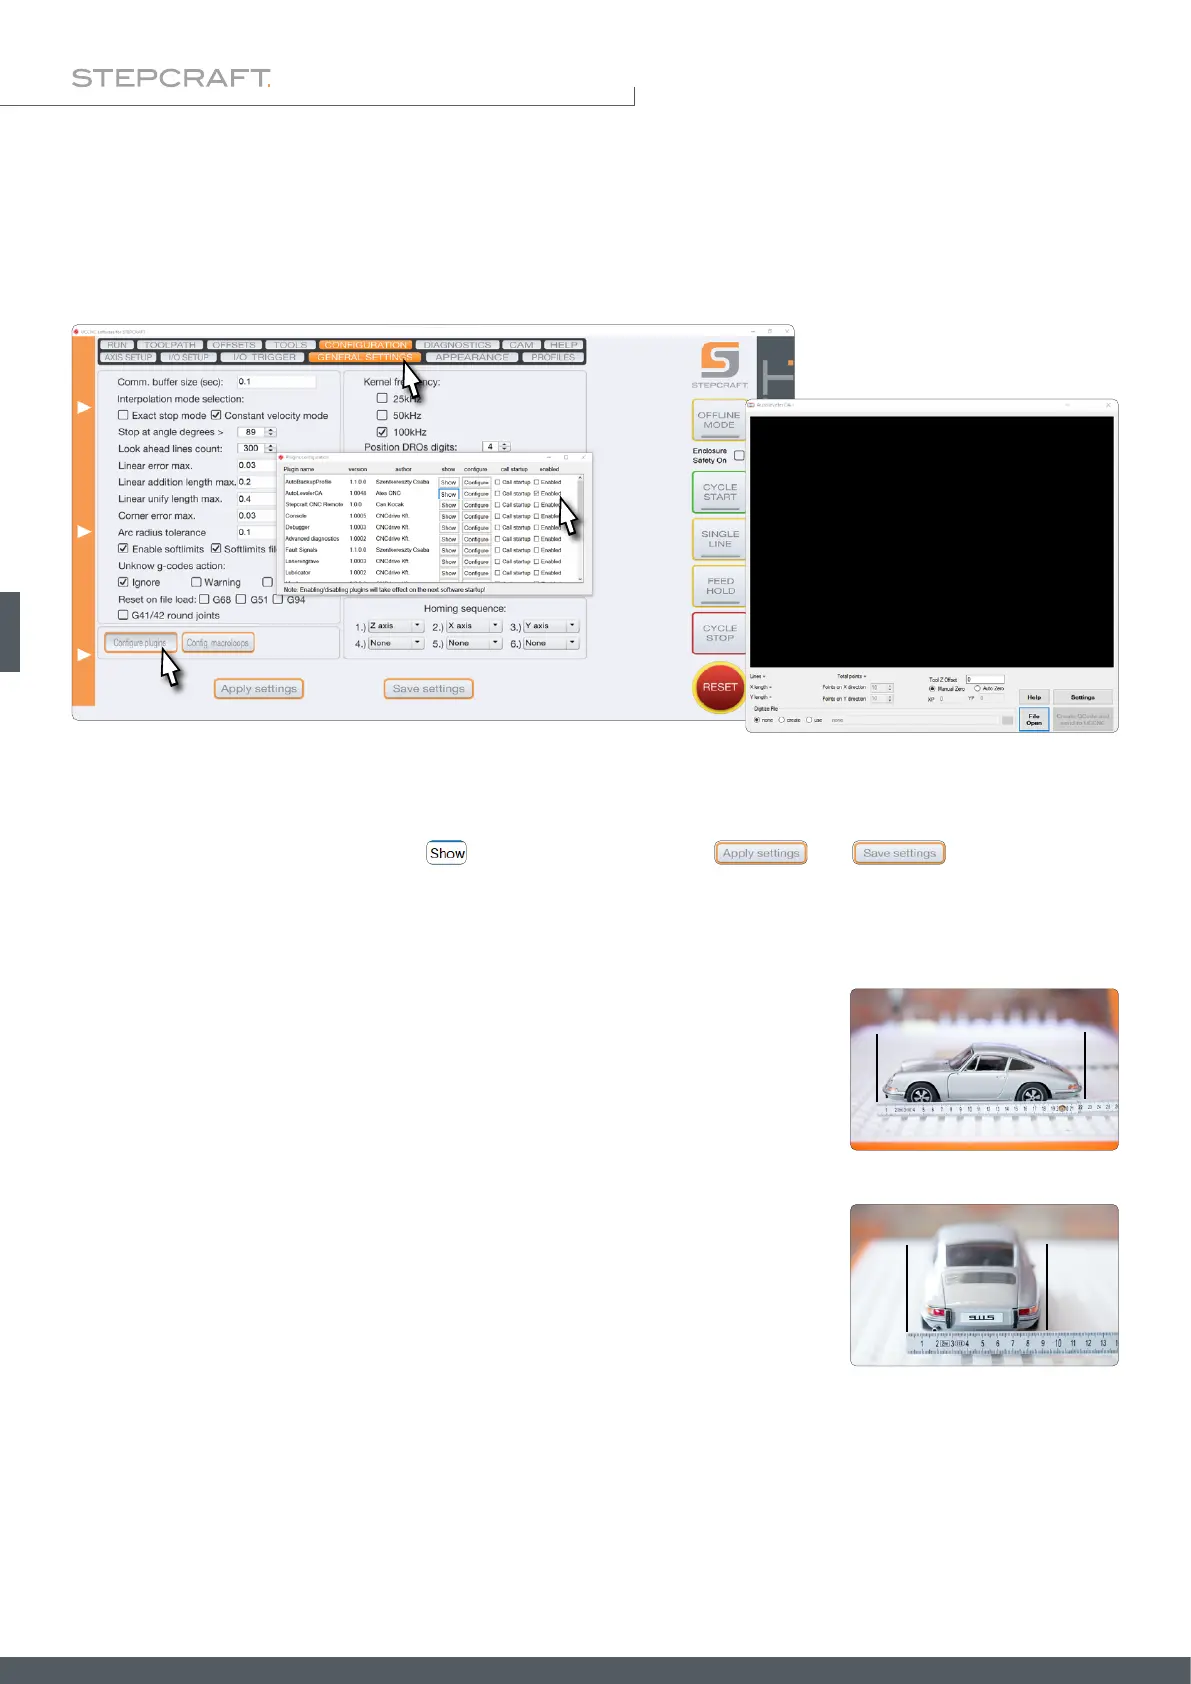
Place the workpiece on your milling machine and make sure that it cannot move. The
xtures must be outside the toolpath. Measure the maximum length and width of the
object you intend to measure and record the dimensions. To ensure that the entire
object is scanned, you should add a few millimeters to the measurements.
If the distance between the highest point of the workpiece and the machine table is
too large, the tool holder of the Z-axis will hit the workpiece. This could result in losing
steps or damage to the workpiece. Therefore, the length difference between the tip
of the 3D probe and that of the insert tool you want to work with must be known and
considered in relation to the height of your workpiece.