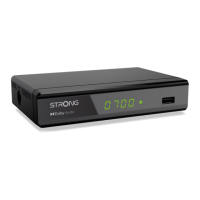
3.5 Connecting to a Digital Audio Amplier and TV using
HDMI
Fig.8
By connecting your receiver to the latest digital ampliers or home theatre systems with HDMI
connections, you will enjoy the best possible sound quality and multi-channel audio (depending
on broadcast), up to Dolby Digital Plus. Connect the HDMI output of the receiver to an input of your
amplier, and then connect the HDMI output of the amplier to your TV set. Select the correct input
on your amplier to watch and listen to programmes.
3.6 Connecting a USB storage device
Fig.9
NOTE: We recommend the use of a hard disk drive USB 2.0 for recording and play
back of TV events.
For proper functioning of Timeshift and recording functions, a fast USB device (such as a hard
disk drive) is needed. Interrupted playback or a distorted picture during playback or Timeshift are
indications for a low device speed. STRONG cannot guarantee proper functioning of recording and or
Timeshift functions with all USB devices.
4.0 STARTING UP FOR THE FIRST TIME
If you use your receiver for the rst time, the Installation Guide menu appears. Use pq to move the
highlight to the setting you wish to change and use tu to change values. Start by selecting your
On-Screen Language (OSD) using tu. Once you have selected your language, press q to move the
highlight to Country. Select your country using tu. Press OK to proceed.
Next options are:
Resolution Connected by HDMI: The highest possible resolution is already negotiated
automatically. But you could change it anyway. Connected by SCART: 576i is
the correct value.
Aspect Mode Connected by HDMI: 16:9 in Fullscreen is already negotiated automatically.
Connected by SCART: Select the Aspect Ratio you wish to use for 16:9
transmissions on a 4:3 screen. Press OK to proceed.
See chapter 7.4 for explanation. Settings can be changed later on in the
Menu.
Antenna Power: Set to On if you use an active antenna. When set to On, a 5 Volt voltage will
be present on the ANT IN connector of the receiver. Select O for passive
antennas
FTA Select Yes to store scrambled and free to air channels or select No to store
only Free-To-Air channels. Note: Scrambled channels you cannot watch with
this receiver.
Once all settings are made, Press OK to proceed to start scanning.
The receiver will now search for all available channels. Once scanning is nished, the receiver switches
to viewing mode.
8

 Loading...