PPrroocceedduurree::
1. Raise the product to the highest height position.
2. Raise the siderail to the up and locked position.
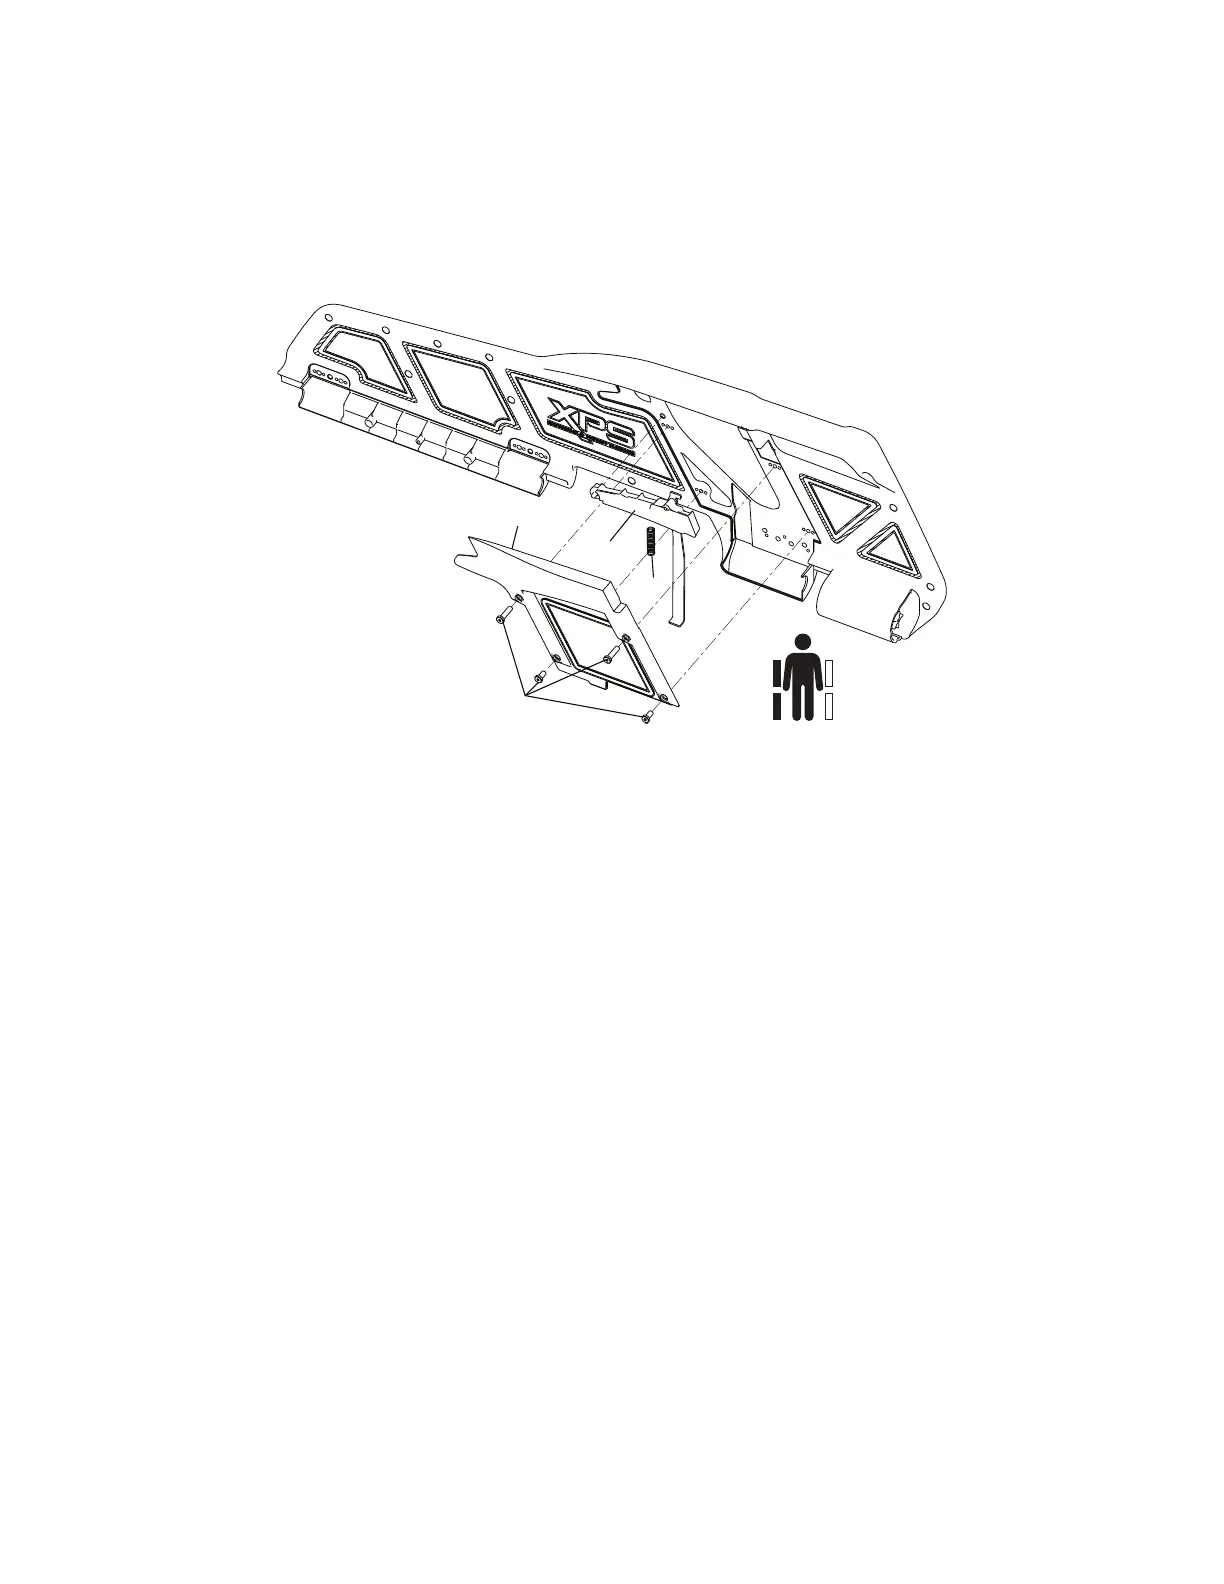
3. Using a 3/32" hex wrench, remove the four screws (A) that secure the release cover (B) to the overmold assembly to
remove the release cover (Figure 18).
4. Using a small slotted screwdriver, pry the release handle return spring (C) up to remove the spring (Figure 18).
5. Grasp the release handle assembly (D), and hinge upward on the spring side to remove from the cover (Figure 18).
FFiigguurree 1188 –– RReelleeaassee//sspprriinngg hhaannddllee aasssseemmbbllyy rreeppllaacceemmeenntt ((XXPPSS))
6. Reverse steps to reinstall.
7. Verify proper operation before you return the product to service.
SSpprriinngg hhaannddllee aasssseemmbbllyy rreeppllaacceemmeenntt ((XXPPSS ooppttiioonn))
TToooollss rreeqquuiirreedd::
• 3/32'' hex wrench
• Small slotted screwdriver
PPrroocceedduurree::
1. Raise the product to the highest height position.
2. Raise the siderail to the up and locked position.
3. Using a 3/32" hex wrench, remove the four screws (A) that secure the release cover (B) to the overmold assembly to
remove the release cover (Figure 18).
4. Using a small slotted screwdriver, pry the release handle return spring (C) up to remove the spring (Figure 18).
5. Reverse steps to reinstall.
6. Verify proper operation before you return the product to service.
EN 24 6086-009-002 Rev AB.2