RRaattcchheett aasssseemmbbllyy rreeppllaacceemmeenntt ((XXPPSS ooppttiioonn))
TToooollss rreeqquuiirreedd::
• 3/32'' hex wrench
• 1/4'' hex wrench
• 3/16'' hex wrench
• Torque wrench (ft-lb)
PPrroocceedduurree::
1. Raise the product to the highest height position.
2. Raise the siderail to the up and locked position.
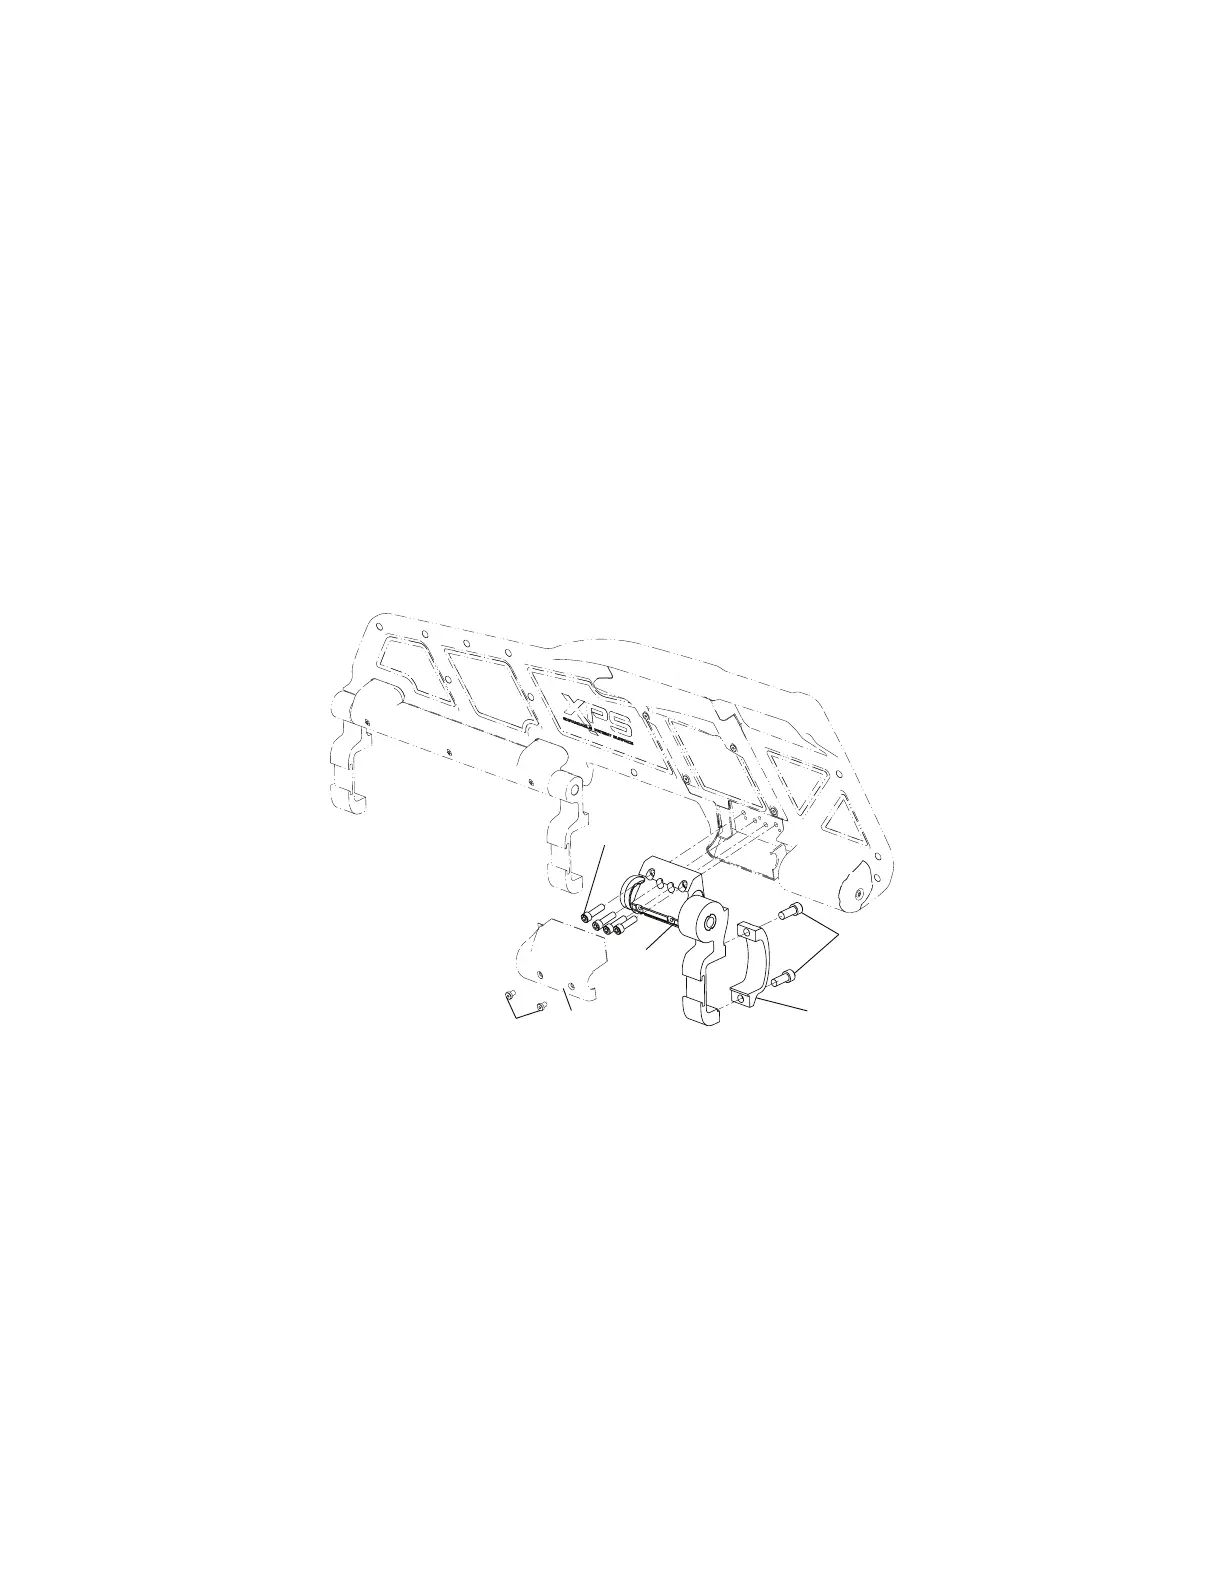
3. Using a 3/32" hex wrench, remove the two screws (A) that secure the ratchet cover (B) to the ratchet assembly. Remove
the cover (Figure 17).
4. Using a 1/4" hex wrench, remove the socket head cap screws (C) that secure the siderail clamp (D) to the ratchet
assembly at the foot end of the main assembly (Figure 17). When you reinstall, use a torque wrench to torque both new
screws to 22 ± 3.3 ft-lb.
5. Using a 3/16" hex wrench, remove the four screws (E) that secure the ratchet assembly (F) to the overmold assembly
and discard. Remove the ratchet assembly (Figure 17). When you reinstall, use a torque wrench to torque the four new
screws to 9.5 ± 1.5 ft-lb.
FFiigguurree 1177 –– RRaattcchheett aasssseemmbbllyy rreeppllaacceemmeenntt ((XXPPSS))
6. Grasp the ratchet assembly and pull toward the head end of the cot to remove.
7. Reverse steps to reinstall.
8. Verify proper operation before you return the product to service.
RReelleeaassee hhaannddllee aasssseemmbbllyy rreeppllaacceemmeenntt ((XXPPSS ooppttiioonn))
TToooollss rreeqquuiirreedd::
• 3/32'' hex wrench
• Small slotted screwdriver
6086-009-002 Rev AB.2 23 EN