CheckPoint Pharma and CheckPoint
e
Operation and Maintenance Manual
SUEZ © 2018 59 of 112 DLM 97200-03 EN Rev. A
Chapter 5 — Basic Operation and Menu Options
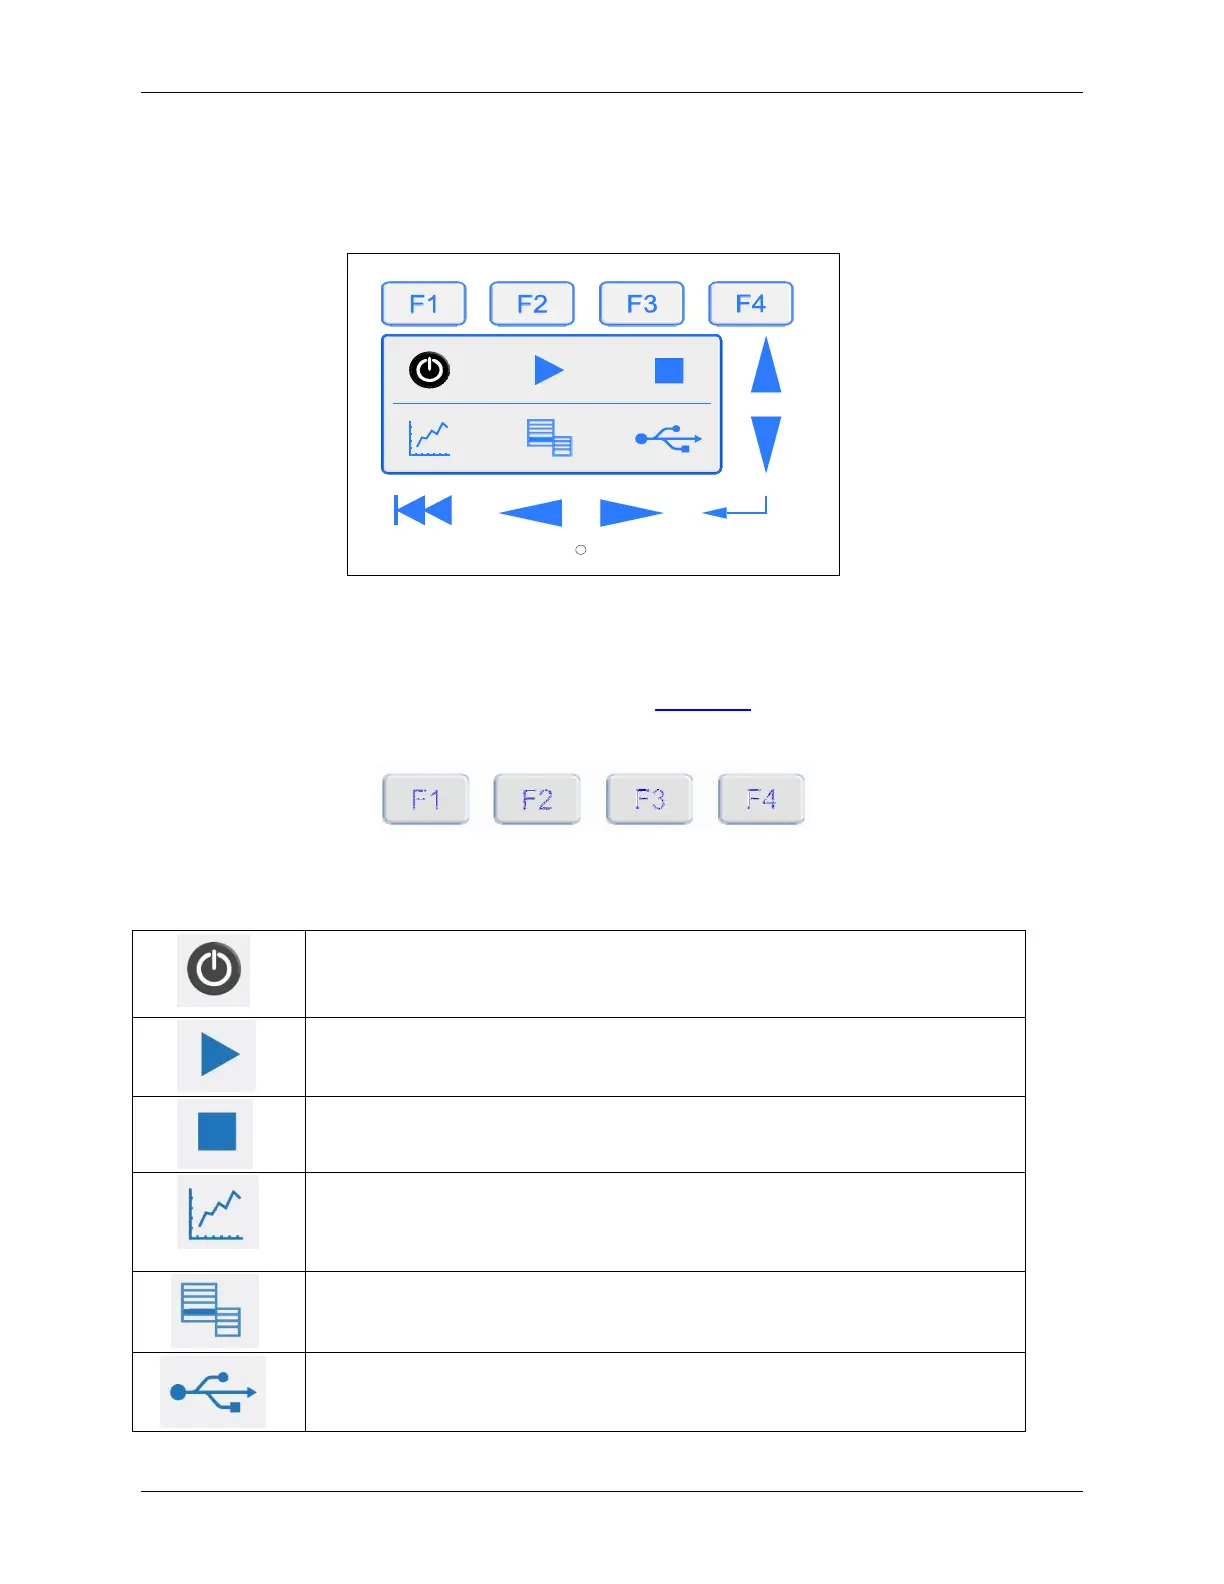
The buttons on the CheckPoint touch screen provide easy access to all Sensor functions.
Figure 19: Touch Screen Buttons
Function Keys
The four function keys at the top of the touch screen (see Figure 20: The Function Keys) are context
sensitive; depending on which screen is displayed, the function keys provide quick access to various
features. The display will always list the function of each key for that particular screen.
Figure 20: The Function Keys
Main Buttons
Press and hold the power button to power on the Sensor. You can stop
pressing the button after the display illuminates. To power off the Sensor,
press and hold the button until the Sensor indicates that it is saving settings.
The Start Analysis button starts analysis.
The Stop Analysis button stops analysis.
The Display button cycles through the display mode options. (TOC, TOC
Countdown, TOC and Conductivity or TOC and Resistivity, TOC Chart, View
Data, and System Information). When the Sensor is in standby, only the View
Data, TOC Chart, and System Information screens are available.
The Menu button displays the main menu screen. Menus provide access to
configuration screens and advanced functions of the Sensor.
The Save button starts a download of all of the data and system constants on
the Sensor to the USB storage device.