12 Operation & Maintenance Manual
Cyclo® HBB
Cyclo® HBB
Installation onto Driven Shaft
Using Taper-Grip® Bushing
16
Finished Installation.
• Install the Torque Arm Assembly according to the instructions described in
the Torque Arm Installation section of this manual.
• ChecktheTaper-Gripbushingscrewtorquesafter20-30hoursofoperation.If
necessary,tightenthescrewsaccordingtothetorquechartinstep10.Checkthe
screwtorques every 6months thereafter.
Do not operate unit until the torque arm has been attached. The torque
arm prevents counter-rotation during unit operation. Refer to the Torque
Arm Installation section in this manual for instructions.
15
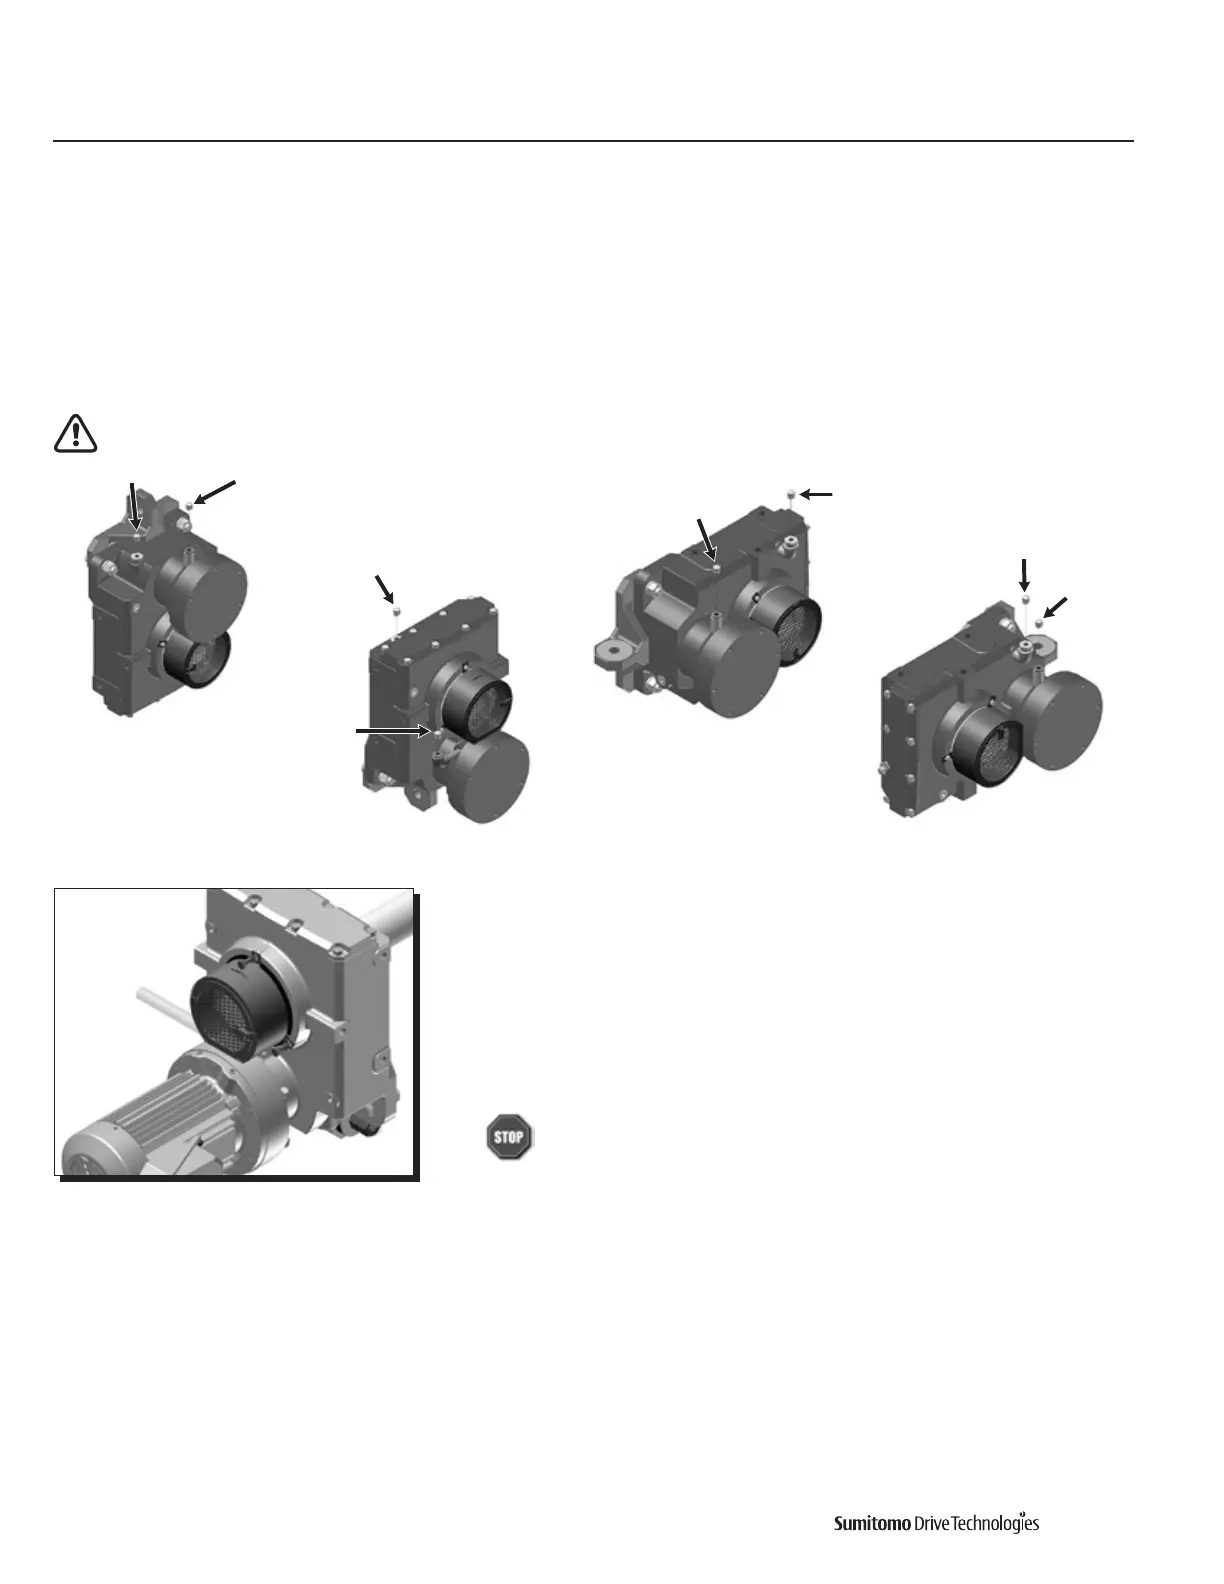
Verify lubrication and install air vents.
• Ensurereducerisinthepropermountingposition.
• Removeplugsandinstallairventsincludedinreducerpackage.
• Anelbowisincludefor:
- the gear portion when mounting in the Y2 and Y4 position.
- the Cyclo® portion when mounting in the Y3 position.
Unit is filled with oil. Removing plugs before placing unit in correct mounting position will cause oil to spill.
HBB Breather
Cyclo Breather
Cyclo Breather
HBB Breather
Cyclo Breather
HBB Breather
Cyclo
Breather
HBB Breather
Y1 Y2
Y4Y3

 Loading...


