EasyManuals Logo

SunSynk SUNSYNK-8K-SG01LP1 User Manual

SunSynk SUNSYNK-8K-SG01LP1
86 pages
To Next Page IconTo Next Page
To Previous Page IconTo Previous Page
Page #24 background imageLoading...
Page #24 background image
SINGLE PHASE HI 8kW| User Manual24
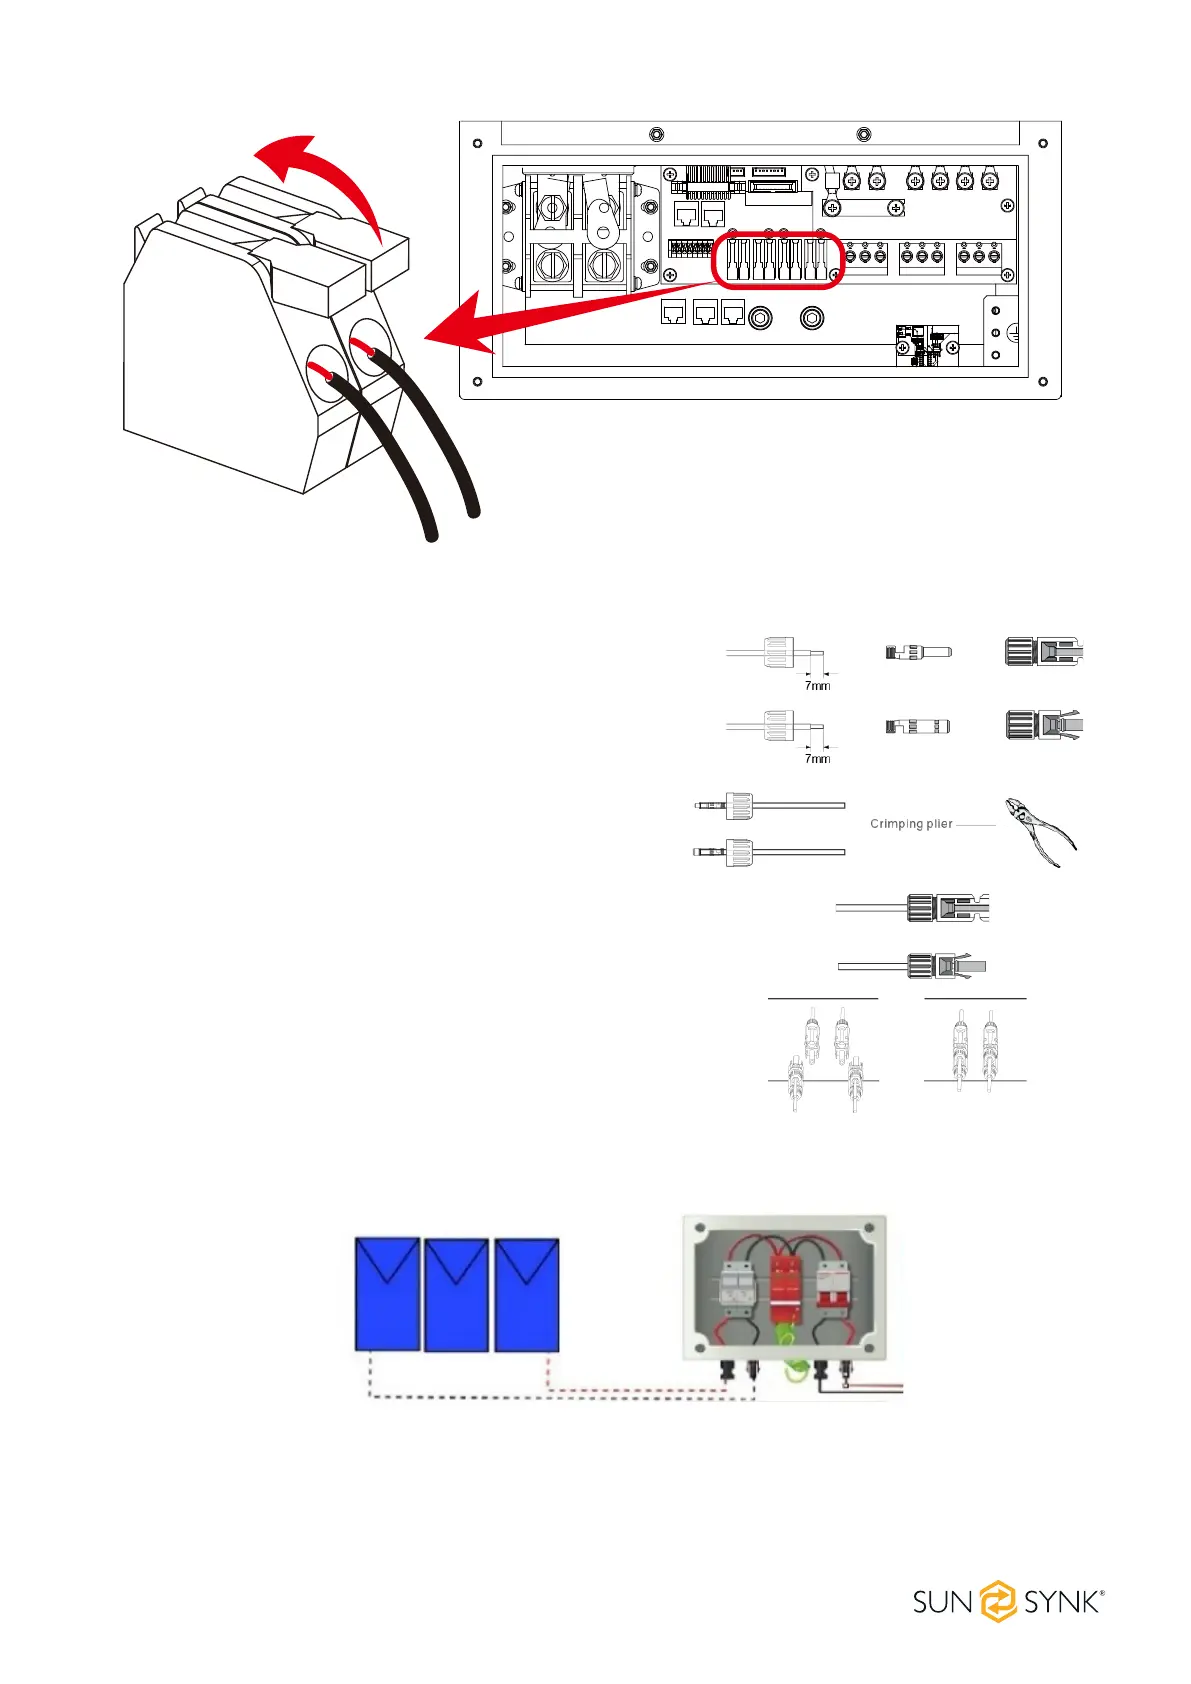
The correct steps in assembling the DC connector are explained below:
1. Strip 7mm of the plastic coating o the DC wire and
disassemble the connector cap nut.
2. Crimp metal terminals with crimping pliers.
3. Insert the contact pin into the connector housing until it
locks into place. Then screw the cap nut onto the connector
housing. Torque to 2.5-3 N.m.
4. Finally, insert the DC connector into the positive and negative
input of the inverter.
4.8.3. PV Protection
solar surge
protection and
fuse

Table of Contents

Other manuals for SunSynk SUNSYNK-8K-SG01LP1

Questions and Answers:

Question and Answer IconNeed help?

Do you have a question about the SunSynk SUNSYNK-8K-SG01LP1 and is the answer not in the manual?

SunSynk SUNSYNK-8K-SG01LP1 Specifications

General IconGeneral
BrandSunSynk
ModelSUNSYNK-8K-SG01LP1
CategoryInverter
LanguageEnglish

Related product manuals