6.6 Relay 1
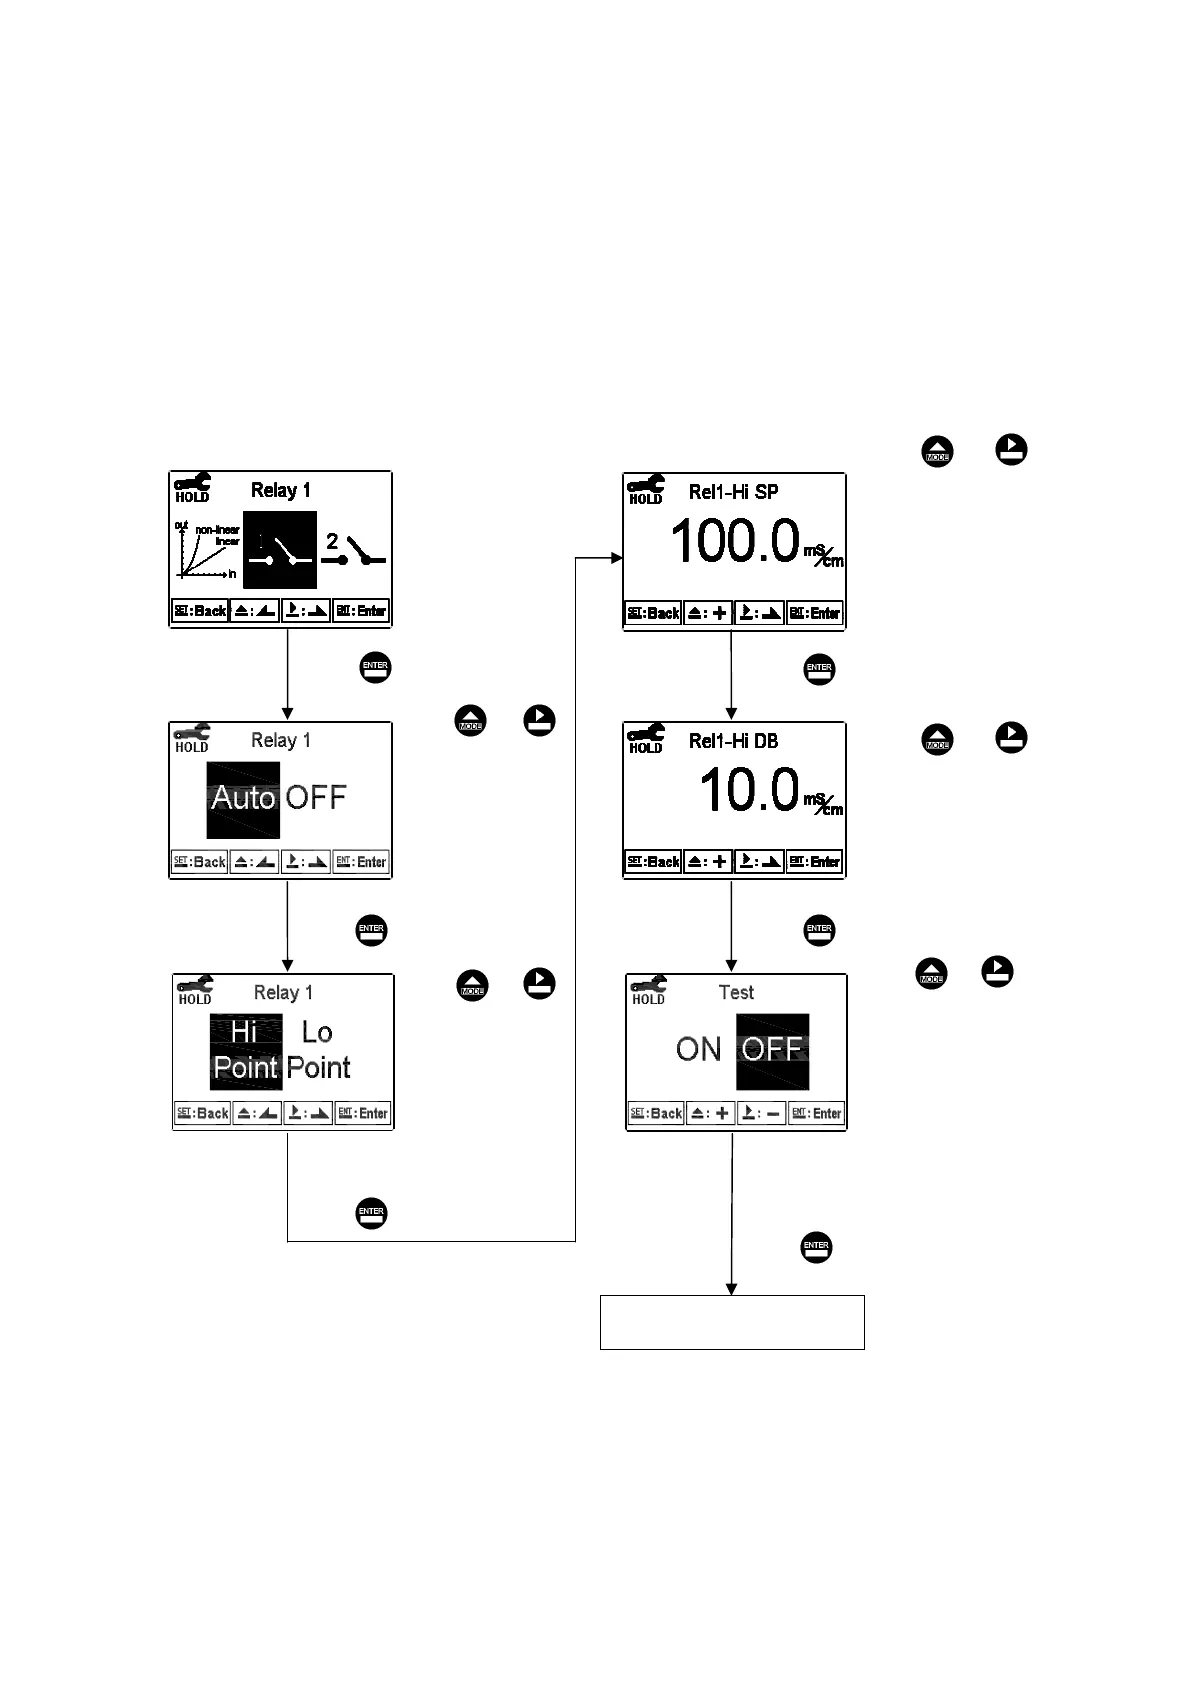
Enter setup of Relay 1. Select the item to turn on or turn of the relay 1 function. If you
select to turn on the relay 1, then select for using relay 1 as “Hi set-point” alarm or
“Low set-point” alarm. Set the value of set-point (SP) and dead-band (DB). The range
for set-point isʳ00.00M~19.99 M/00.00s~1999mS; while the range for DB is
00.00M~2.00 M/00.00s~19.99mS.ʳ(The measurement unit is depending on the use
of measuring range)
Press or to adjust
dead-band(DB) value
Press ʳ or
to select to activate
REL1 or not. If
not, the guide
menu goes to setup
of Relay 2.
Press to confirm it.
Enter “Relay 2” Setup
Press to confirm it. Press to confirm it.
Press to confirm it.
Press to confirm it.
Press to confirm it.
Press ʳ or
to select use REL1
as Hi point or Lo
point alarm.
Press ʳ or
to select to activate
a test of REL1 or
not. If “ON”, the
relay 1 is in action,
and the “ACT”
indication light
will light up.
Press or to adjust
set-point (SP) value.
If the measuring range of
conductivity measurement is set
as AUTO, then it needs to be set
unit((S /cm or mS/cm), value,
and decimal point by order.
лк



 To Next Page