The Time Setup Menu
Remember: After making changes to the settings press/click the APPLY button.
41
By using the mouse or the arrow buttons, navigate to the numeric time display 1.
and left click or press select.
The first digit will now be highlighted for editing.2.
Using the pop-up keypad, use the mouse of the arrow buttons to select the 3.
digit that you want. Left click or press select to choose a digit.
Confirm your selection by highlighting and pressing select or left clicking with 4.
the mouse the ENTER button.
The time and date settings are not lost when the DVR is turned off or unplugged
from power. There is a small battery within the DVR which powers the clock (and
the BIOS) of the DVR whilst power is not connected. This battery usually lasts
quite a long time (months to a charge). If the DVR is unplugged for an extended
period, the battery’s charge might run out, and you may lose some of your saved
settings.
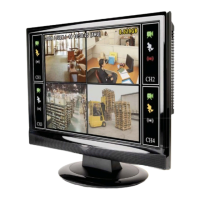
Setting the Date and Time
It is very important if you’re planning
on using the video search function
that the date and time are correctly
set. This is also the case if you want to
be able to use the footage from your
DVR in a court of law or similar legal
proceeding.
Configuring Custom DST MODE
As the standards for daylight savings differ from country to country, and often
state to state, you might need to manually tell the DVR exactly when it commences
and ends in your locality.
First, turn DST on. Then, select the appropriate week from the drop-down menu
which lists the 1ST WEEK, 2ND WEEK (and so on) that DST commences in your
region. Then, select the appropriate month from the drop-down menu listing
months.
Repeat these steps for the week and month that daylight savings ends. Once con-
figured, your DVR will automatically adjust the time settings when daylight savings
begins and ends without you having to change anything.