1 2 3 4 6 7 8
9
5
10 11 12 13 15 16 17 18 1914
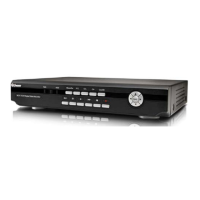
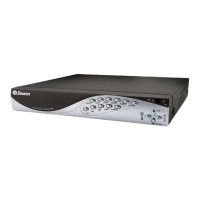
Layout of the Front Panel
1) Power Indicator: This LED is illuminated when
the DVR is connected to power and switched on.
2) Infrared Sensor: Monitors signals coming
from the infrared remote control. If this sensor is
blocked or obstructed, then the functionality of
the remote will be impaired.
3) Hard Drive Indicator: Lights up when the hard
drive is active. It will flash rapidly when recording
or searching (in time with the read/write cycles).
4) Menu/ESC: One of the primary controls for
navigating through the menus. When in live-
viewing mode, it will enter the main menu. When
pressed in the main menu, it will return the DVR
to live-viewing mode. Finally, when in a submenu,
this button will return you to the main menu.
5) PTZ: Opens the Pan, Tilt, Zoom pop-up menu.
This is used to control PTZ capable camera
systems, and will not affect standard cameras.
6 & 7) Previous Channel & Next Channel:
Moves back or forward through available channels
in either live-viewing mode or playback.
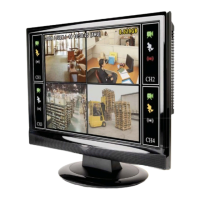
8) Quad Mode: Enters split-screen quad-view.
The whole screen is split into four quadrants,
each displaying the images from one camera.
9) Rewind: During playback, this will reverse
the footage. Press multiple times to increase the
speed of the reversing. When navigating through
menus, this button will move the cursor to the
left.
10) Pause: During playback, will pause the current
recording and leave a still-frame on screen. In
live-viewing mode, this will activate the auto-
sequence mode, where the display automatically
cycles through the available camera signals (this
must be correctly configured and enabled to
function correctly).
11) Play: If pressed in live-viewing mode, this will
take you directly into playback mode, and begin
playing the most recent recording. In playback
mode, use it to resume playback after pausing or
stopping a recording.
12) Fast-Forward: During playback, this will
speed up the footage. Press multiple times
to increase the speed of the playback. When
navigating through menus, this button will move
the cursor to the right.
13) Stop: In playback mode, pressing this button
will stop playback.
14) Record: Press to immediately start recording.
This acts as a manual override to the schedule
and motion recording modes. For a channel to be
recorded in this mode (or any other) it must listed
as ‘active’ in the Camera Setup and Record Setup
menus.
15 ~ 18) Arrows: Move the cursor in the selected
direction in the menus.
19) Select: The equivalent of Enter/Return on a
computer keyboard. Use this button to (as the
name suggests) select an option in the menus, or
to confirm an entry.
8