116 Disassembly and Reassembly TP9100 Service Manual
© Tait Electronics Limited May 2005
Fitting the Flexible
Accessory Board
and the Rear Panel
The circled numbers in this section refer to the items in Figure 5.12 on
page 117.
1. Pre-bend the joint of the flexible accessory board
E and its loom by
90° as illustrated in Figure 5.12.
2. Feed the loom through the slot in the chassis
F and place the flexible
accessory board into the cavity provided.
3. Peel off the backing of a new rear-panel seal
D and place the rear-
panel seal over the flexible accessory board and chassis. To achieve
proper sealing, use a blunt instrument to press down the rear-panel
seal inside the perimeter of the rear-panel seal and around all holes.
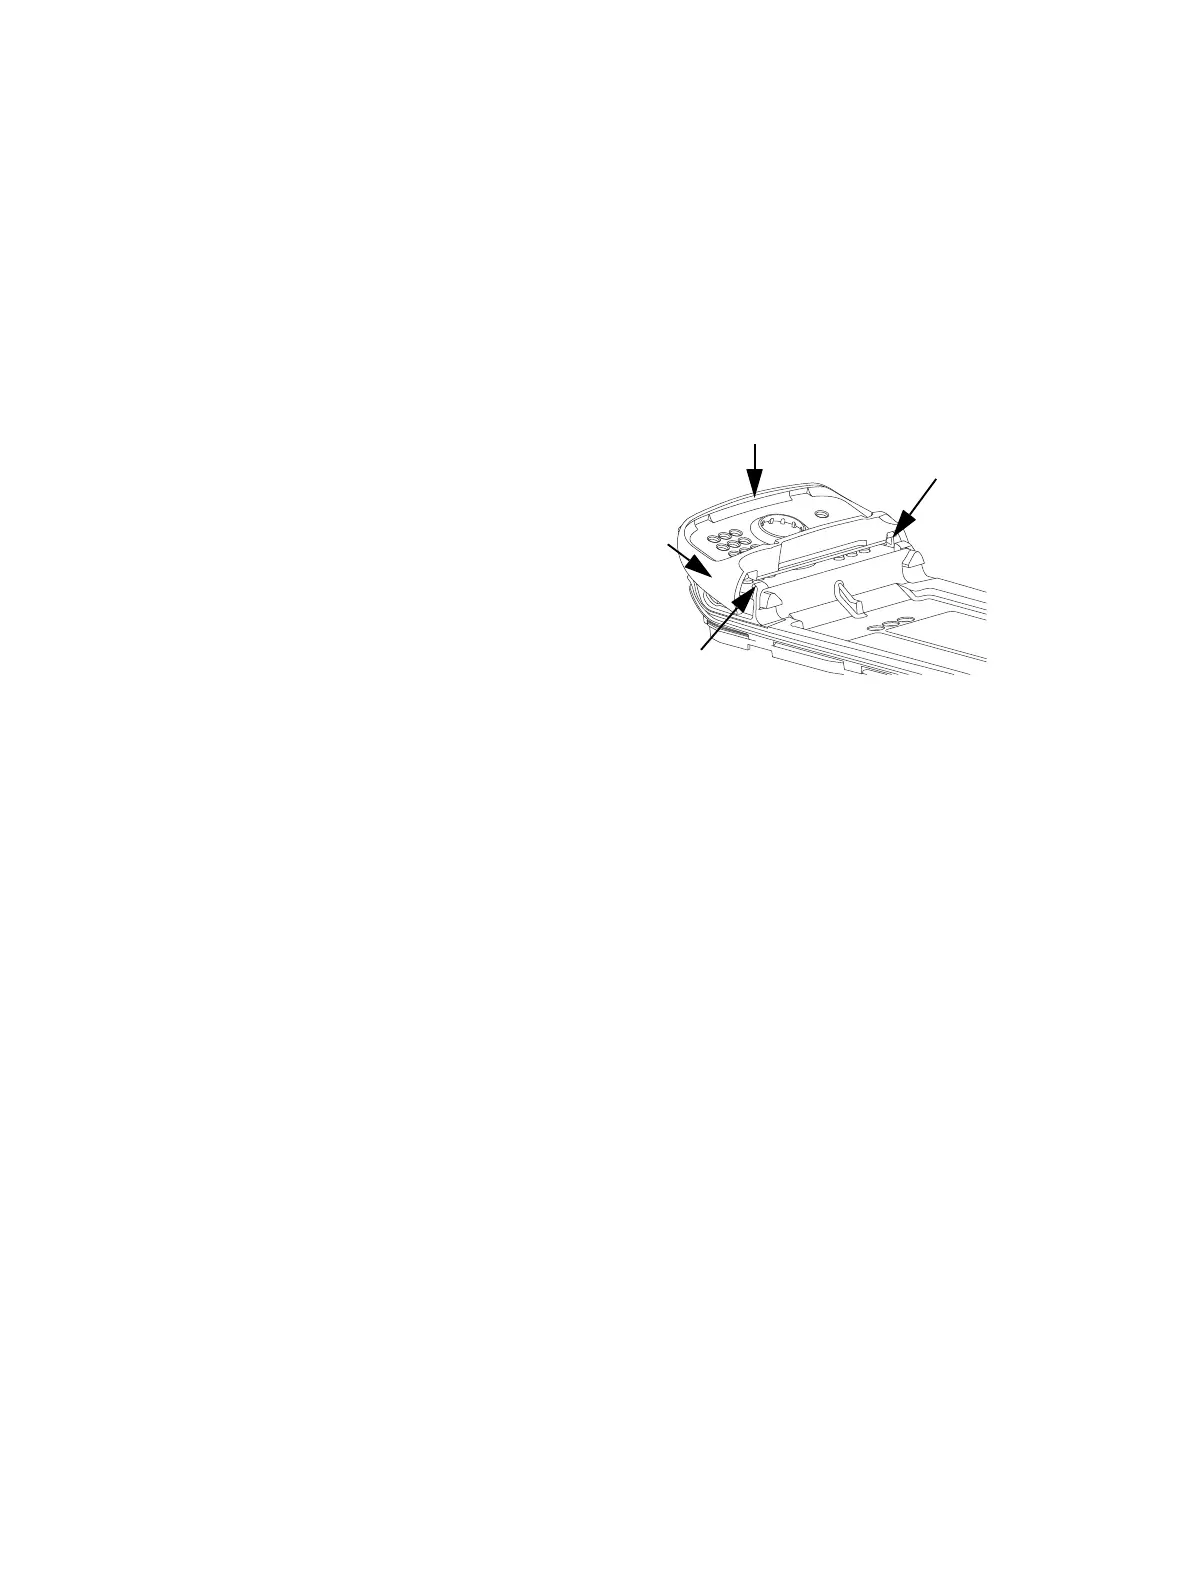
4. At an inclined angle (
B),
slide the rear panel onto
the chassis until the two
lugs of the rear panel are
positioned under the two
lugs of the chassis.
5. Press against the top edge
(
C) of the rear panel until
the rear panel clicks into
place.
6. If applicable, fit the dummy cover
B and turn the lock counter-
clockwise by a quarter turn.
lug of rear panel
lug of chassis
B

 Loading...


