312 TPA-AA-201 Accessory Connector Kit TP9100 Service Manual
© Tait Electronics Limited May 2005
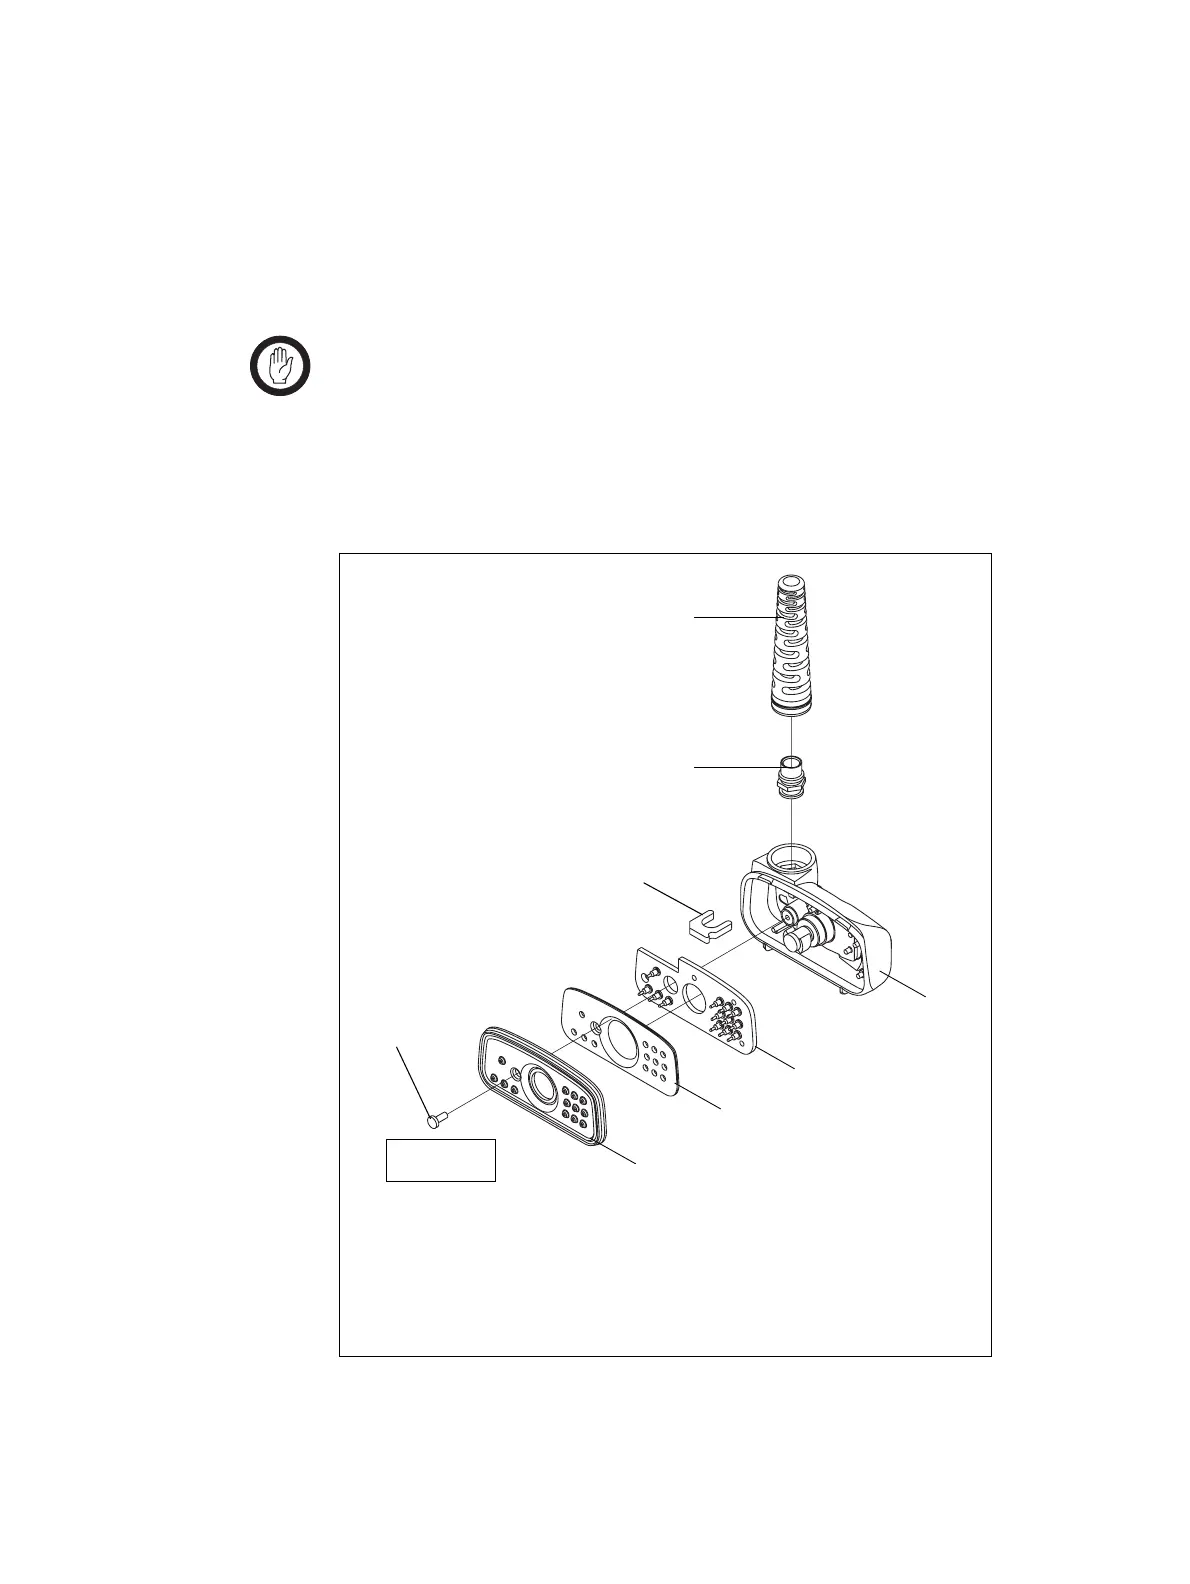
16.2 Disassembly and Reassembly
1. Use a Torx T6 screwdriver to remove the screw B, and remove the
accessory housing seal
C, the accessory seal plate D, and the accessory
connector PCB
E.
2. Use pliers to pull out the clamp
G, and remove the strain relief I,
and the insert
H.
Important During reassembly, make sure that the accessory housing
seal
C is inserted correctly inside the accessory connector
housing
F.
Reassembly is carried out in reverse order of the disassembly.
Figure 16.2 Components of the accessory connector kit
B
Tor x T 6 s crew
F
accessory connector housing
C
accessory housing seal
G
clamp
D
accessory seal plate
H
insert
E
accessory connector PCB
I
strain relief
Torx T6
3lb·in (0.34N·m)
H
C
D
E
F
G
I
B

 Loading...


