12
1. Ethernet Port.
(Access to upgrade program to PLC and touch screen)
2. USB port.
(USB connection hole. Communicate with HMI, like barcode scanning and data collection)
3. CD port.
(Connect to centering device via CD cable.)
4. RS 232 Connector.
(Connect to Ultrasonic welding machine.)
5. Air Cooling Socket.
(Connect to air cooling fixture, refer to section 4.6.3 & 4.6.4)
6. Main Power Fuse.
(2 X 230V, 3.15A anti-surge)
7. Power Input Socket.
(230V)
8. Main Power Switch.
(Used to turn ON/OFF to RBK processor)
9. Fan Fuse.
(230V AC, 1A anti-surge)
10. Heater Fuse.
(230V AC, 3A anti-surge)
11. Cooling Fan.
(Operates when heater temperature above 190 °C.)
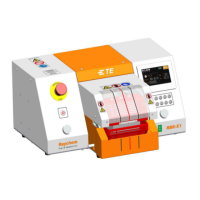
RBK-X1 2234800-1, 230V
RBK-X1 2234800-2, 24V
RBK-X1C 2376800-1, 230V
RBK-X1C 2376800-2, 24V
12. CD Cable
(Communication cable, RBK processor connect with Centering Device)
13. Air inlet.
(Pressure air: 4~6 bar. Outer diameter of pipe: 10mm)
14. Air supply kit.
(F.R.L)
Do not use the Mains Power Switch or E-stop button as normal process to turn off the
processor, as this will cause a significant reduction to the life of the heater element.
Turn off the Heater using the I/O Switch. The temperature will drop and cooling will
continue, once below 190º C, the fan will turn off and the processor will enter the
stand-by mode. The power can now be switched off using the Main Power Switch.