39
4.2.7 Single Process Operation
Action of the Process Start buttons is inhibited until the heater LED has
changed to green.
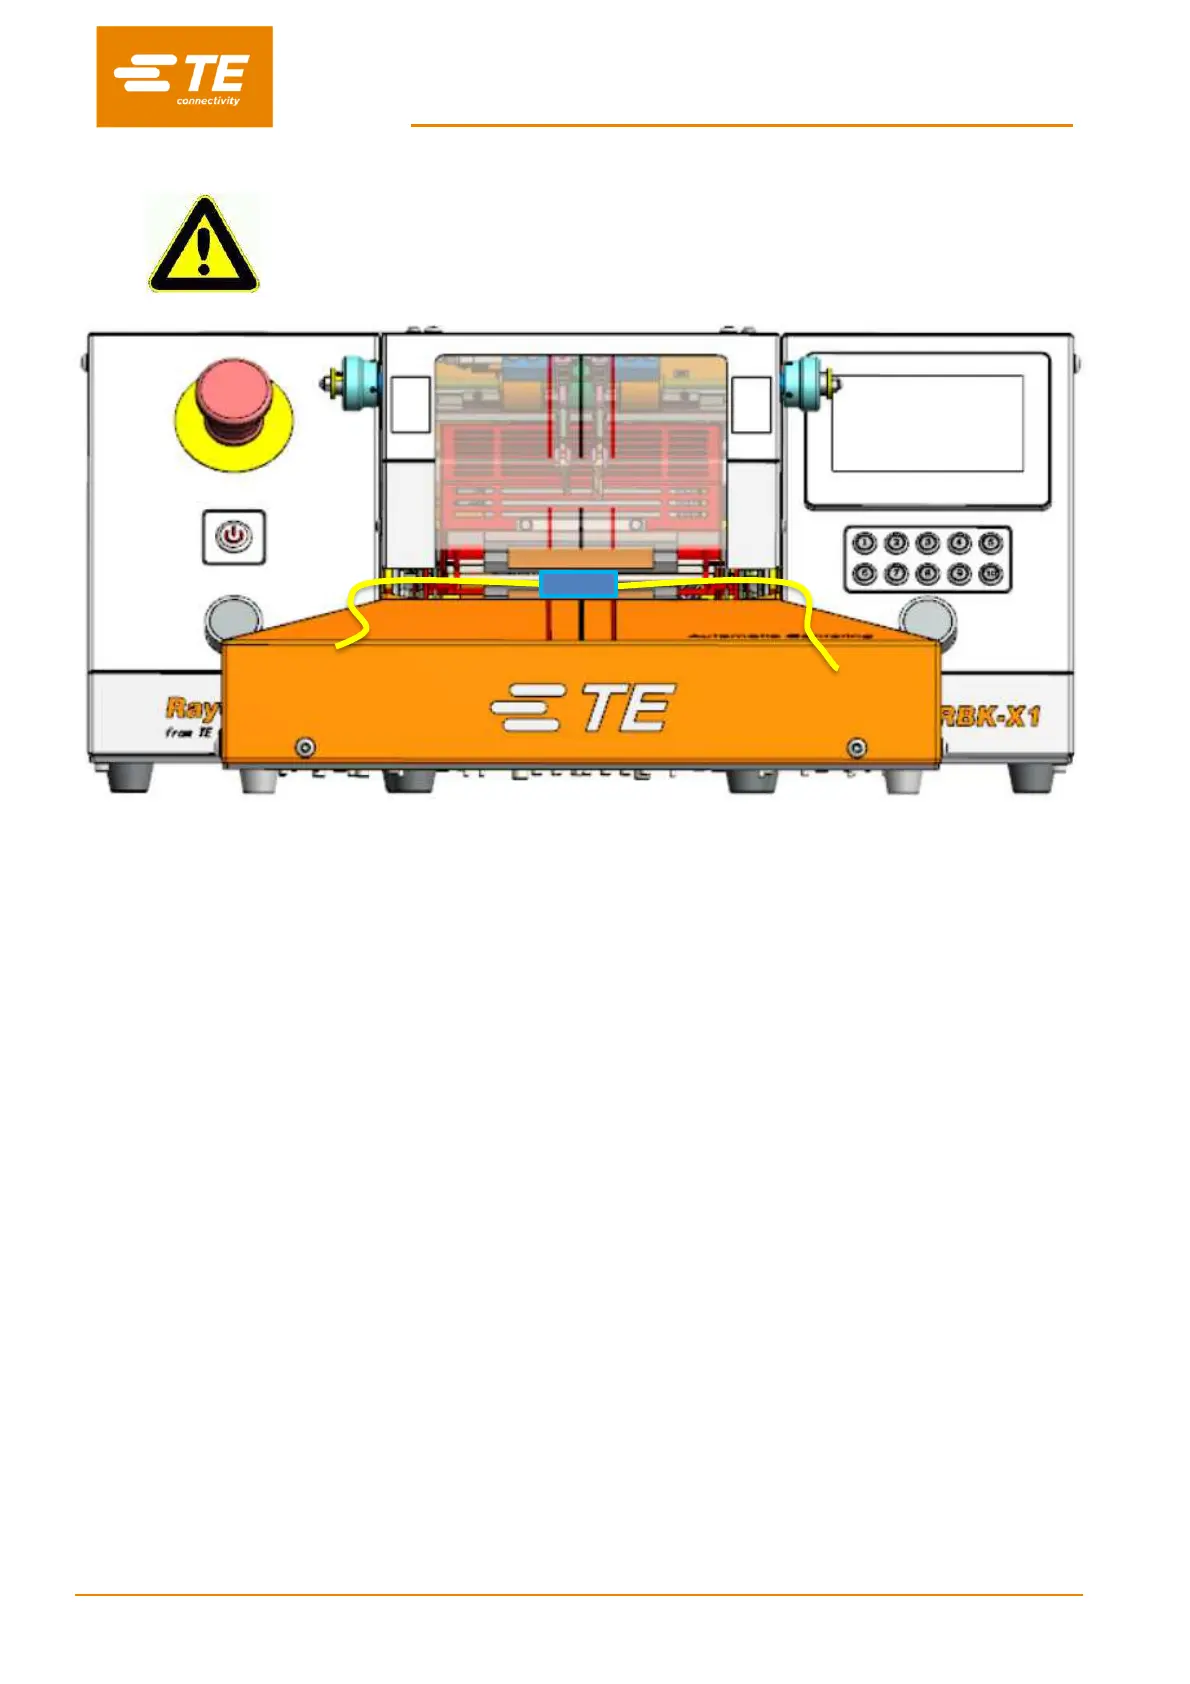
Fig. 4-2: Single process (RBK-X1 & RBK-X1C)
1. Log on in HMI, switch OFF to the ‘Centering’ button in Maintenance page, to inactivate Auto
Centering function (see section 3.5, item 10).
2. Check from main interface, if correct process button has been selected for the cable assembly to
be processed. And the heater indicator lit green.
Note: This will be selected automatically if the Processor is being controlled remotely.
3. Select the correct size (ILS. / QSZH) product (Code 1; 2; 3; 3A) and position over splice to be
processed.
4. Insert the cable splice into the Processor grippers. Align the center of the splice and product ends,
with the guide markers on the Perspex shield and Guard.
5. Press and hold both START CYCLE buttons 0.5S simultaneously, heater carrier move forward to
load position.
Note: When cycle start, release hands before heater carrier arrived at loading position will
interrupt cycle. Heater carrier will stop at the position when hands release.
(
Can turn off
the interrupt in maintenance page
.
Quick press on both START CYCLE button, the heater
carrier will back to home position. Ready for new cycle.
6. Check from main interface that the process Cycle indicator lit green.
7. Check that the Timer Display start to count down.
8. When the Timer reaches zero, the heater will move backward to home position, and the processed
splice will be ejected.
Note: TAKE CARE WHEN HANDLING THE EJECTED CABLE SPLICE AS IT WILL BE HOT.
9. Without selecting another process button, the next cycle will continue the last selected process.