40
4.2.8 Auto Centering Operation
Action of the Process Start buttons is inhibited until the heater LED has
changed to green.
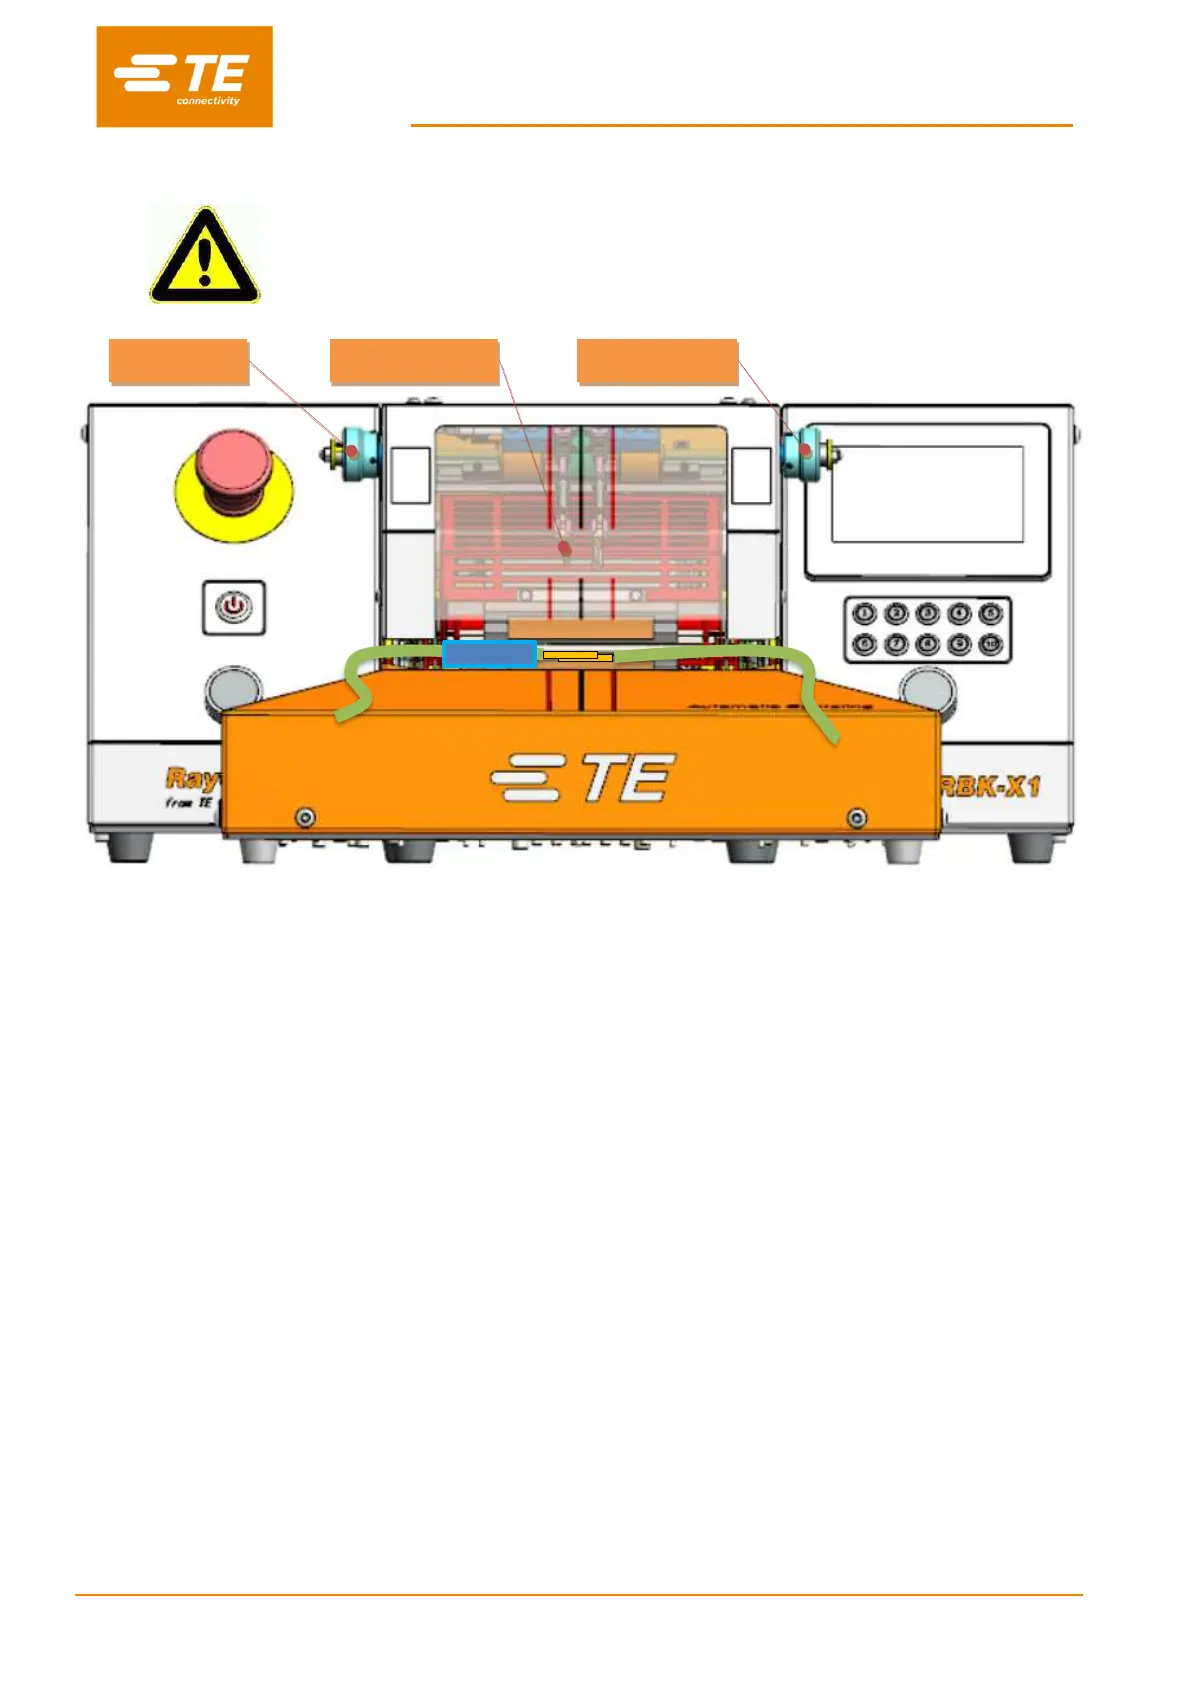
Fig. 4-3: Auto Centering (RBK-X1C only)
1. Log on in HMI, switch ON to the ‘Centering’ button in Maintenance page, to activate Auto
Centering function (see section 3.5, item 10).
2. Turn back to main interface, you would find it show additional auto centering illuminator on the
screen top (see section 1.3, item 5). Press both start button to drop down the DETECTION
PLATE, the centering illuminator will show green.
3. Pull and rotate the right DISTANCE KNOB to find a suitable distance between 2 detection plates,
according to the width of splice, then processor is ready for centering.
4. If necessary, pull and rotate the left OFFSET KNOB to adjust the splice offset.
Note: Due to current centering device capacity, splice offset CANNOT lager than 10mm.
5. Push tube to expose the splice (Fig.4-3), then insert cable with splice contact with both
DETECTION PLATE.
Note: Due to current centering device capacity, tube CANNOT longer than 60mm.
6. When detection success, the DETECTION PLATE will swing up, then the CENTERING PLATE
will push the tube to the center, and back to both side at once.
Note: In case of CENTERING PLATE was stuck when moving to center, remove the cable manually and
press on both start button to start a new cycle.
7. Press on both start buttons simultaneously until the heater carrier move forward to load position.
Note: If turn on “Auto Trigger” button in maintenance page, operator don’t need to press both start
button to activate heater carrier moving forward, it would automatically move forward when detection
success. But we won’t recommend operating like this, since heater carrier moving without hands on
button, operator may have chance to put hands in heating chamber. That would cause accident.
8. Check from main interface that the process Cycle indicator lit green. Timer Display start to count
down.