3.2 Logging in
After you’re complete with the setting up as described in the section above, you are ready to start logging into
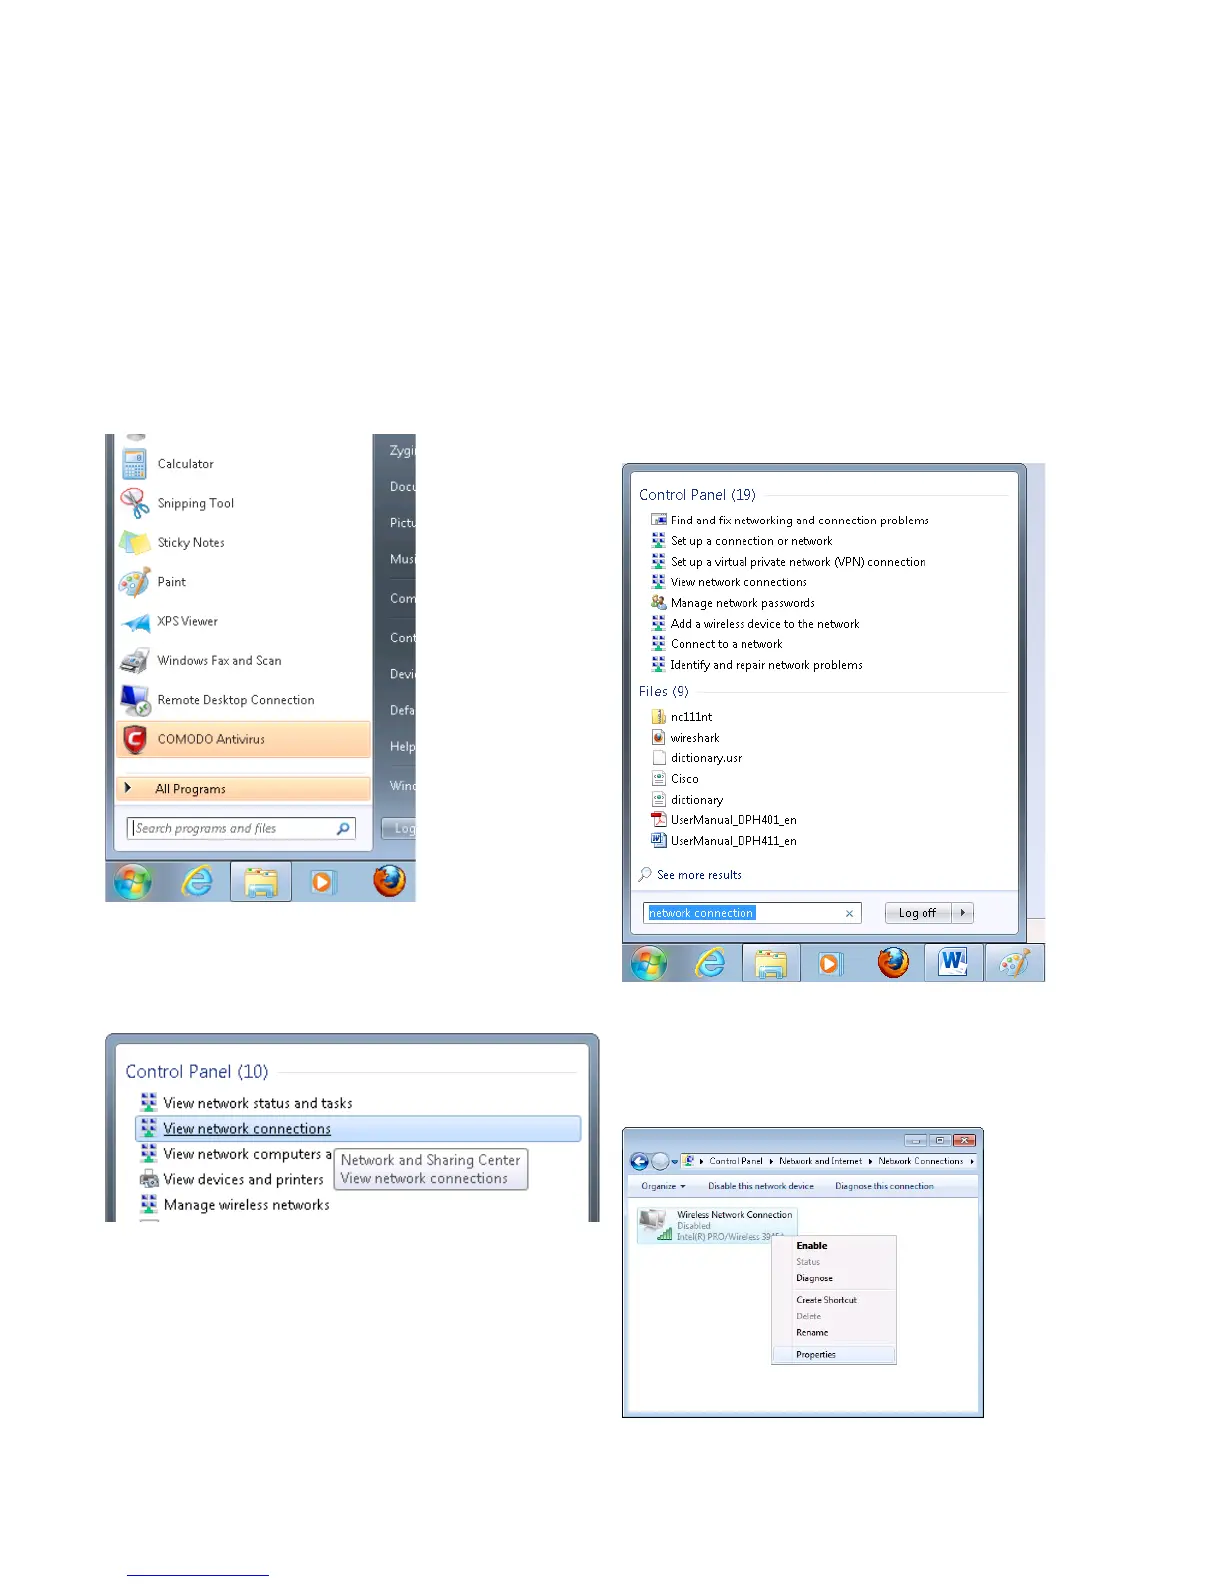
your router and start configuring it. This example shows how to connect on Windows 7. On windows Vista: click Start ->
Control Panel -> Network and Sharing Centre -> Manage network Connections -> (Go to step 4). On Windows XP: Click
Start -> Settings -> Network Connections -> (see step 4). You wont’s see “Internet protocol version 4(TCP/IPv4)”, instead
you’ll have to select “TCP/IP Settings” and click options -> (Go to step 6)
We first must set up our network card so that it could properly communicate with the router.
connect to other access points (It is the one with the name
“Wireless Network Connection” and has signal bars on its
icon).
13
 Loading...