Texi Iris 10 Operation Manual
22
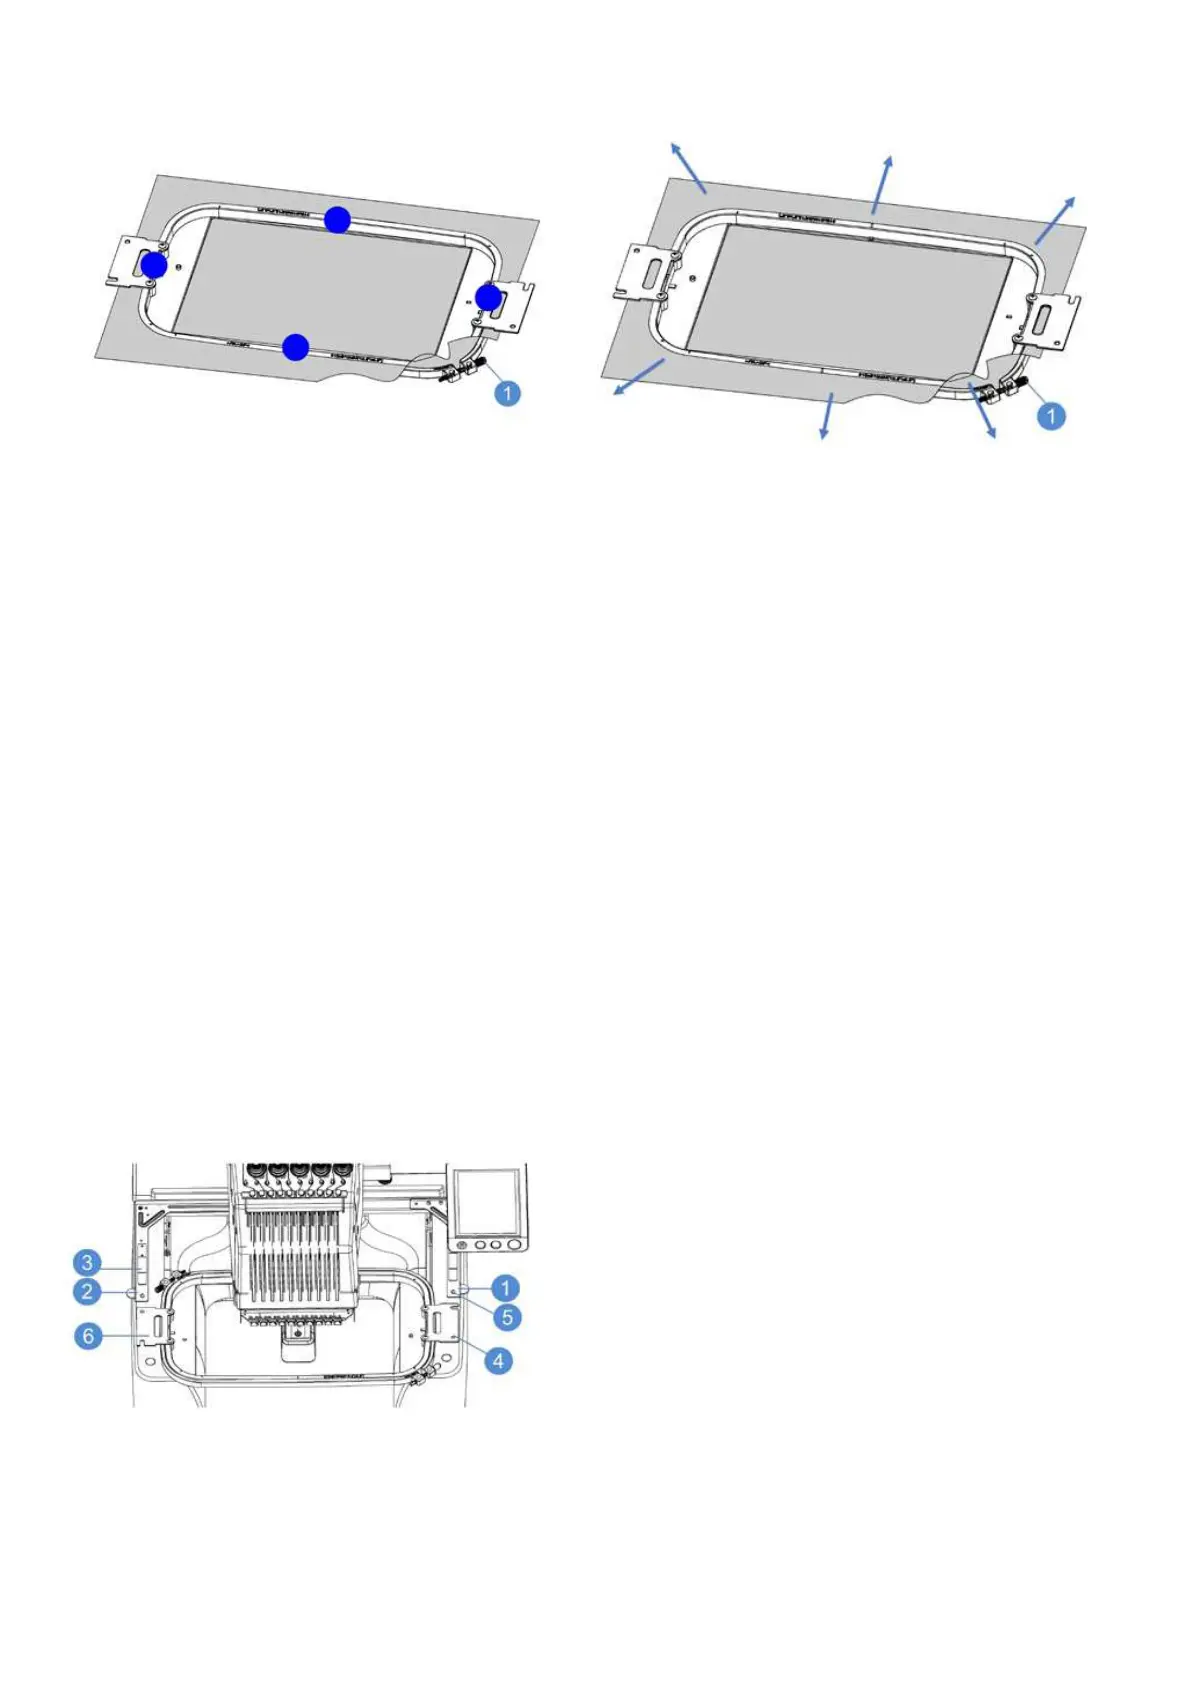
Put the internal frame into the external one.
Tighten screws slightly, pull cloth/material edges out.
Make sure the cloth is free from wrinkles before you in-
stall it in the machine.
1) After securing the cloth in the embroidery frame, knock the cloth slightly.
2) Clamp the internal and external frame together to keep the bottom of internal frame slightly lower than that of the external one.
3) The stretch level of the cloth and the use of lining paper may differ due to the type of cloth to embroidered. By trying different
methods keep on searching for the best solution for the particular project.
Install embroidery frame in the machine
Be careful during installation of embroidery frame.
·If embroidery frame is not correctly installed, it may impact presser the foot causing damage to the machine bodily injury.
·When embroidery frame is installed, be sure Start/Stop button flashes red. You must be sure that embroidery machine will not
accidentally start to operate, which may cause serious bodily injury.
·After embroidery frame installation, ensure the frame does not collide with any other part of the machine.
·Before embroidery frame installation, please provide with sufficient threads in bobbin.
Embroidery frame installation
Adjust the width of embroidery frame stand to the size of the frame, and install embroidery frame onto machine stand, as de-
scribed below (example on D frame).
1. Right arm of embroidery frame stand
2. Left arm of embroidery frame stand
3. Clamp of embroidery frame stand
4. Location hole of embroidery frame
5. Location pin of embroidery frame stand
6. Embroidery frame