Texi Iris 10 Operation Manual
23
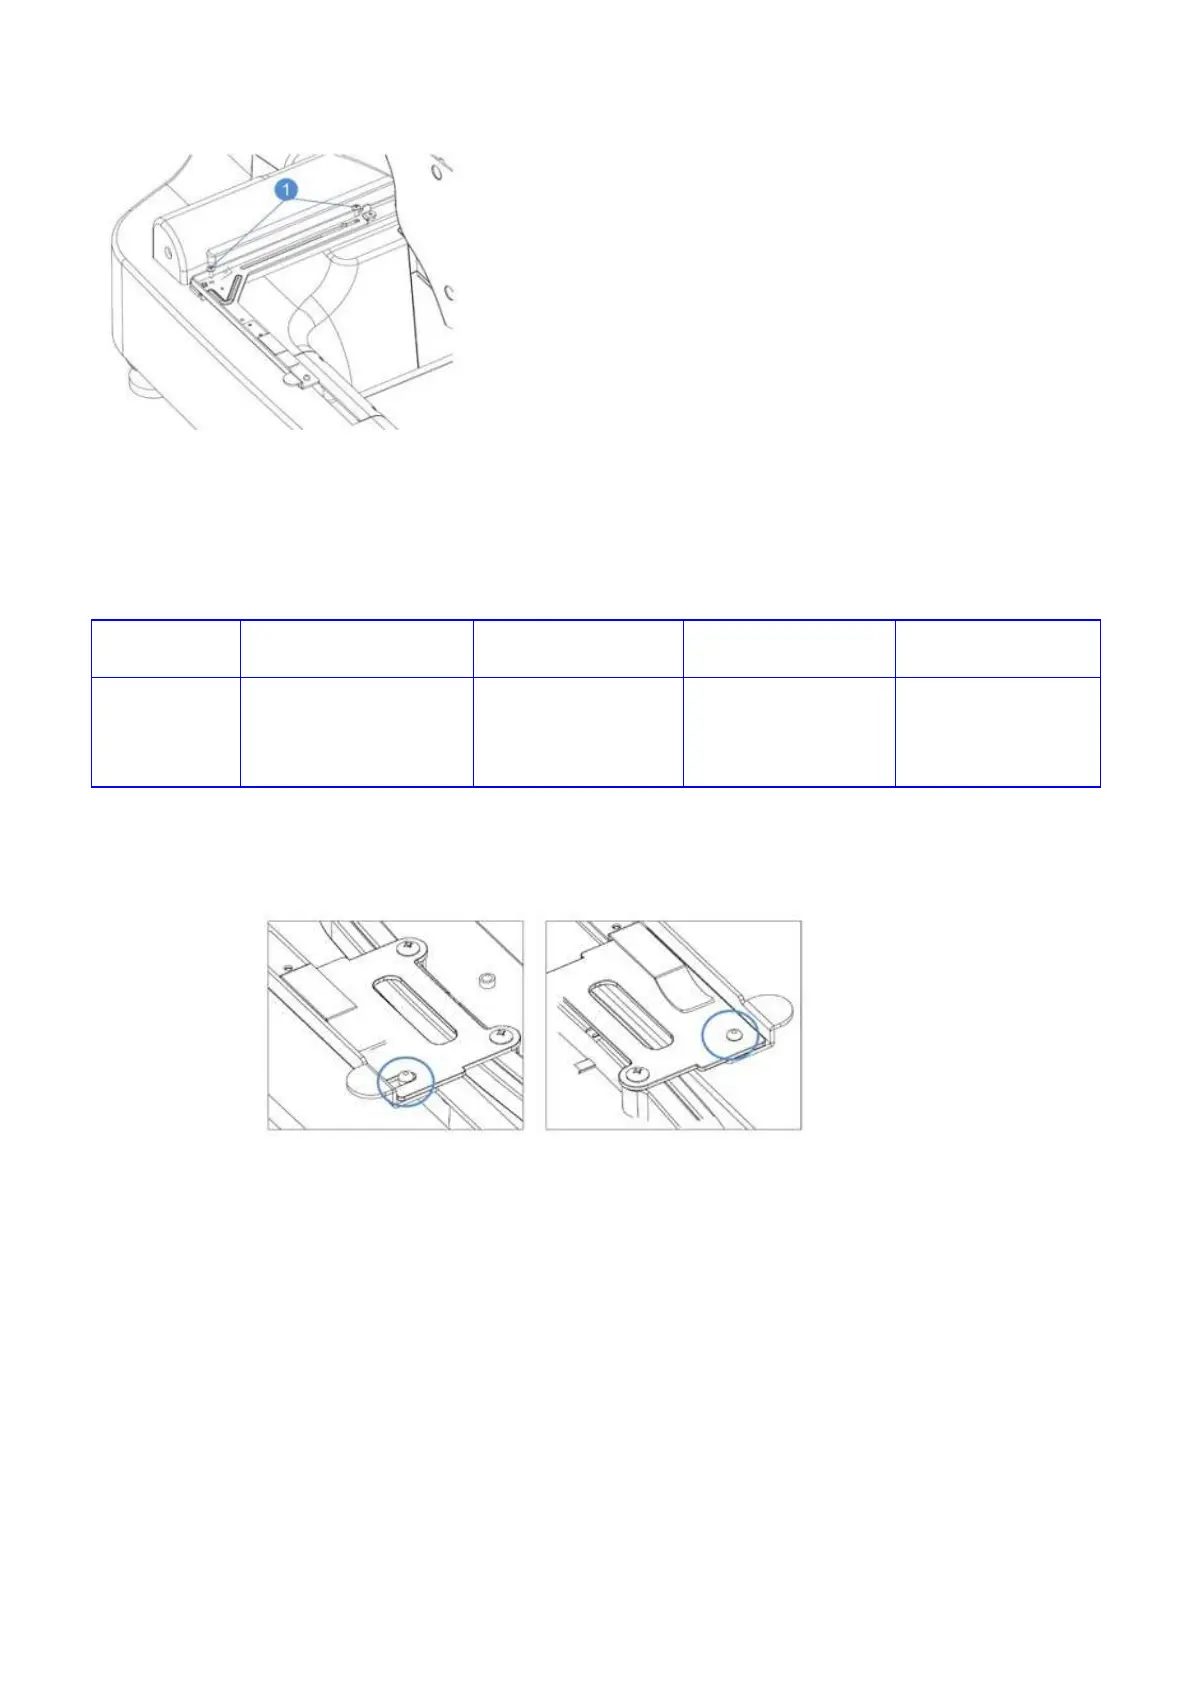
Loosen two screws on embroidery frame stand.
Notes:
1. The left arm of embroidery frame stand can move left or right.
2. Loosen screw s(1) counter clockwise but do not remove the
screw which will make further installation easier.
While installing D frame move the left arm until you notice resistance.
Embroidery frames of four dimensions are provided and if the left arm of embroidery frame is at the most left side, the position of
other embroidery frame is as follows:
Embroidery
frame
Embroidery frame A Embroidery frame B Embroidery frame C Embroidery frame D
Position Left arm of embroidery
frame moves rightward to
the innermost side
Left arm of embroidery
frame moves rightward
to the 3 stuck-point
Left arm of embroidery
frame moves rightward
to the 2 n d stuck-point
Left arm of embroidery
frame moves to the
most left side
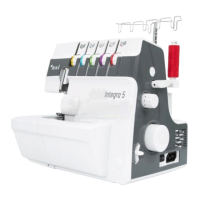
Grab embroidery frame horizontally, align left and right side simultaneously with the embroidery frame stand clamp, move to-
ward the machine, and keep the hole of embroidery frame on the location pin of frame stand.