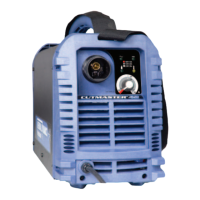
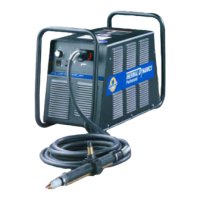
cutmaster 102
SERVICE 5-10 Manual 0-4998
F. Pilot Arc Test
There are three types of START signals which can be
used to begin system operation:
1. Hand Torch - Operator switch mounted on
the torch handle.
2. Machine torch or Automation torch:
A. Hand heled pendant switch
B. CNC cable interfaced to cotroller.
1. Provide a START signal to establish a pilot arc
and note the following
• Cooling fans MOT1-3 turn on.
• Gas solenoid opens
• Gas flows
• After two seconds the gas solenoid closes
and gas stops flowing momentarily, then gas
solenoid re-opens and gas resumes flowing
• DC LED comes on
• Pilot arc is established
2. Remove the START signal and not the follow-
ing
• Gas continues to flow
• DC LED goes off
After 20 second post flow time
• Gas solenoid closes
• Gas flow stops
This completes the Pilot Arc Test. If the above are all
correct then proceed to the next section "G, Main Arc
and Controls Test". If the unit does not function as stated
above, then note the symptom and proceed to Section
"5.08, Pilot Arc Problems".
G. Main Arc and Controls Test
Connect work Cable to the work piece, provide a
START signal to establish a pilot arc. Bring torch to
within 1/8” – 3/8” of the work piece to establish
main cutting arc.
• Main Cutting Arc Establishes
• On PCB 1 D59 turns off and D78 turns on
1. Clamp DC ammeter around the work cable. Out-
put will be 100 amps.
2. While cutting, adjust the CURRENT CONTROL
POTENTIOMETER from maximum setting to
minimum setting.
• Current adjusts from 100 amps down to 20
amps
3. Set the CURRENT CONTROL POTENTIOM-
ETER to maximum position.
• Current adjusts from 20 amps up to 100
amps
4. While cutting, touch the tip of the torch to the
work piece, This is called Drag Mode.
For Hand and Machine Torches:
• Tip Saver circuit will activate, current drops
to 60 amps.
For Automation Torches:
• The Arc will shut off, the FAULT indicator
and the 85 PSI LED will flash at 5 cycles per
second. To reset, lift tip off the work piece,
remove and re-apply the START signal and
go to step 6.
5. Lift tip off the plate approx 1/4”
• Tip Saver circuit deactivates, current goes back
to 100 amps
6. While cutting keep the torch switch closed, bring
the torch off the edge of the material.
• Cutting arc extinguishes
• Gas solenoid closes
• Gas flow stops momentarily then restarts
when solenoid opens
• Pilot arc ignites
7. Open the torch switch
• DC LED turns off
After 20 second post flow time
• Gas solenoid closes
• Gas flow stops
8. Set the FUNCTION CONTROL SWITCH to
RAPID AUTO RESTART mode.
9. Provide a START signal to establish a pilot arc.
Bring torch to within 1/8” – 3/8” of the work
piece to establish main cutting arc.
10. While cutting keep the torch switch closed and
bring the torch off the edge of the material.
 Loading...


