INSTALLATION 18 Manual 0-2470
Installation of the remote control (RC) wire harness is required
for machine torch systems. Installation requires four #6-32 screws
with locknuts.
Disconnect primary power at the source before assembling or
disassembling the power supply, torch parts, or torch and leads
assemblies.
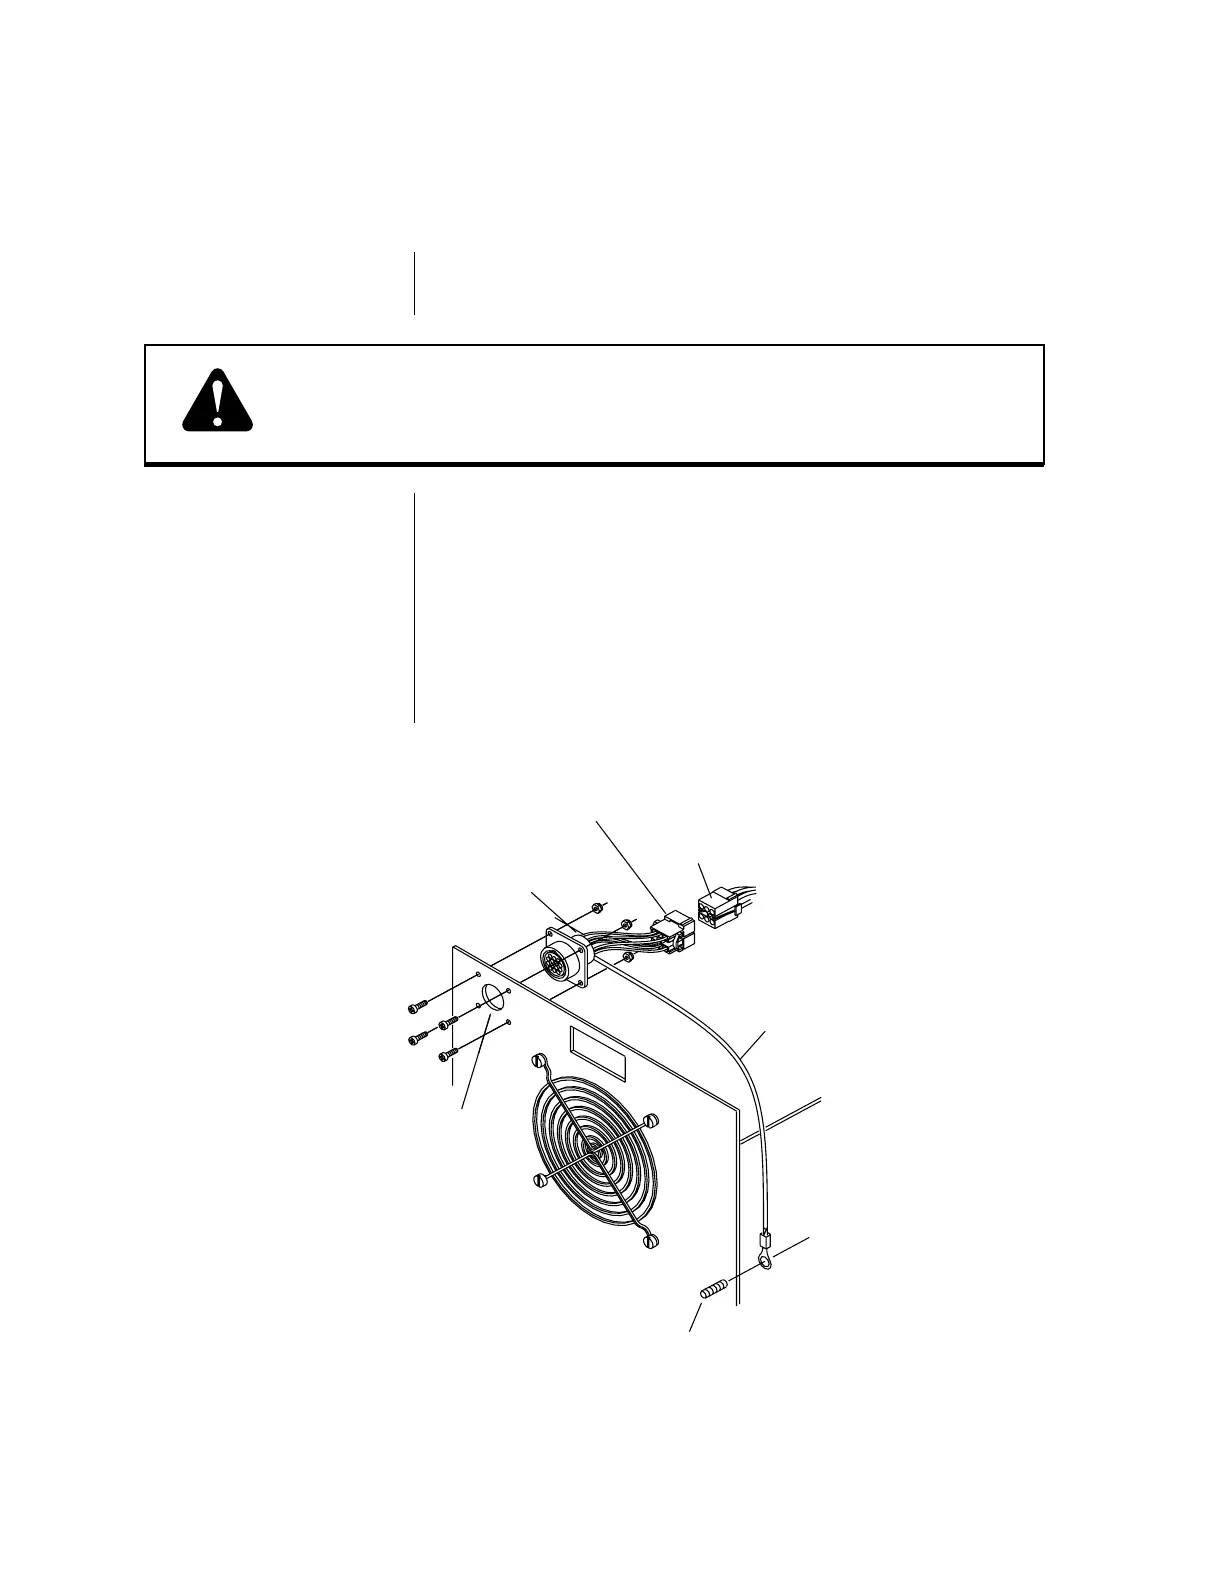
Refer to Figure 3-D and:
1. Remove the hole plug from the hole marked “REMOTE
CONTROL” on the upper left rear panel of the power supply.
2. Locate the eight screws which hold together the two halves of
the power supply enclosure. Lay the power supply on its side
with the screw heads facing UP. Remove all eight mounting
screws and carefully lift the upper half of the enclosure from
the unit. Lift the unit from the lower half of the enclosure and
set the unit in upright position on a secure working surface.
(continued on next page)
RC Wire Harness
WARNING
Remove the Hole Plug
Open the Enclosure
Figure 3-D Installing the RC Wire Harness
3.05 REMOTE CONTROL HARNESS INSTALLATION
Pak Master
Rear Panel
Hole Marked
“REMOTE
CONTROL”
Ground Stud
(Inside Rear Panel)
Remote Control
Wire Harness
J7 Connector
Ground Wire
A-00752
J6 Connector